


Must to read Article : >> Exchange Server 2019 – System Requirements And Prerequisites <<
Introduction
Microsoft Exchange Server 2019 stands as a cornerstone in organizational communication and collaboration. Deploying this robust platform on Windows Server 2016, 2019, or 2022 requires careful consideration of system requirements and thorough preparation of the Active Directory environment. This guide will take you through the installation process, highlighting key steps to ensure a successful deployment.
Exchange Server 2019 installation types
Exchange 2019 installation can be carried out through four distinct methods:
- Unattended Setup Mode:
- For an Exchange 2019 installation in unattended setup mode, the process involves utilizing command line switches. This approach manages all necessary steps in the installation, including tasks such as preparing Active Directory, configuring the Active Directory schema, specifying the desired roles, and selecting installation file directories. Notably, the graphical user interface (GUI) installation option is unavailable in this mode.
- Exchange Setup Wizard:
- Opting for the Exchange Setup Wizard during the installation of Exchange Server 2019 eliminates the need for manual command execution to prepare Active Directory or the Active Directory schema. The wizard automates the entire installation and configuration process, streamlining the setup without requiring additional command-line inputs.
- Manual Installation:
- In the manual installation setup mode, Windows components are installed manually through PowerShell commands. Command line switches are employed to execute tasks such as preparing Active Directory and the Active Directory schema. Subsequently, Exchange Server is installed using the Exchange Setup Wizard, offering a balance between manual control and automated configuration.
- Windows Core Installation:
- For a Windows Core Installation of Exchange 2019, the GUI installation option is not available. Instead, all configurations and management tasks are performed exclusively through command line switches. It’s important to note that this method necessitates the installation of the Windows Server Core version on the designated machine where Exchange Server 2019 is to be installed. This approach emphasizes a command-line-driven setup without the graphical interface.
Co-existence scenarios in Exchange Server 2019
Coexistence refers to a scenario in which, for instance, your organization currently utilizes Exchange Server 2013, and there is a desire to transition to Exchange Server 2016. Rather than directly upgrading the existing Exchange Server 2013 to 2016, the approach involves relocating mailboxes or all data from Exchange 2013 to Exchange Server 2016. In essence, coexistence allows a newer server version to seamlessly receive data or applications from a server with an older version.
The supported coexistence scenarios between Exchange 2019 and earlier versions of Exchange are described in the following table:
| Exchange version | Exchange 2019 organization coexistence |
|---|---|
| Exchange 2010 and earlier versions | Not supported |
| Exchange 2013 | Supported with Exchange 2013 Cumulative Update 21 (CU21) or later on all Exchange 2013 servers in the organization, including Edge Transport servers. |
| Exchange 2016 | Supported with Exchange 2016 CU11 or later on all Exchange 2016 servers in the organization, including Edge Transport servers. |
| Mixed Exchange 2013 and Exchange 2016 organization | Supported if all Exchange 2013 and Exchange 2016 servers in the organization meet the requirements as previously described in this table. |
If your environment currently operates on Exchange Server 2010 and you intend to deploy Exchange 2019, it’s important to note that direct migration of all mailboxes or public folders to Exchange 2019 is not supported due to the lack of coexistence compatibility. In such a scenario, the recommended approach involves first migrating from Exchange 2010 to Exchange 2013 before proceeding to move mailboxes or recipients from Exchange 2013 to Exchange 2019.
For those with an existing Exchange Server 2013 in their environment looking to introduce Exchange 2019, it is imperative to ensure that Exchange 2013 is running the latest update or, at the very least, Cumulative Update 21.
Similar considerations apply to environments with Exchange Server 2016. To facilitate coexistence with Exchange Server 2019, it is essential to confirm that Exchange Server 2016 is running the latest update, preferably Cumulative Update 11.
In instances where both Exchange Server 2013 and 2016 are present, and there are plans to incorporate Exchange Server 2019, it becomes paramount to have the latest updates installed on both Exchange servers. This proactive measure ensures seamless coexistence and compatibility among the different Exchange Server versions in the environment.
Before Proceeding into the next sections of the tutorial, make sure that you have completed the steps in the previous tutorial : Exchange Server 2019 – System Requirements And Prerequisites
Active Directory Preparation:
- Permissions:
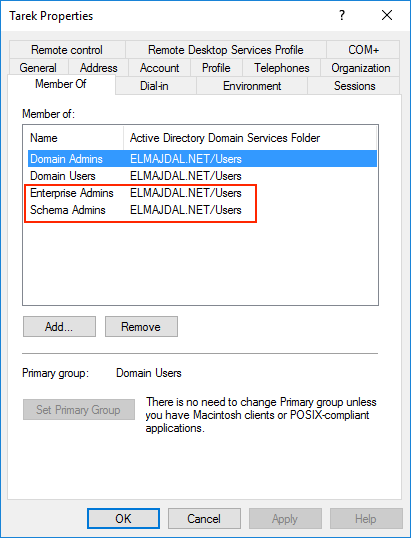
- Ensure that the user account used for schema extension and subsequent Exchange installation possesses the necessary permissions:
- Schema Admins: Granting the ability to modify the Active Directory schema.
- Enterprise Admins: Facilitating forest-wide changes for Exchange settings across the Active Directory forest.
- Domain Admins: Although not mandatory for schema extension, these permissions aid in the smooth installation and ongoing management of Exchange Server.

- Ensure that the user account used for schema extension and subsequent Exchange installation possesses the necessary permissions:
- Schema Extension:
- The Active Directory schema must be extended to accommodate Exchange Server 2019’s specific attributes and classes. To do this, log in to the server with an account holding Schema Admins privileges.
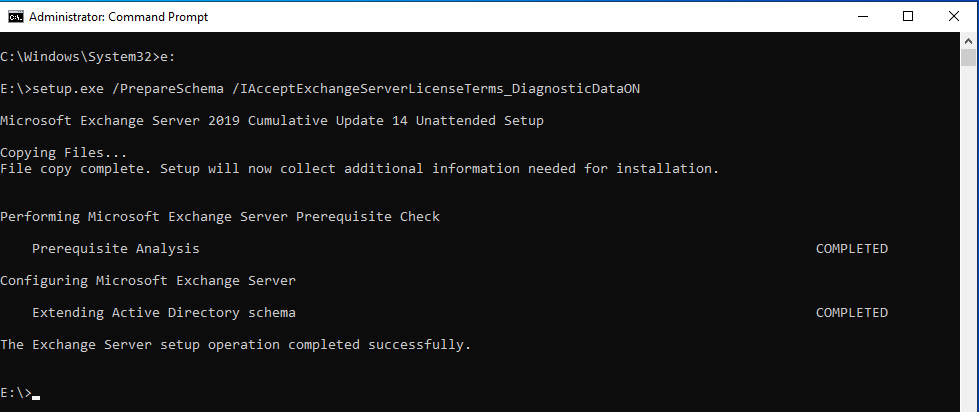
- Extract the Exchange Server 2019 installation files and open a Command Prompt with elevated privileges. Navigate to the directory containing the setup files and run the following command:
setup.exe /PrepareSchema /IAcceptExchangeServerLicenseTerms_DiagnosticDataON
- Allow time for the changes made during the schema extension to replicate across the entire Active Directory forest before proceeding.
With the foundation laid, let’s proceed with the installation steps:
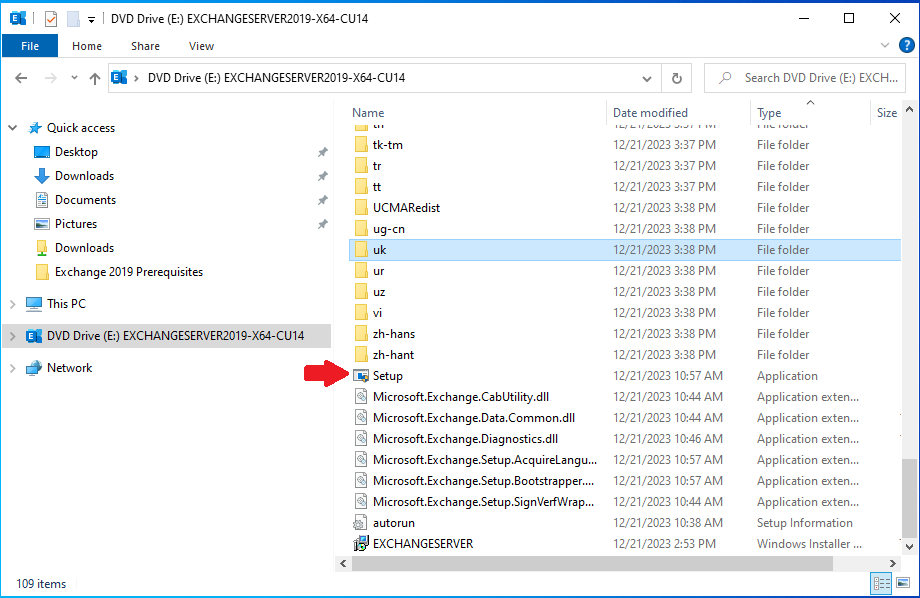
- Copy and extract the Exchange Server 2019 installation media to a local drive on your server. Execute the Setup.exe file to launch the Exchange Server setup.

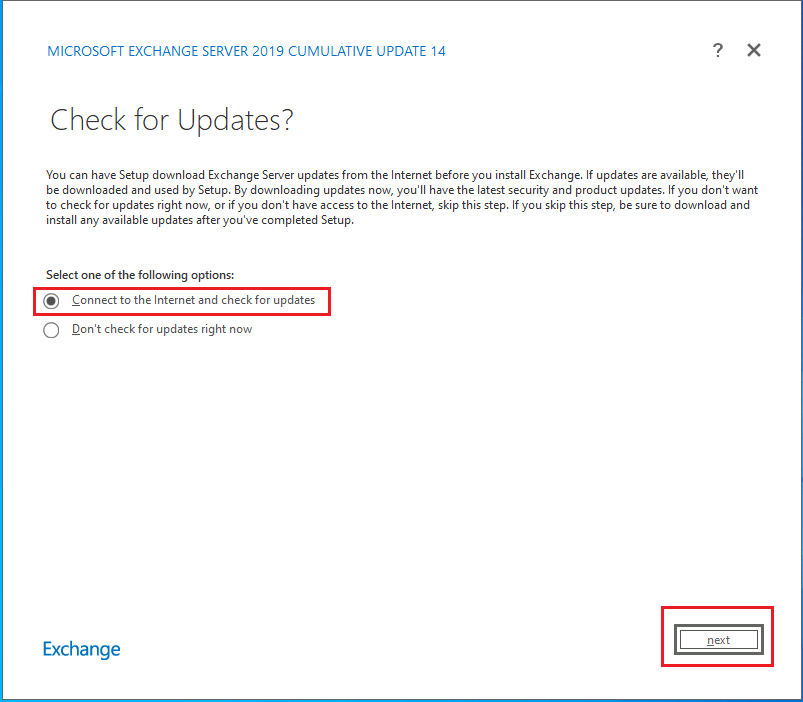
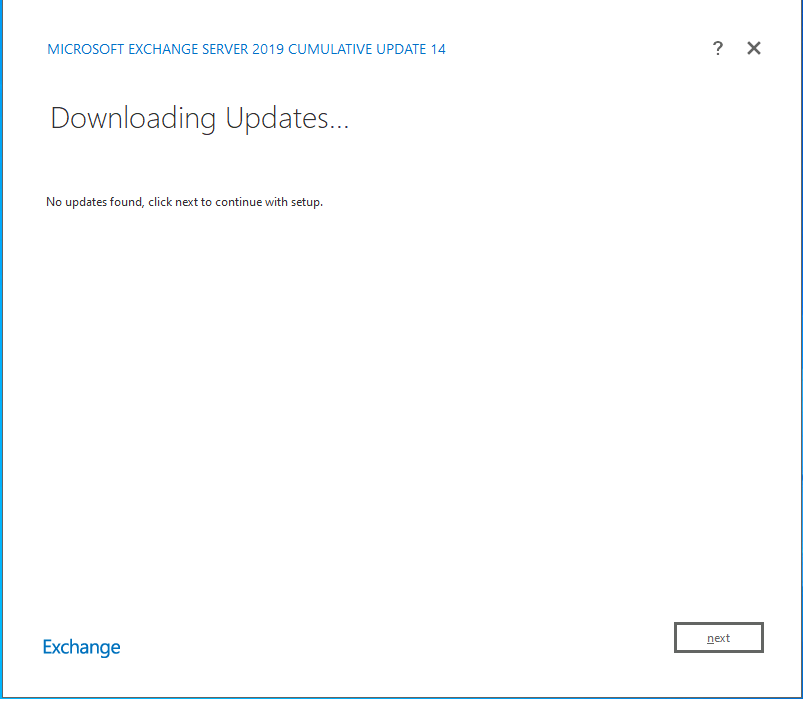
- On the Check for Updates page, select Connect to the internet and check for updates and click next. allows the installer to connect to Microsoft servers to retrieve the latest updates, patches, and fixes for the Exchange Server software. This step ensures that the Exchange Server being installed is up-to-date with the latest improvements, security patches, and bug fixes available from Microsoft.
 If updates are found during the Check for Updates step in the Exchange Setup Wizard, the wizard will prompt you to choose whether you want to download and install those updates during the installation process. You’ll typically be presented with options to either:
- Download and install updates: This option allows the setup wizard to connect to Microsoft Update and download the latest updates to be applied during the Exchange Server installation. This ensures that your Exchange Server is up-to-date with the latest fixes and improvements.
- Do not check for updates: If you choose this option, the setup wizard will skip the step of checking for updates, and the installation will proceed with the version included in the installation media. You can manually apply updates after the installation is complete.
If no updates are found, it indicates that the Exchange Server installation files you are using already include the latest updates and patches available up to the point of the installation media’s release. Click next
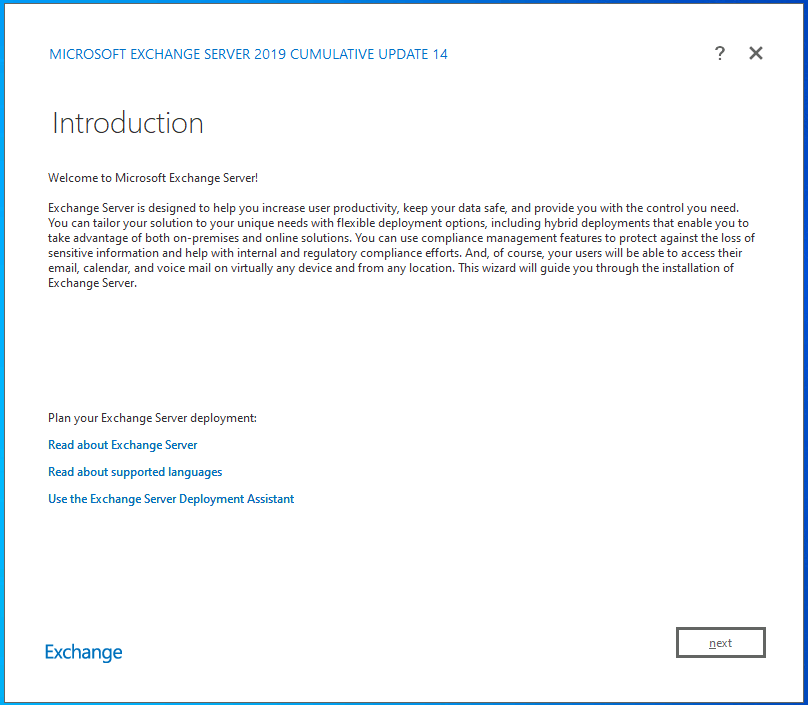
- Copying files and Initializing setup will start, and then you will be presented with the Introduction page, click next

- On the License Agreement page, accept the terms and click next
![]()
- On the Recommended Settings page, select Use recommended settings option to configure Exchange with optimal settings. These are the default settings that Microsoft recommends for optimal performance and security.It include settings related to server roles, security configurations, and other aspects of the Exchange Server deployment.Then click next
![]()
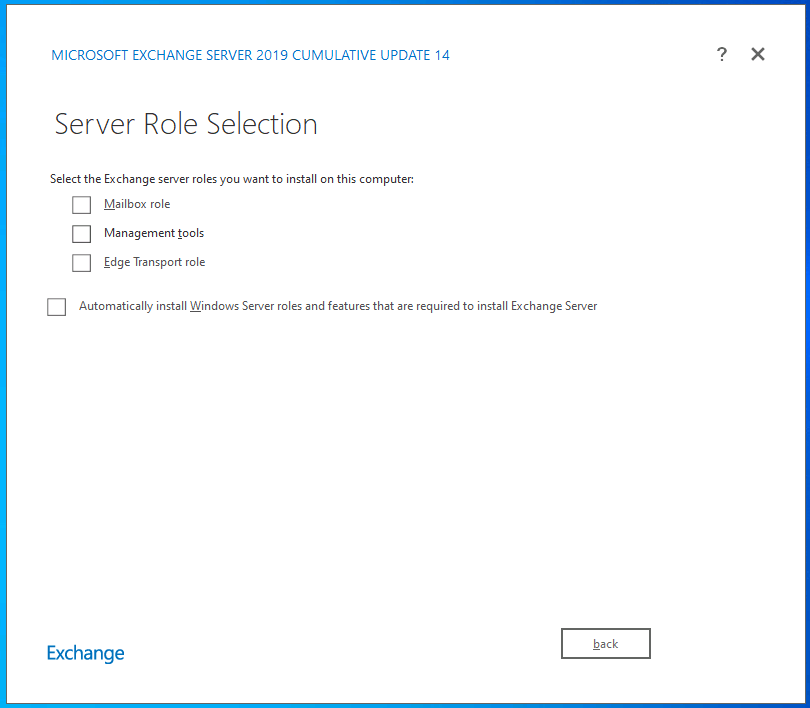
- Choose the Exchange Server roles you want to install, such as Mailbox role or Edge Transport role.
The Mailbox server in Exchange 2019 includes all of the server components from the Exchange 2013 Mailbox and Client Access server roles:- Client Access services provide authentication, limited redirection, and proxy services. Client Access services don’t do any data rendering and offer all the usual client access protocols: HTTP, POP and IMAP, and SMTP.
- Mailbox services include all the traditional server components found in the Exchange 2013 Mailbox server role except Unified Messaging: the backend client access protocols, Transport service, and Mailbox databases. The Mailbox server handles all activity for the active mailboxes on that server.
The Edge Transport role is typically deployed in your perimeter network, outside your internal Active Directory forest, and is designed to minimize the attack surface of your Exchange deployment. By handling all Internet-facing mail flow, it also adds additional layers of message protection and security against viruses and spam, and can apply mail flow rules (also known as transport rules) to control message flow.
Note : Unified Messaging (UM) has been removed from Exchange 2019.
![]()
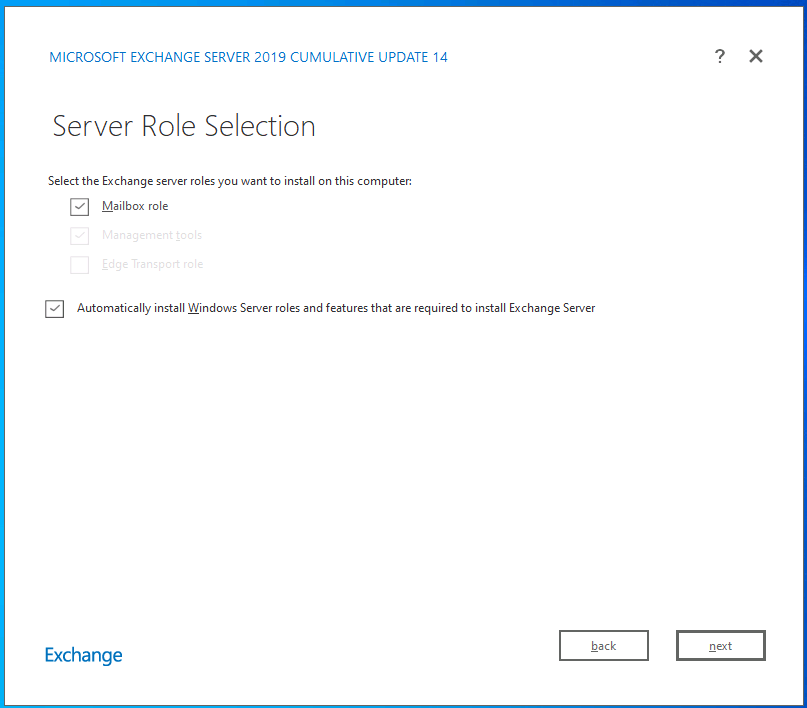
- When you select any of the roles, the Management tools is selected automatically. In my case as a new installation, I will be selecting the Mailbox role. Select also the checkbox beside Automatically install Windows Server roles and features that are required to install Exchange Server. Although we have installed all prerequisites in a previous tutorial, there is no harm to select this option in case we missed any role/feature. Click next to continue.
![]()
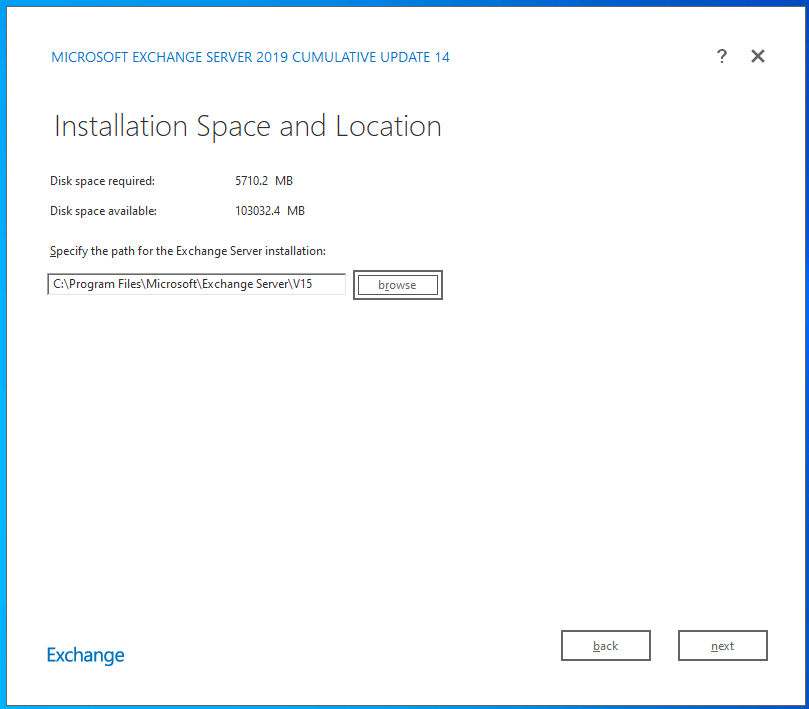
- Specify the installation location for Exchange Server files, typically using the default location and then click next to continue.
![]()
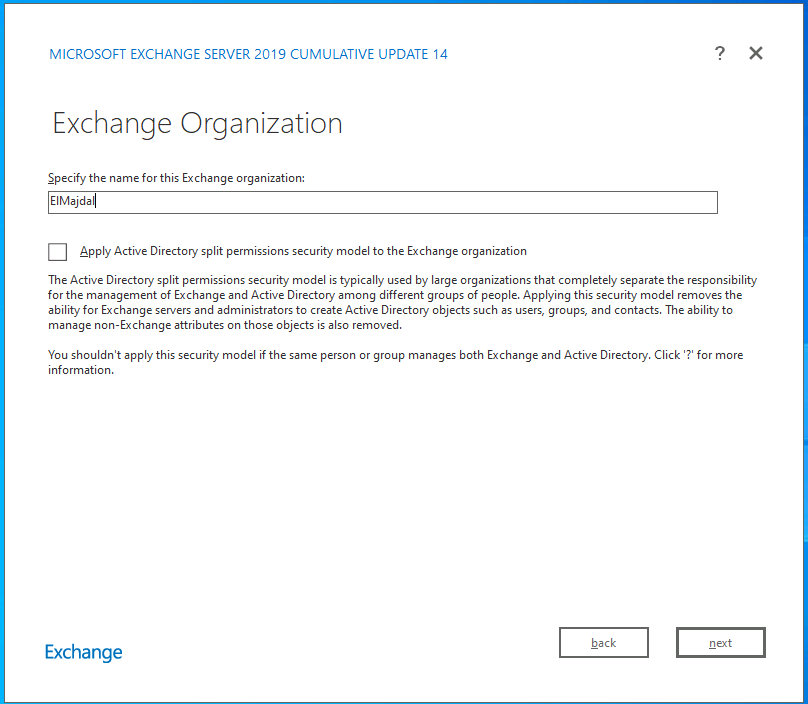
- On the Exchange Organization page, provide a unique name for your Exchange organization. It’s essential to choose an organization name that aligns with your organizational naming conventions and helps identify your Exchange deployment within the broader Active Directory infrastructure.You can configure your Exchange organization for Active Directory split permissions. Active Directory split permissions completely remove the permissions that allow Exchange administrators and servers from creating security principals in Active Directory or modifying non-Exchange attributes on those objects. Exchange administrators and servers will only be able to manage the Exchange attributes on existing Active Directory security principals.
In Summary, After you enable Active Directory split permissions, Exchange administrators and servers will no longer be able to create security principals in Active Directory, and they won’t be able to manage distribution group membership. These tasks must be performed using Active Directory management tools with the required Active Directory permissions. Before you make this change, you should understand the impact it will have on your administration processes and third-party applications that integrate with Exchange and the RBAC permissions model.
Type your organization name and decided weather you want to apply Active Directory split permissions, and then click next
![]()
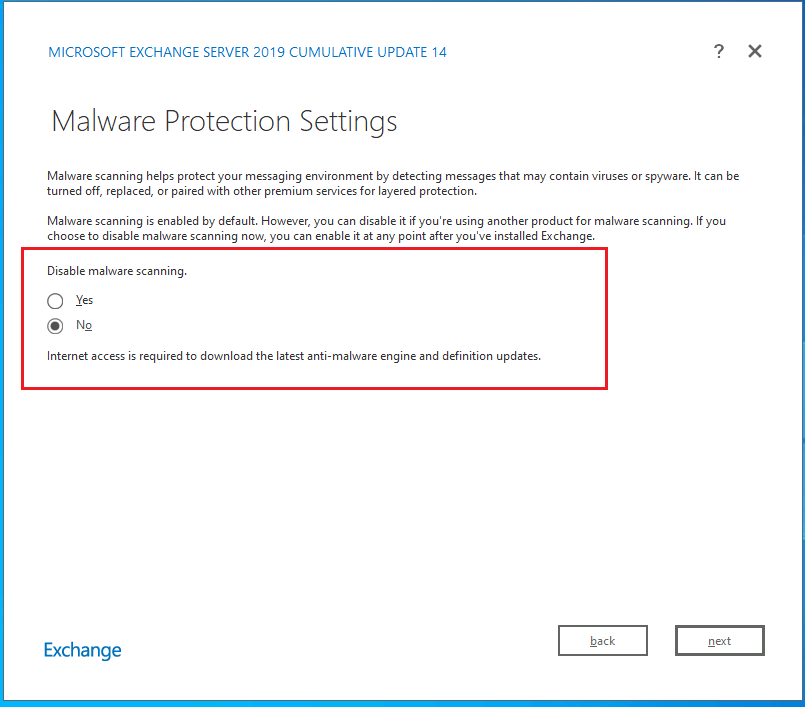
- On the Malware Protection System page, you are presented with the option to disable malware protection or keep it enabled. I prefer to keep it enabled , so will have the selection on No and click next
![]()
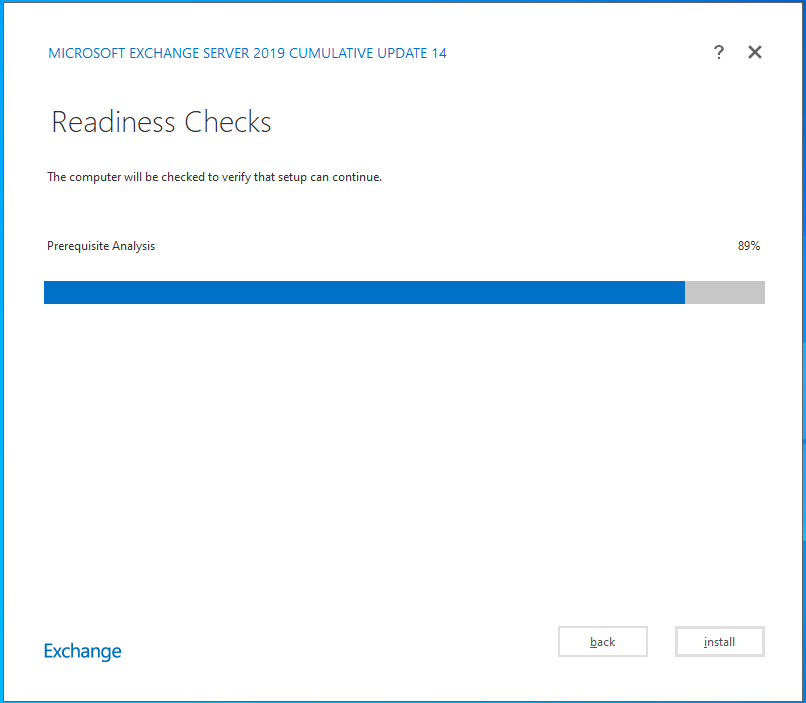
- The Readiness checks ensure that your Active Directory forest and Exchange servers are ready for the version of Exchange that you’re installing. It will also analyses all prerequisites for a successful exchange installation. If you have any prerequisites missing in the readiness checks, then you will not be able to install Exchange, The Install button will not be displayed, and you will have a Retry button. You will have to fix the error mentioned in the readiness check and click the Retry button to check again.
![]() If the readiness checks result is ok, then you are presented with the Install button. Click on it to begin the installation process.
If the readiness checks result is ok, then you are presented with the Install button. Click on it to begin the installation process.
![]()
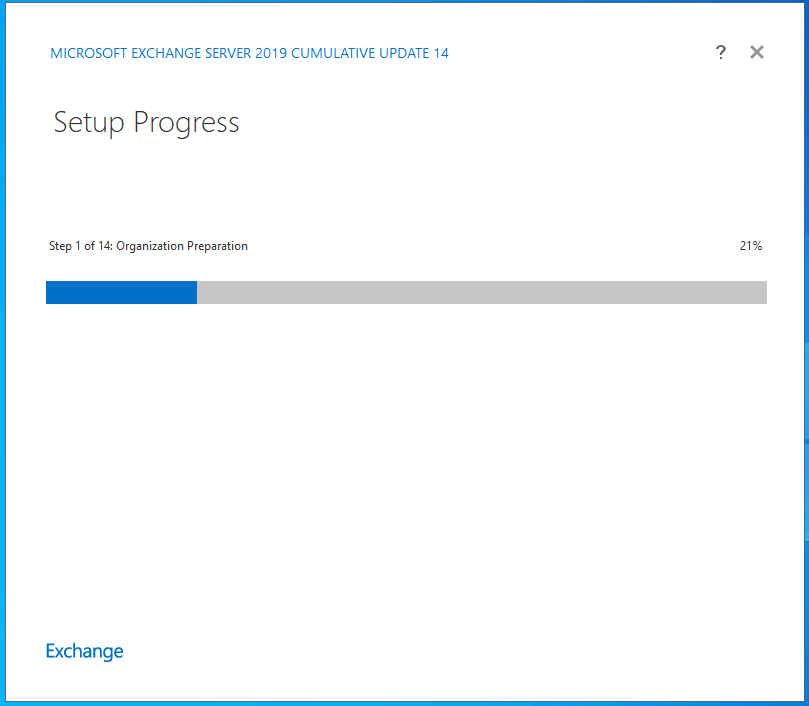
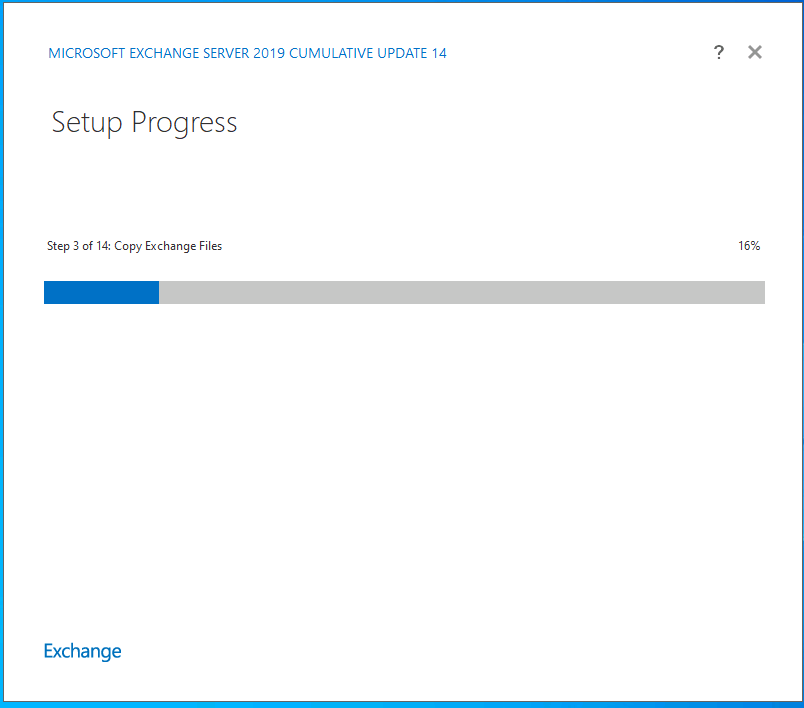
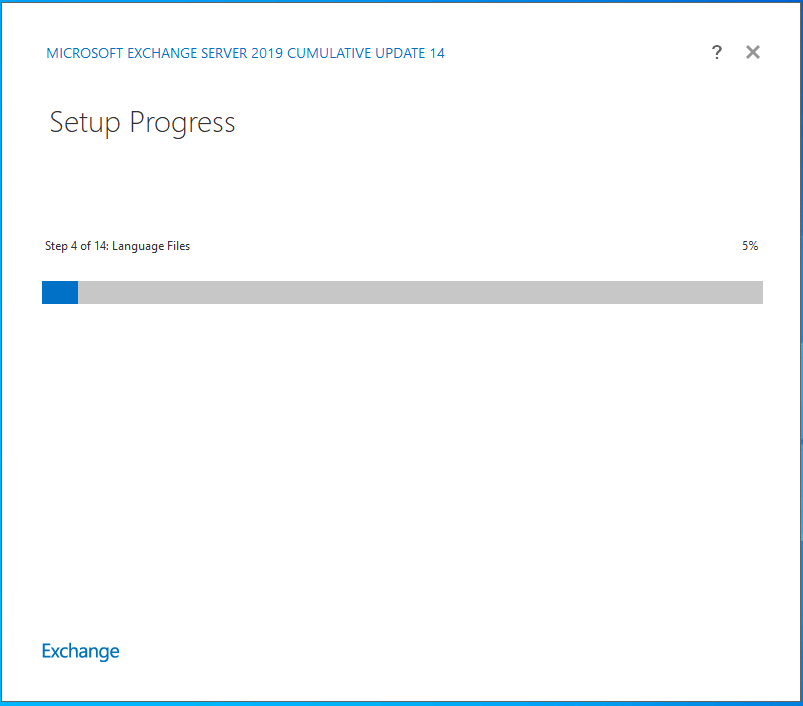
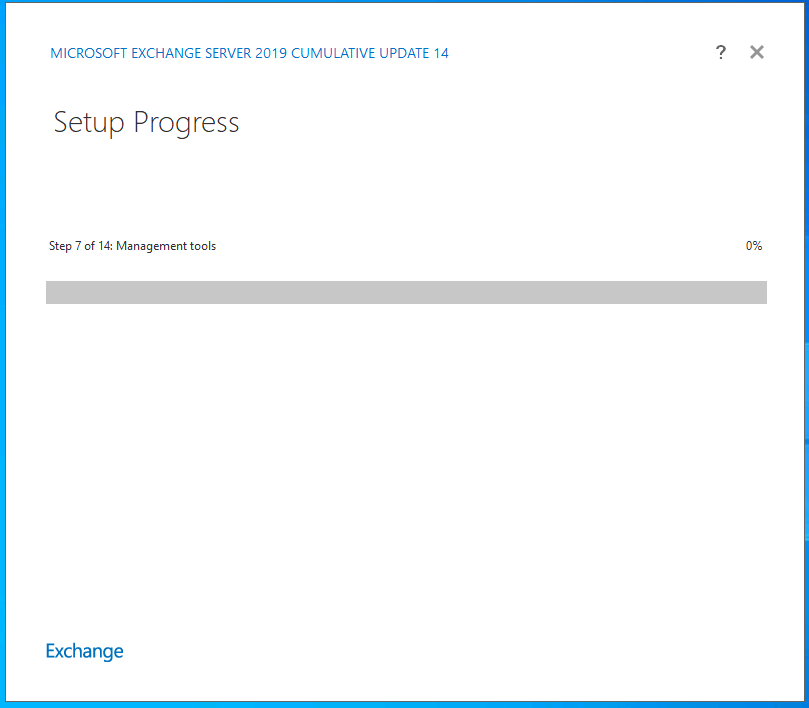
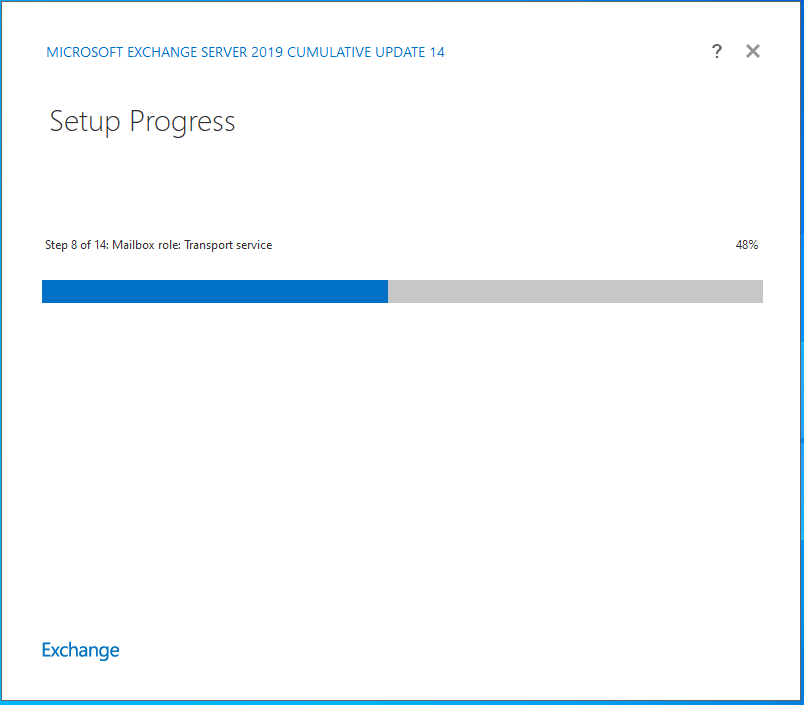
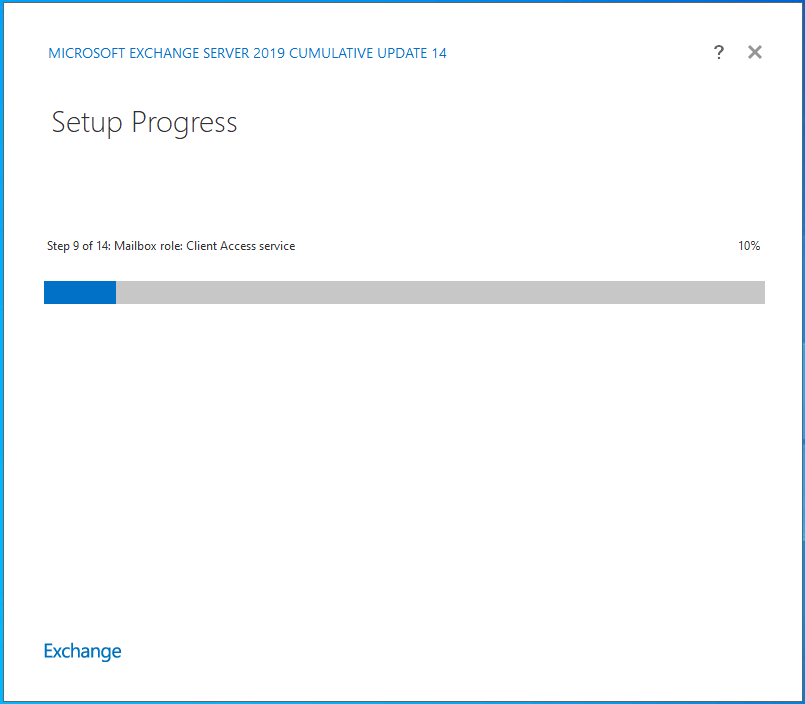
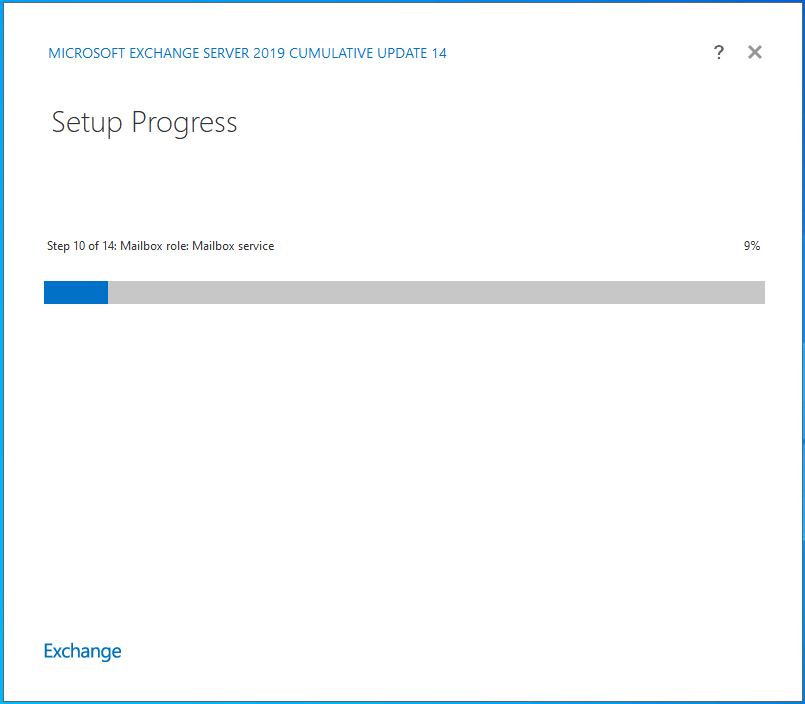
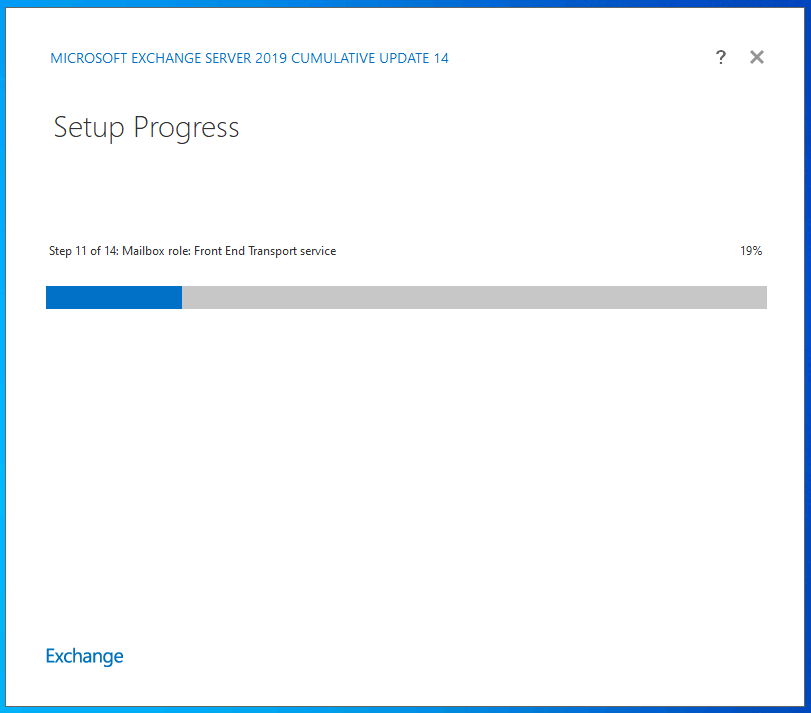
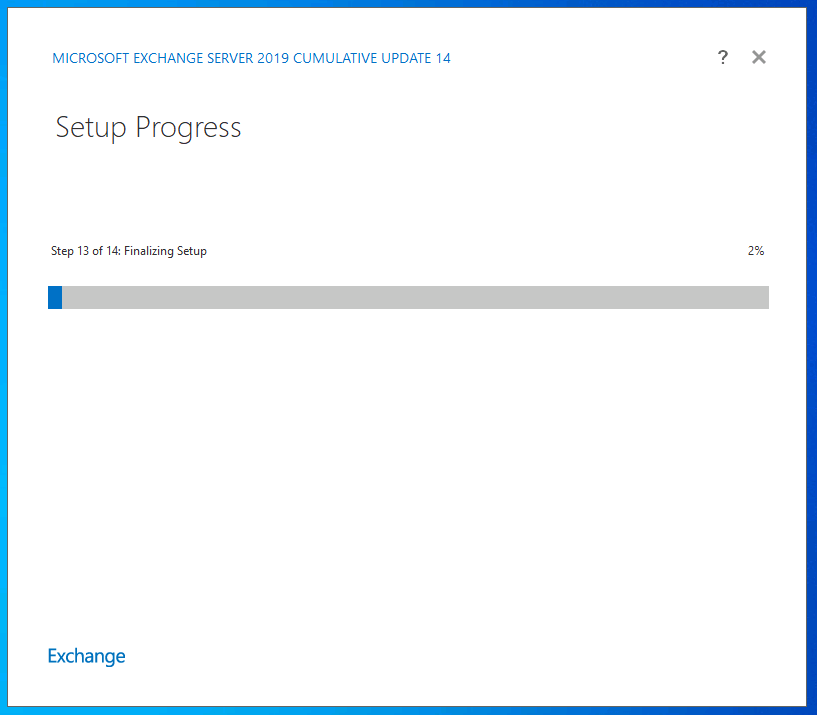
- Setup will start installing Exchanges Server 2019. This will take time.The below table shows you some of the steps taken while installing Exchange Server 2019.

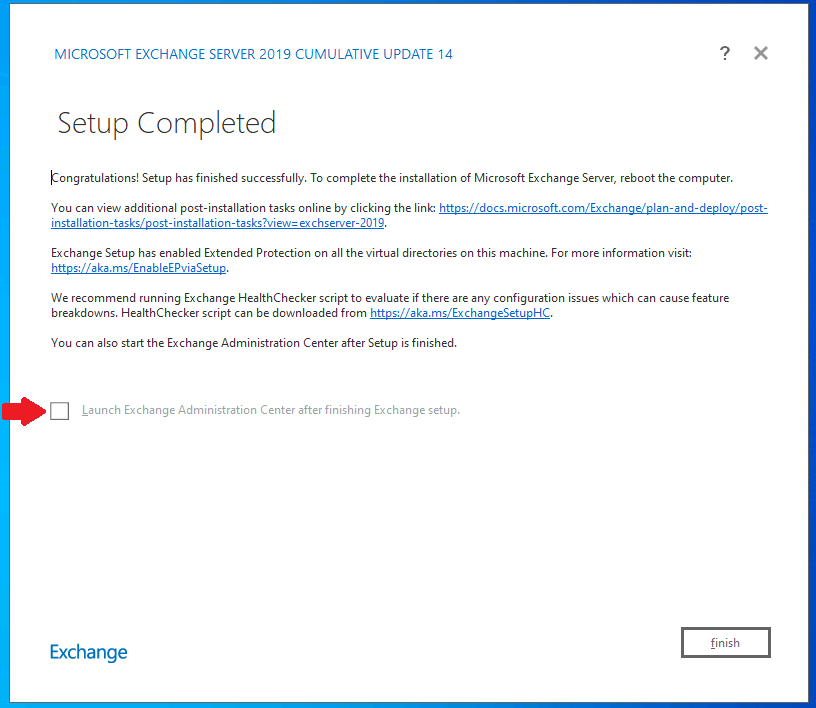
- Review the information on the completion page and click Finish to complete the setup.
If you want to open Exchange Administration Center after you click Finish, then enable the checkbox beside Launch Exchange Administration Center after finishing Exchange setup.
![]()
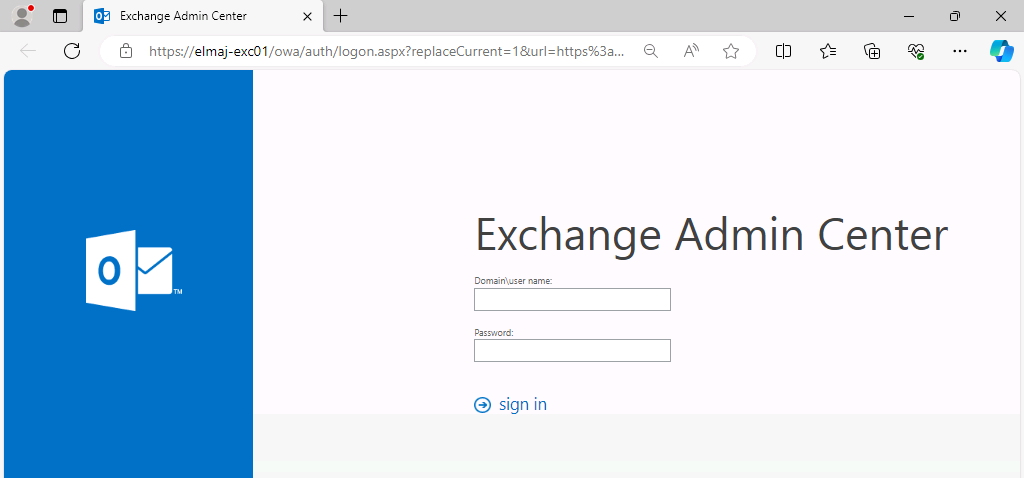
- Anytime you wish to access Exchange Admin Center , open any internet explorer and type the address : https://ServerName/ecp , where Servername is the name or IP address of your Exchange Server.
![]()
 If updates are found during the Check for Updates step in the Exchange Setup Wizard, the wizard will prompt you to choose whether you want to download and install those updates during the installation process. You’ll typically be presented with options to either:


 If the readiness checks result is ok, then you are presented with the Install button. Click on it to begin the installation process.
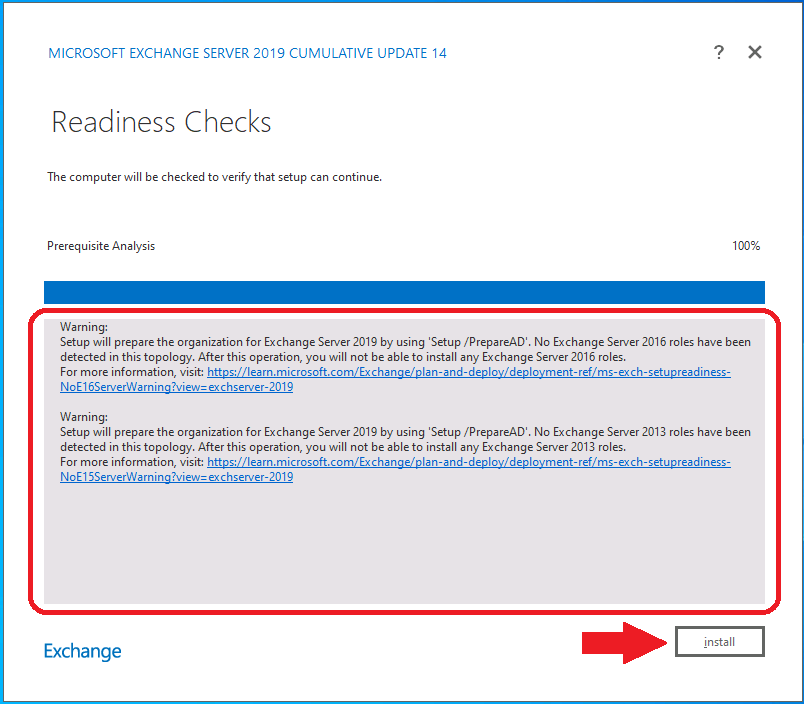

Conclusion
Successfully installing Exchange Server 2019 on Windows Server 2016, 2019, or 2022 involves meticulous preparation of both system requirements and Active Directory. Following this comprehensive guide ensures a stable and efficient messaging and collaboration platform, contributing to the seamless operation of organizational communication. Regularly update your server and Exchange Server software to maintain a secure and reliable environment.