Introduction
Following the successful installation of Exchange Server, the next crucial step is its activation, ensuring proper licensing and functionality. In this tutorial, we will guide you through the step-by-step process of activating Microsoft Exchange Server 2019.
A product key serves as confirmation to Exchange Server regarding the type of license you’ve acquired, whether it’s Standard or Enterprise Edition. For Standard Edition licenses, the key permits the mounting of up to five databases, while Enterprise Edition licenses enable the mounting of more than five databases per server.
If a product key is not provided, the Exchange server will operate as a Trial Edition. This Trial Edition mirrors the functionalities of an Exchange Standard Edition server, making it convenient for testing purposes before making a purchase.
The Trial Edition license is valid for a duration of 180 days. To continue using the server beyond this period, you must input a product key. Otherwise, the Exchange admin center (EAC) will display reminders prompting you to enter a product key for licensing the server.
Let’s Activate Exchange Server 2019:
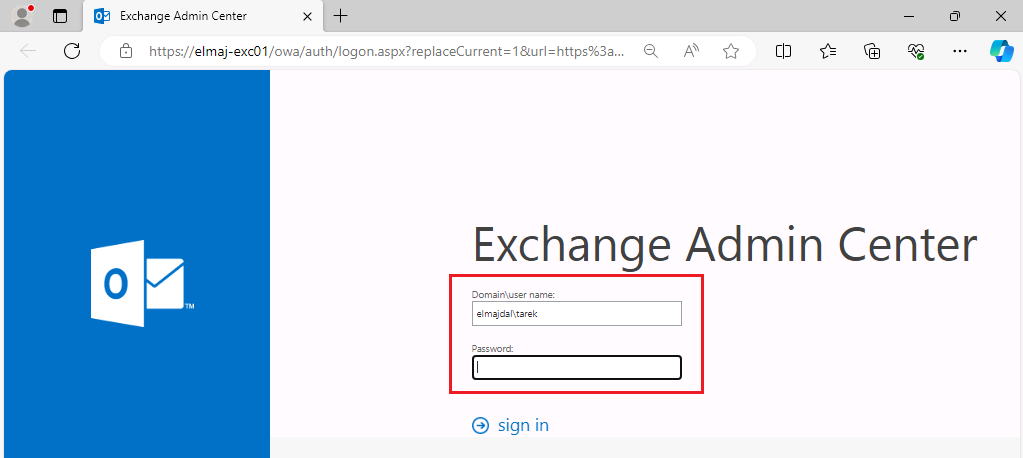
- Access the Exchange Admin Center (EAC), open a web browser and navigate to the Exchange Admin Center (EAC). The URL is typically https://ExchangeServer/ecp, where ExchangeServer is the name or IP address of your Exchange Server.

- Log in with an account that has the necessary permissions, such as a member of the Organization Management role group.

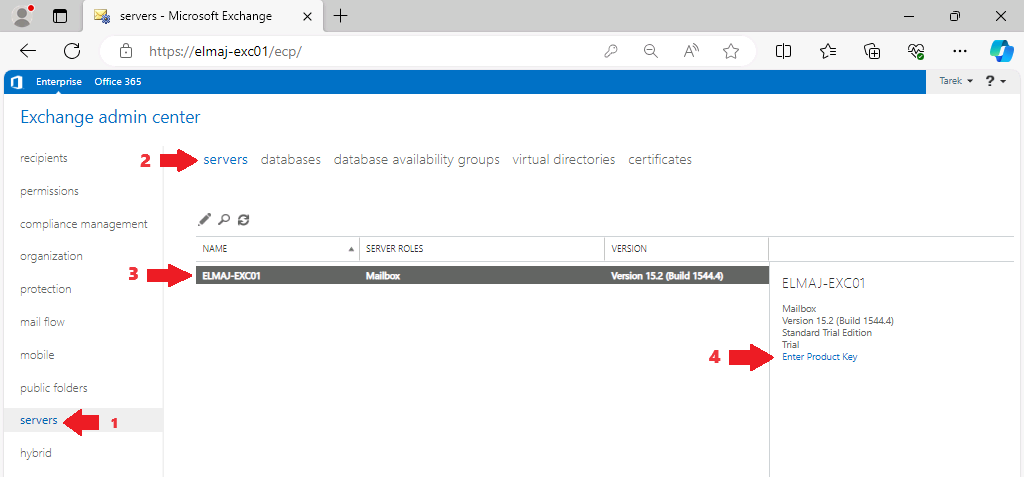
- In the Exchange Admin Center, Click on Servers in the left navigation pane. This is where you manage your Exchange servers. In this page you will have multiple tabs ( servers, databases, database availability group, virtual directories, certificates ) on the top of the page, under the servers tab, select your exchange server from the lists of servers ( if you have multiple servers, else only a single server will be listed as shown below in my screenshot). Then from the right side pane, you have an option to Enter Product Key to click on it .

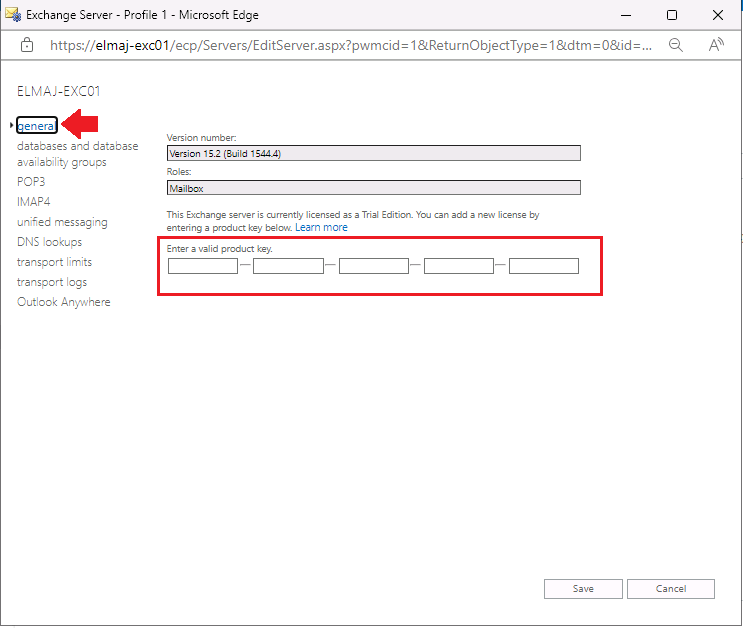
- The server properties window opens. On the general tab, fill in a valid product key. You might have received this key when purchasing Exchange Server or through your Microsoft Volume Licensing Service Center (VLSC) account. When done, click Save to apply the product key.

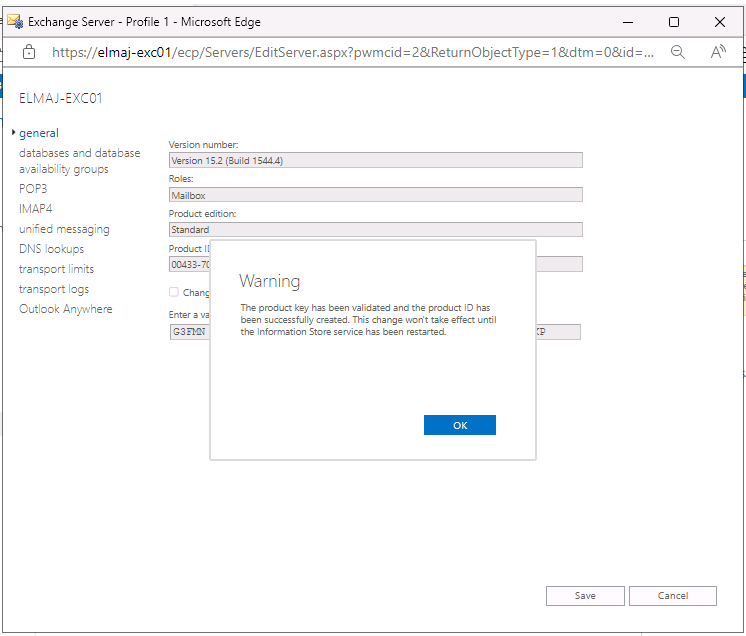
- A warning message shows up: The product key has been validated and the product ID has been successfully created. This change won’t take effect until the Information Store service has been restarted. Click OK to dismiss the notice.

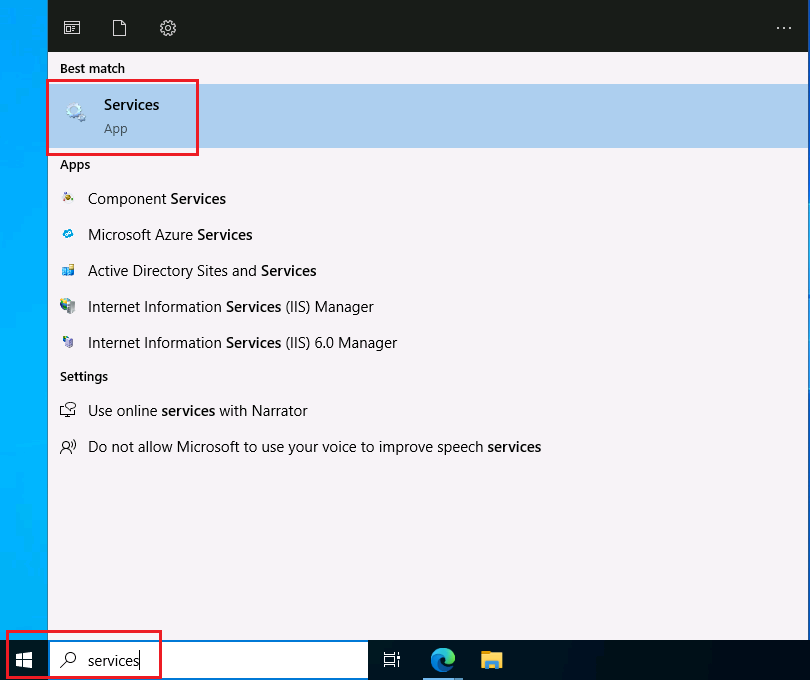
- As informed in the previous warning message, the changes won’t take effect until we restart the information Store service. On the Exchange Server, open the Services console.

- Search and click on Microsoft Exchange Information Store. Right click it and click Restart.

Verify Activation
After activation, it’s essential to verify that Exchange Server is successfully activated:
- In the Exchange Admin Center, navigate to Servers -> Servers.
- Select your Exchange Server, and on the right side pane, you should see the activation status as Licensed.

Conclusion
Successfully activating Exchange Server 2019 with a valid product key is a pivotal step in ensuring the proper licensing and optimal performance of the server. This process unlocks the full potential of the Standard or Enterprise Edition license, allowing users to leverage the specified features and capabilities. With the server now properly licensed, administrators can confidently manage mailboxes, databases, and other essential functions within the Exchange environment.


