


Introduction:
In Windows 11, the default behavior is to hide certain files and folders as a precautionary measure to prevent users from unintentionally altering or deleting critical system files. This security feature is in place to maintain system stability and protect essential components from accidental interference. While this default setting is beneficial for the majority of users, there are instances when you may need to access these hidden files for troubleshooting, customization, or other advanced tasks.
Reasons for Accessing Hidden Files:
- Troubleshooting: When encountering issues with your system or specific applications, accessing hidden files can provide valuable information. System logs, configuration files, and error logs are often stored in hidden folders.
- Customization: Advanced users who want to personalize their Windows experience or make specific changes to system settings may need to access hidden files and folders. This is especially true for users who engage in themes, icon customization, or other system tweaks.
Now, let’s delve into the steps to reveal hidden files and folders in Windows 11:
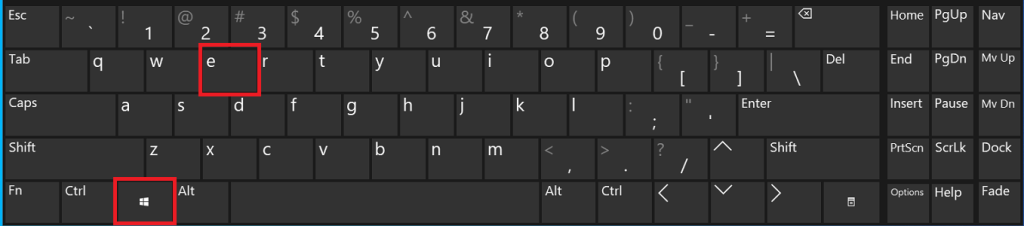
- Press the Win + E key combination on your keyboard to open File Explorer.

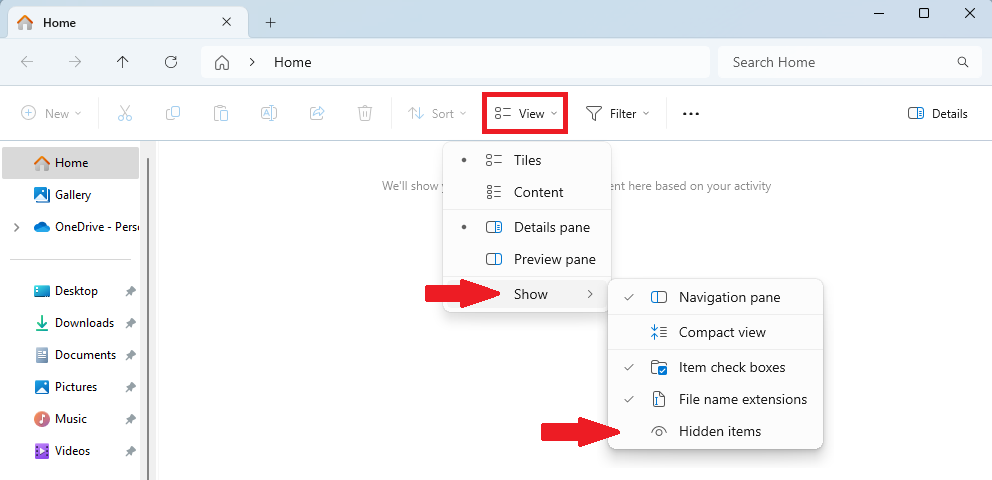
- Navigate to the View tab in the File Explorer window. Within the View tab, find the Show group. In the Show group, locate the Hidden items option and check the checkbox next to it. This action will immediately reveal hidden files and folders in your File Explorer.
 Important Note: Exercise caution when modifying or deleting hidden files. Only make changes if you are certain about the consequences.
 - Verify the Changes. After checking the Hidden items option, you should now see previously hidden files and folders displayed alongside your regular files in File Explorer.
Note: Hidden files and folders are typically displayed with a fainter icon or a translucent appearance to distinguish them from regular files.
- Hide Files and Folders Again (Optional). If you want to hide the files and folders again, simply go back to the View tab and uncheck the Hidden items option.
 Important Note: Exercise caution when modifying or deleting hidden files. Only make changes if you are certain about the consequences.
Conclusion
By following these simple steps, you can easily show or hide hidden files and folders in Windows 11. Keep in mind that modifying or deleting system files can affect the stability and functionality of your operating system, so exercise caution when working with hidden files. Only make changes if you are certain about the consequences, and always back up important data before making any modifications.