Introduction
Upgrading your infrastructure to the latest Active Directory Domain Services is a best practice to benefit from all the new features the operating system can provide you with. Years ago, I have shown you how to Migrate Active Directory Domain Controller from Windows Server 2003 to Windows Server 2008 . In this article, I will show you how to prepare your AD DS and migrate it from Windows Server 2008 R2 to Windows Server 2012.
To perform the below steps, you will need to use a domain account which is member member of Domain Admins and Enterprise Admins Groups and member of the Schema Admins group. I will be using the domain Administrator account which is already a member of all these groups.

Migrating your Domain Controller from Windows Server 2008 to Windows Server 2012 undergoes a few major steps, which are discussed in details below :
Step 1 : Check Forest and Domain Functional Level
1. The Forest Functional level and Domain Functional Level must be at least Windows Server 2003
2. To Check The Functional Levels, read my article : How to Raise the Forest and Domain Functional Levels in Windows Server 2008/R2
Step 2 : Preparing Active Directory Schema
The schema has to be upgraded and prepared for Windows Server 2012. To do this you have to run the adprep command.
1. Insert the Windows Server 2012 /R2 DVD into the DVD drive of the Windows Server 2008 / R2 Domain Controller
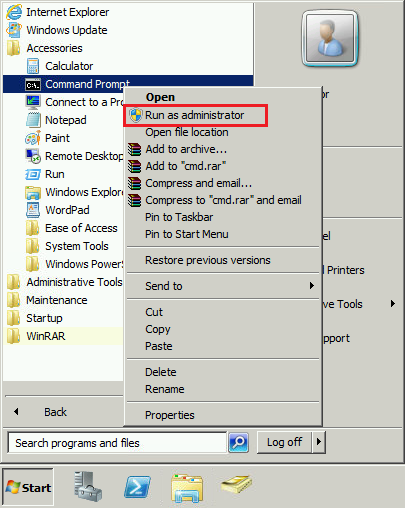
2. Open command prompt in administrative mode, and type adprep /forestprep and press enter.
3. Open the Directory of the DVD drive and navigate to adprep directory and then type : adprep /forestprep

You will receive a warning that all active directory domain controllers in the forest must be running at least windows server 2003. click c and Enter to confirm and continue.

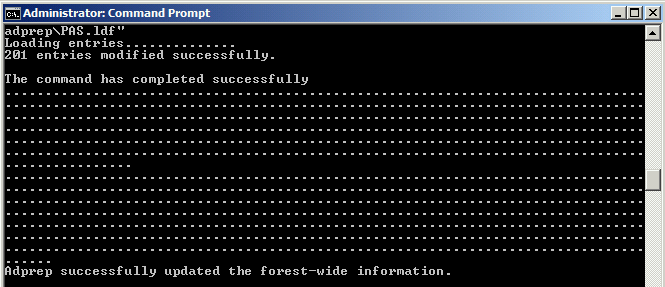
Adprep will successfully update the forest
4. Then type adprep /domainprep and press enter
![]()
![]()
Step 3 : Install Windows Server 2012 and join it to the Windows Server 2008 Domain
- For Installing Windows Server 2012, read this article : How To Install Windows Server 2012
- For Joining Windows Server 2012 to the domain of Windows Server 2008, read this article : How To Join Windows Server 2012 to a Domain
Step 4 : Setting Up Additional Active Directory Domain Controller With Windows Server 2012
By now you already have your Windows Server 2008 Domain Controller, and you have installed Windows Server 2012 and is now a domain member. Now we need to introduce our first Windows Server 2012 domain controller in our network. This has been discussed in a previous article, read it here : Setting Up Additional Active Directory Domain Controller With Windows Server 2012
Step 5 : Transferring the Flexible Single Master Operations (FSMO) Role
You have your Windows Server 2008 Domain Controller ( in my lab its called : ELMAJDAL-DC ) and have an additional Windows Server 2012 domain controller ( in my lab its called : ELMAJDAL-DC13). To complete the migration , we need to transfer 5 FSMO roles to the new domain controller.
The five FSMO roles are:
- Schema Master
- Domain Naming Master
- Infrastructure Master
- Relative ID (RID) Master
- PDC Emulator
To check who is currently holding FSMO, run the following command : netdom query fsmo
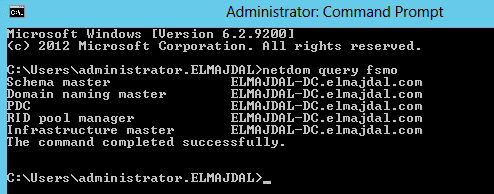
The FSMO roles are currently with the Windows Server 2008 R2 domain controller : ELMAJDAL-DC
The FSMO roles are going to be transferred, using the following three MMC snap-ins :
- Active Directory Schema snap-in : Will be used to transfer the Schema Master role
- Active Directory Domains and Trusts snap-in : Will be used to transfer the Domain Naming Master role
- Active Directory Users and Computers snap-in : Will be used to transfer the RID Master, PDC Emulator, and Infrastructure Master roles
Lets start transferring the FSMO roles.
- Using Active Directory Schema snap-in to transfer the Schema Master role
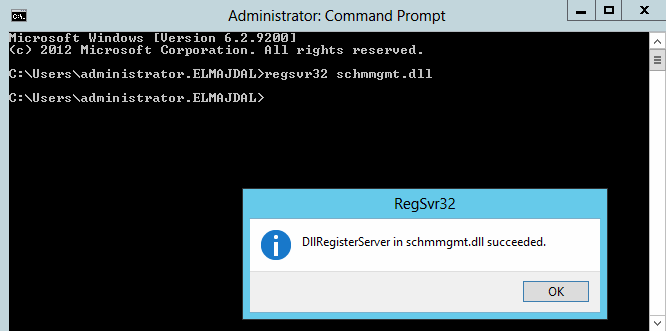
You have to register schmmgmt.dll in order to be able to use the Active Directory Schema snap-in
1. Open Command Prompt in administrative mode and type regsvr32 schmmgmt.dll
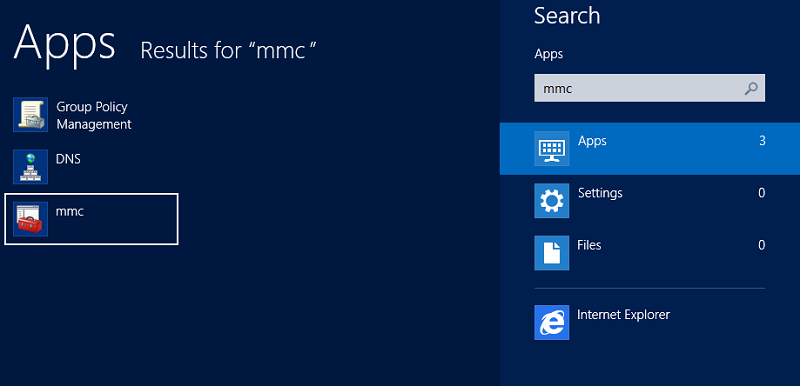
2. Open Microsoft Management Console , mmc
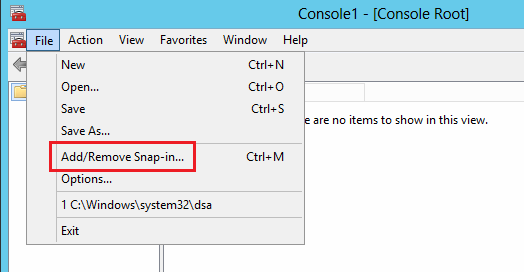
3. Click File > then click Add/Remove Snap-in…
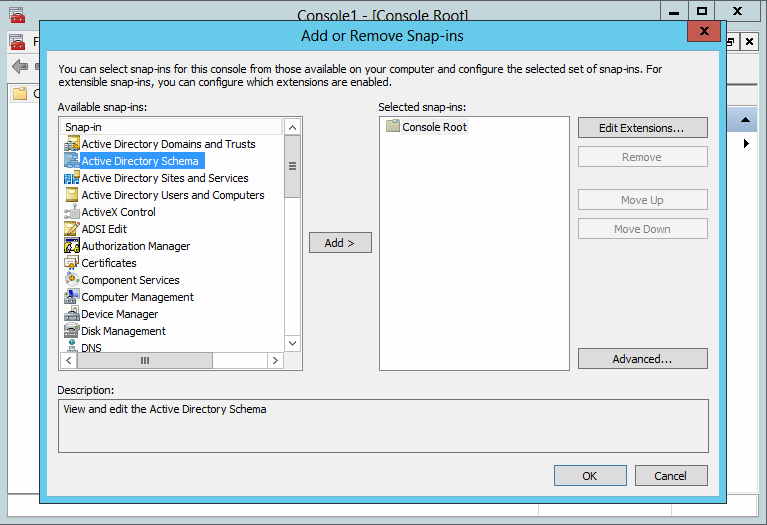
4. From the left side, under Available Snap-ins, click on Active Directory Schema, then click Add > and then click OK
5. Right click Active Directory Schema, then click Change Active Directory Domain Controller…

6. From the listed Domain Controllers, click on the domain controller that you want to be the schema master role holder and then click on OK
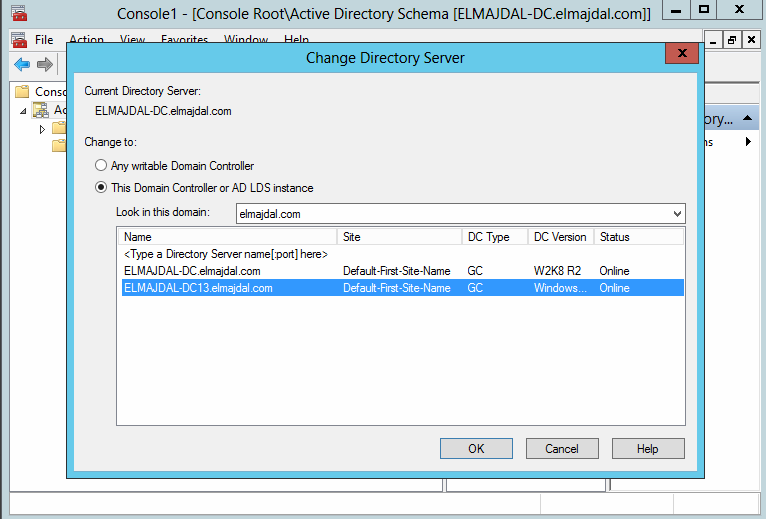
You will receive a message box stating that the schema snap-in is not connected to a schema operations master. That is for sure, as we have not yet set this Windows Server 2012 domain controller as a Schema Master role holder. This will be done in the next step. Click OK

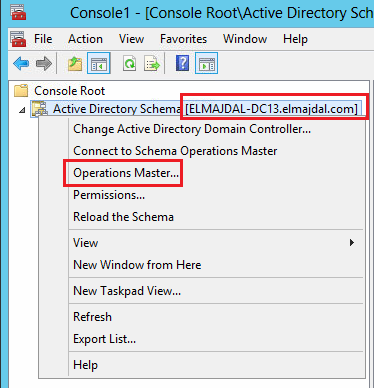
7. In the console tree, right click Active Directory Schema [DomainController.DomainName], and then click Operations Master…
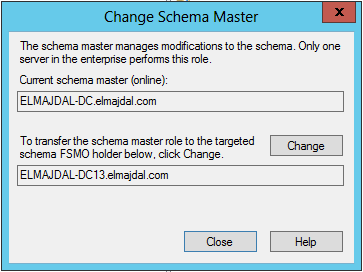
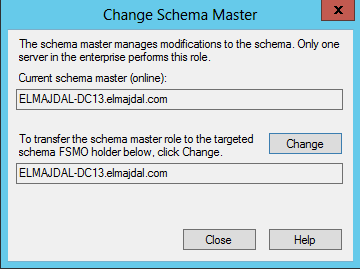
On the Change Schema Master page, the current schema master role holder will be displayed ( ex. ELMAJDAL-DC.ELMAJDAL.COM) and the targeted schema holder as well (ex. ELMAJDAL-DC13.ELMAJDAL.COM). Once you click Change, the schema master holder will become
ELMAJDAL-DC13.ELMAJDAL.COM , click Change
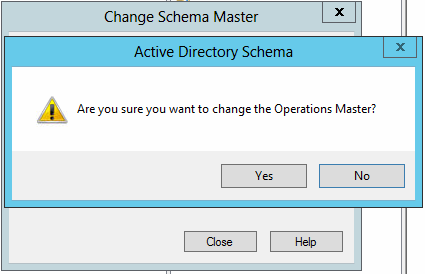
Click Yes to confirm the role transfer
The role will be transferred and a confirmation message will be displayed. Click OK
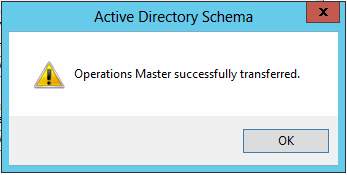
Then click Close, as you can see in the below snapshot, the current schema master is ELMAJDAL-DC13.ELMAJDAL.COM which is the Windows Server 2012 DC
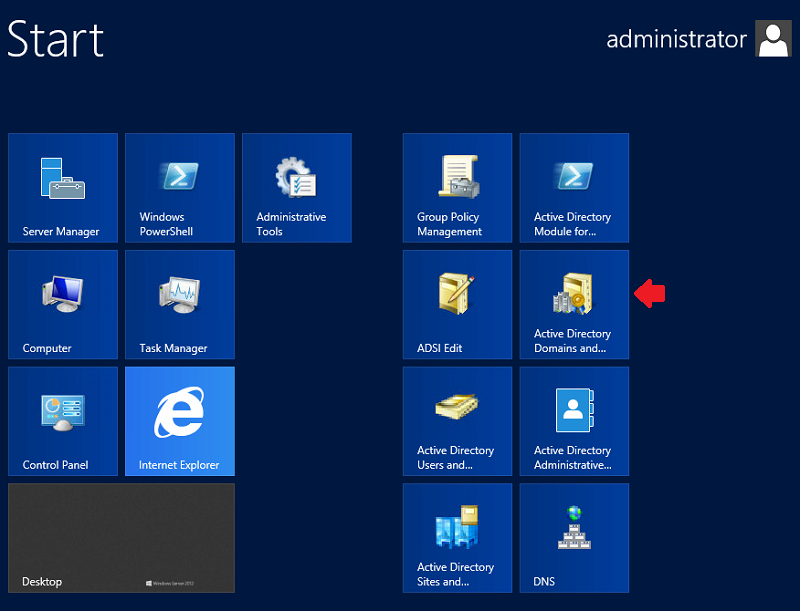
1. From the Start Screen, open the Active Directory Domains and Trusts
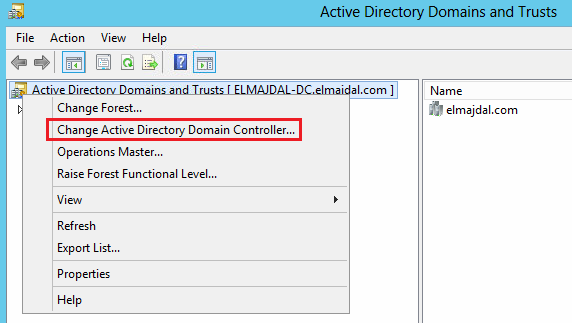
2. Right click Active Directory Domains and Trusts, then click Change Active Directory Domain Controller…
3. From the listed Domain Controllers, click on the domain controller that you want to be the Domain Naming master role holder and then click on OK
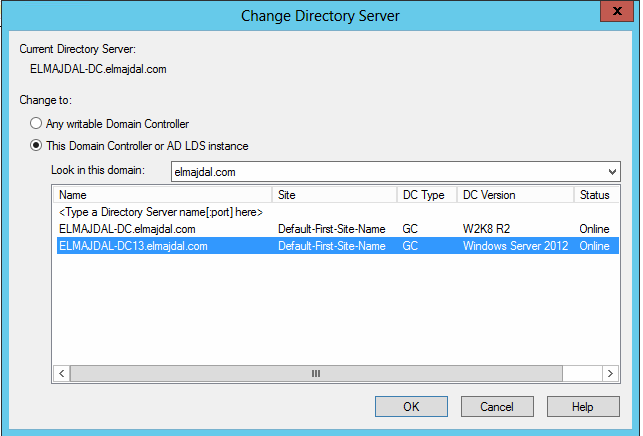
4. Right click Active Directory Domains and Trusts, then click Operations Master…
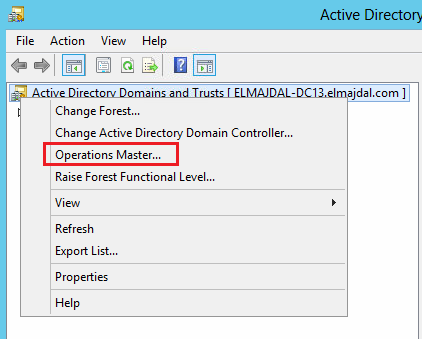
5. On the Operations Master page, we are going to change the Domain Naming role holder from ELMAJDAL-DC.ELMAJDAL.COM to ELMAJDAL-DC13.ELMAJDAL.COM, Click Change
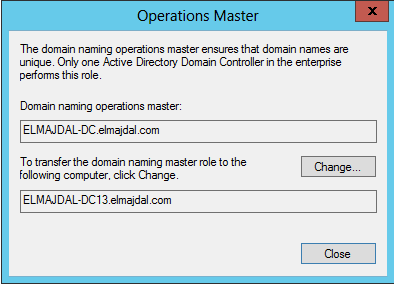
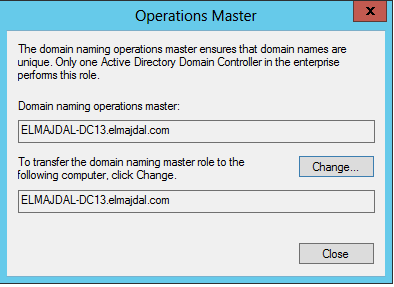
6. Click YES to confirm the transfer of the Domain Naming role. The role will be transferred and a confirmation message will be displayed. Click OK , then click Close
Using Active Directory Users and Computers snap-in to transfer the RID Master, PDC Emulator, and Infrastructure Master Roles
1. From the Start Screen, open the Active Directory Users and Computers console
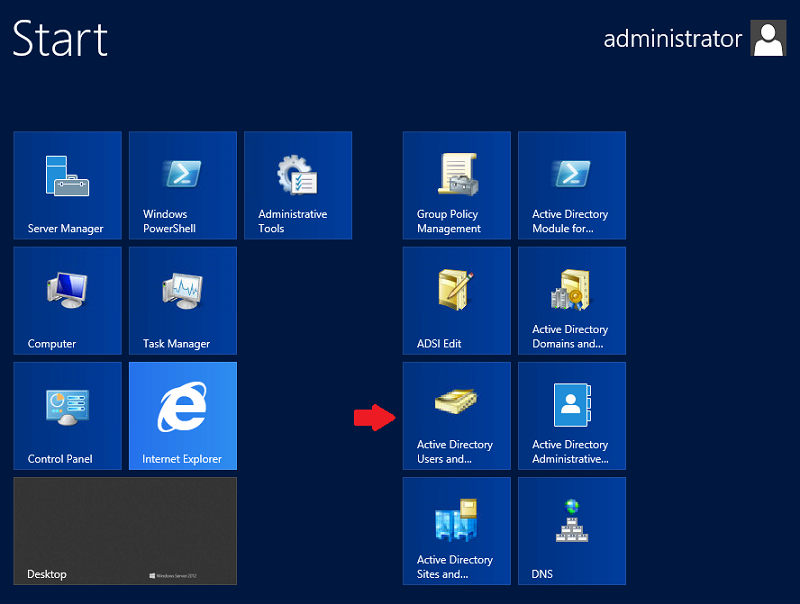
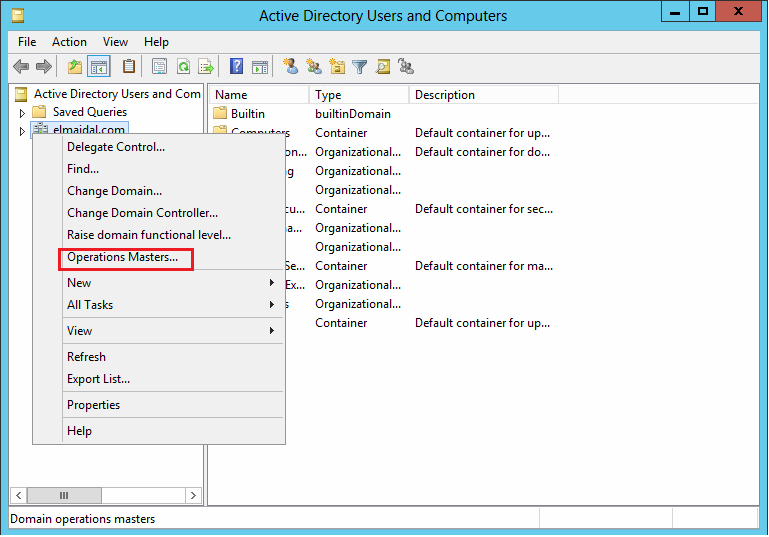
2. Right click your domain and select Operations Masters
3. In the Operations Masters window, ensure the RID tab is selected.
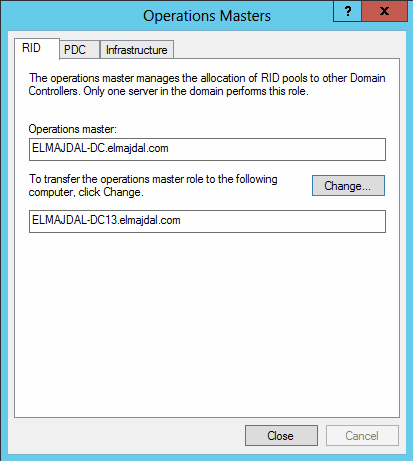
4. Click the Change button. Select Yes when asked about transferring the operations master role. Once the operations master role has successfully transferred, click OK to continue.
Ensure the Operations Master box now shows your new Windows Server 2012

5. Repeat steps 4 to 6 for the PDC and Infrastructure tabs.
 |
>> |  |
 |
>> |  |
Once completed, click Close to close the Operations Masters window.
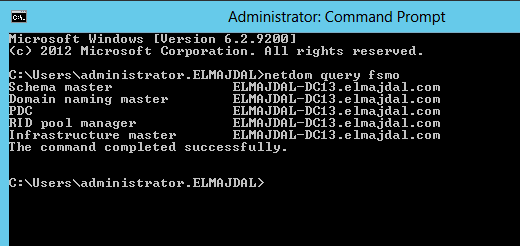
If you would like to check if the roles were properly transferred, open command prompt and type: netdom query fsmo. If you see your new server listed in each role, you have successfully transferred all of your FSMO roles to the new server
