Introduction
In this article, I will be showing you how you can start using Telnet in Windows Server 2012.
By default, Windows Server 2012 does not recognize the telnet command.

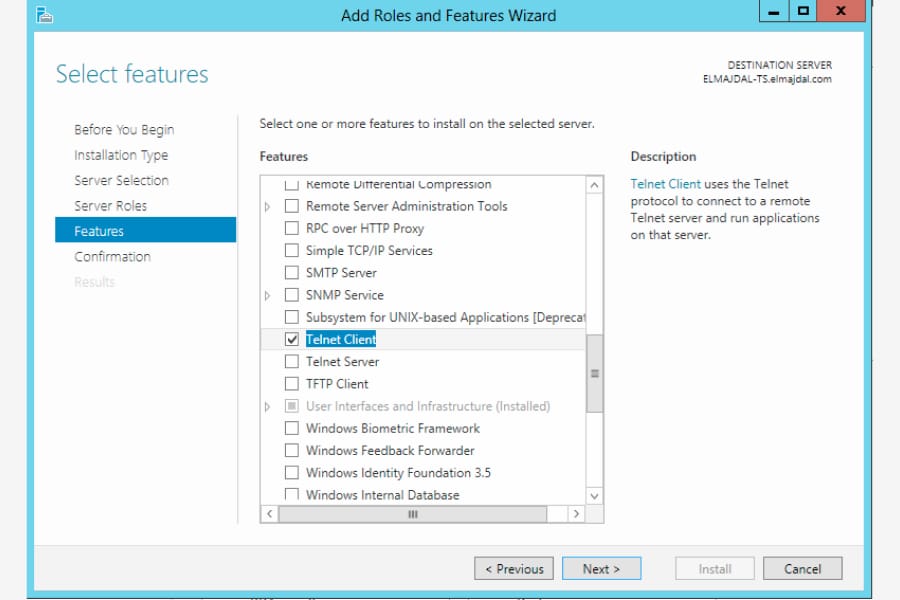
If you want to start using telnet on your Windows Server 2012, then you need to install the Telnet Client Feature.
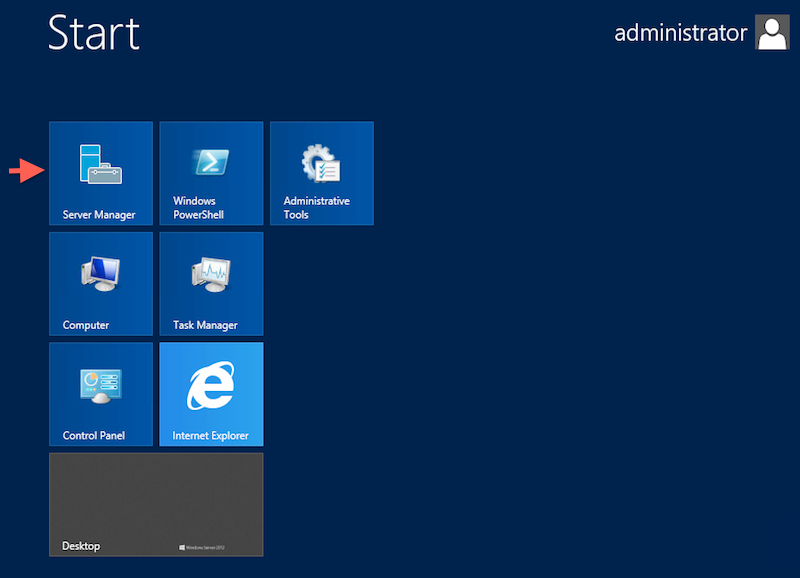
1. Open Server Manager
2. From the Server Manager Dashboard page, Click on Add roles and features

3. The Add roles and features wizard will open, click Next to begin
4. On the installation type page, select Role-based or feature-based installation and click Next
5. On the destination server, select a server from the server pool and make sure that the server you want to install Telnet on is currently highlighted ( You can manager a server pool if you had any but this is out of the scope of this article )
6. The Telnet Client is a Feature, so skip the Roles and click Next
7. From the list of available Features, select Telnet Client and then click Next
8. On the Confirmation page, If you need to reboot the machine automatically if required after installation is completed, then select the option Restart the destination server automatically if required. The Telnet Client Feature does not require any restart, so don’t select this option.
Click Install
9. Installation will be completed successfully and no reboot is required. Click Close
Now, when you try to use telnet inside command prompt, telnet will be recognized and if you typed ? and hit Enter, you will get a list of the supported commands that can be used along with telnet