Windows 11 features a revamped Taskbar, showcasing a centralized alignment for the Start menu and app buttons, a fresh notification area, as well as new effects and animations. While it brings about several welcomed enhancements, it also eliminates certain legacy functionalities, including the option to reposition the Taskbar.
The inability to relocate the Taskbar in Windows 11 stems from its entirely new design, making the process of moving it across the screen a formidable challenge. Microsoft clarifies that altering its placement to the right side results in a significant transformation of the entire design, affecting not only the Taskbar but also the Start menu and apps. The existing interface and animations are meticulously tailored for a bottom placement, making any alternative positioning impractical and, according to Microsoft, not worth pursuing due to limited demand.
For users who prefer the Taskbar in a different location, such as at the top, left, or right side, there is still a method to achieve this. However, it involves using a 3rd party software. This guide will walk you through the steps to change the Taskbar position to various sides of the screen on Windows 11.
Relocate the Taskbar using Taskbar Settings
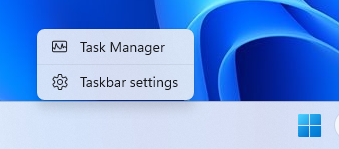
- Right-click on any part of your taskbar and select Taskbar Settings.

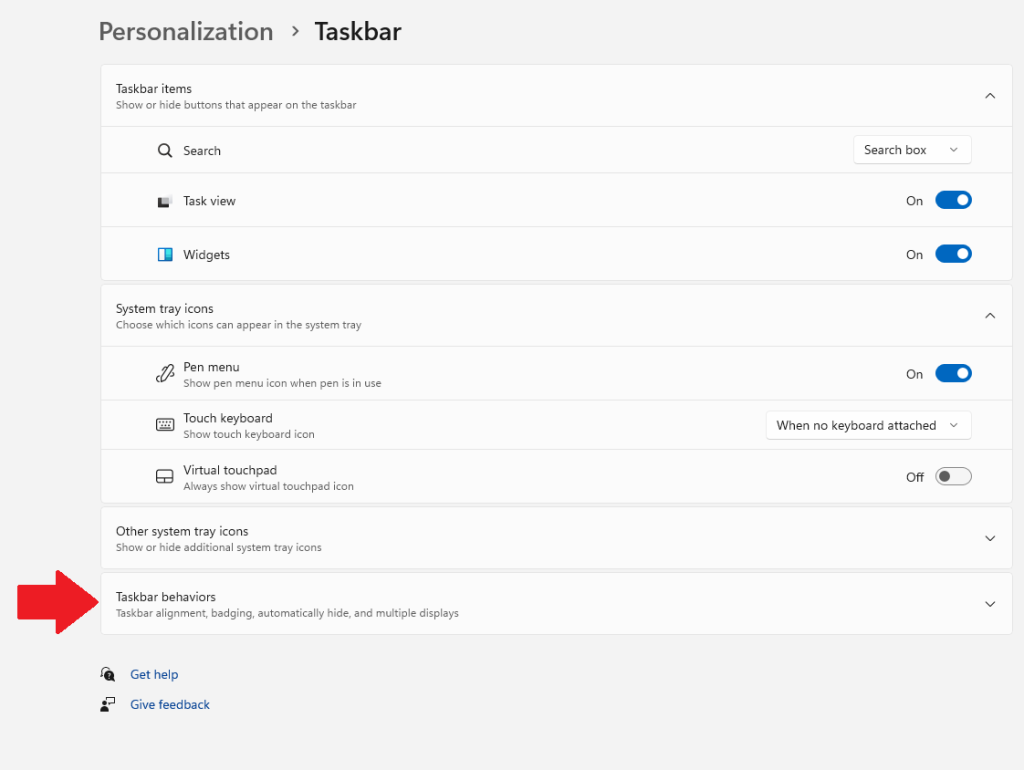
- Navigate to the Taskbar behaviors dropdown located on the right-hand side.

- Click on the Taskbar alignment dropdown and select your preferred alignment, such as Left.

- Upon switching the taskbar to the left, you will observe an immediate shift of your Start menu and all the pinned apps, files, and websites to the left side of the screen.
Regrettably, officially supporting the relocation of the taskbar to the right or top of the screen in Windows 11 is not possible, and achieving such changes requires using a 3rd party software, which we will do it with the next sections.
Prior to initiating the taskbar relocation process on Windows 11, ensure that you have established a System Restore Point. This precautionary measure provides a secure point to revert to in case any errors occur. If you are unfamiliar with creating a System Restore Point, refer to our guide available here for detailed instructions: How To Create And Use System Restore Points in Windows 11
Relocate the Taskbar to the top using a third-party tool
- Visit the ExplorerPatcher (ep_setup.exe) GitHub page. Or download it directly from here : https://github.com/valinet/ExplorerPatcher/releases/latest/download/ep_setup.exe
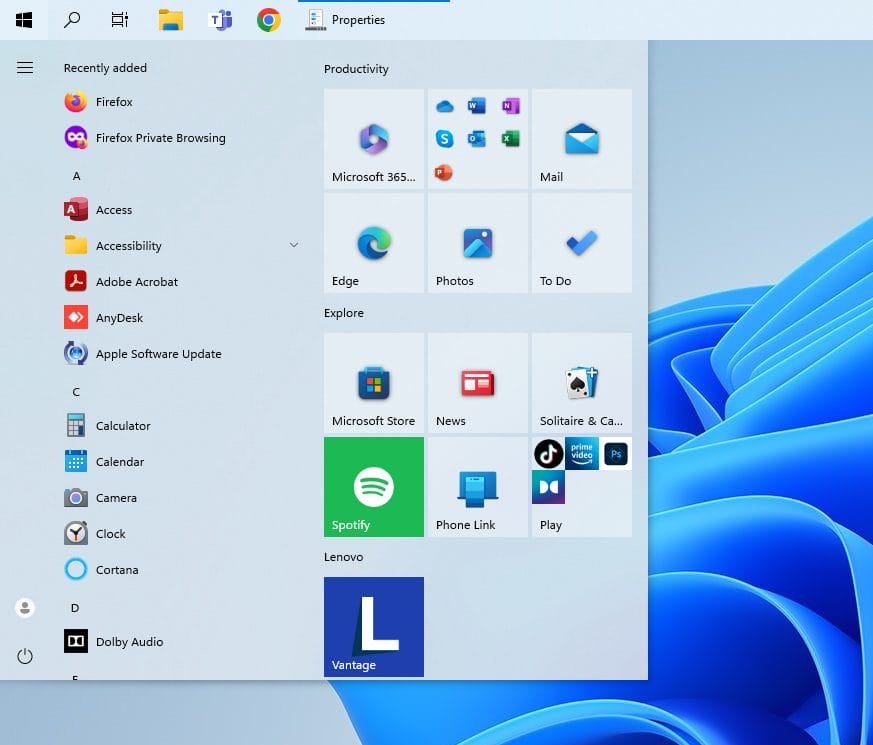
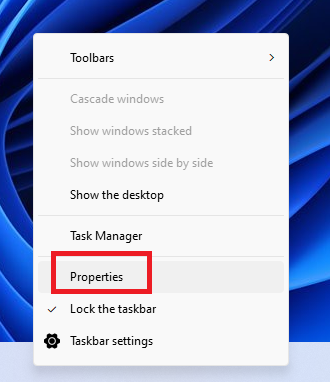
- Double-click the downloaded file to initiate the application installation. It will prompt for elevation automatically. Upon completion, you’ll encounter the well-known Windows 10 taskbar. To customize the program’s options, simply right-click on the taskbar and select Properties.

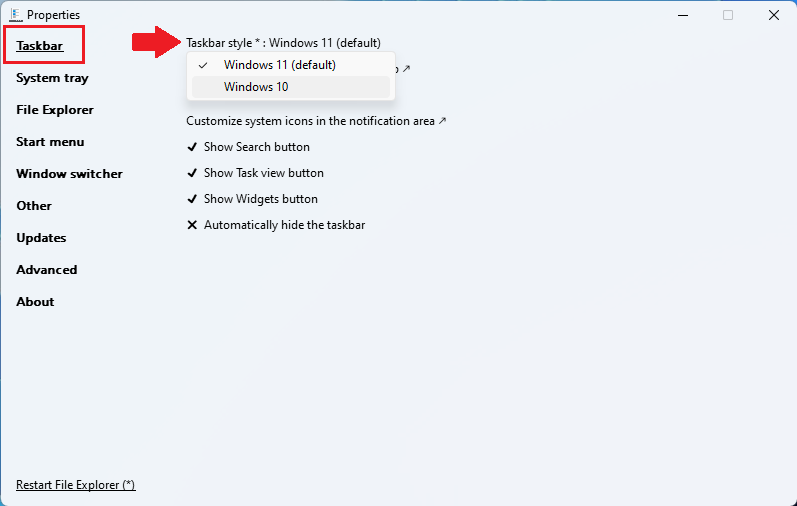
- Navigate to the Taskbar tab. Utilize the Taskbar style setting and opt for the Windows 10 choice.

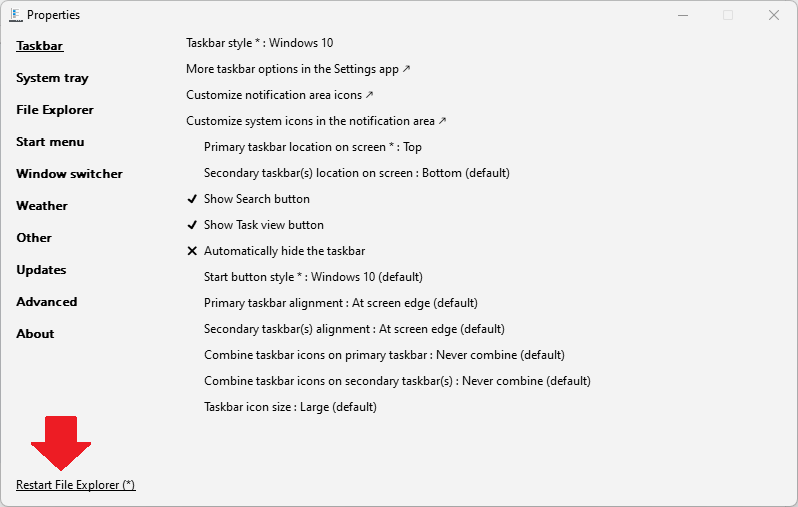
- In the Primary taskbar location on screen setting, select the Top option to relocate the Taskbar to the top of the screen (alternatively, you can choose left or right).

- If the changes are not immediately visible, click the Restart File Explorer option in the bottom-left corner.

Optionally To have the Start Menu have the Windows 10 style:
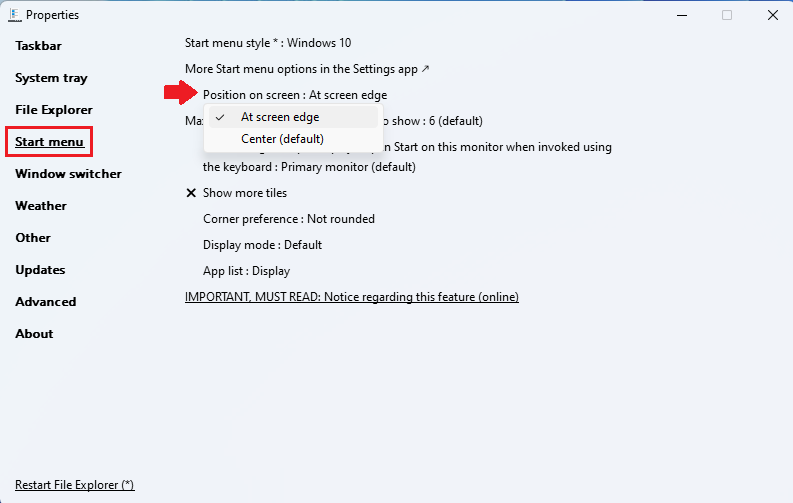
- Click on the Start menu. In the Start menu style setting, choose the Windows 10 option.

- From the Start menu tab, click the Position on screen and choose At screen edge. Then click Restart File Explorer
 Upon completing these steps, you can commence using the Taskbar located at the top of the screen and the start menu has the Windows 10 style positioned at the edge of the screen.

Uninstalling
If you wish anytime to uninstall ExplorerPatcher , follow any of the below methods:
- Use Programs and Features in Control Panel, or Apps and features in the Settings app
- or Run ep_setup.exe /uninstall
- or Rename ep_setup.exe to ep_uninstall.exe and run that.





 Upon completing these steps, you can commence using the Taskbar located at the top of the screen and the start menu has the Windows 10 style positioned at the edge of the screen.