


Introduction:
In the dynamic landscape of virtualization, Hyper-V stands out as a robust platform for creating and managing virtual machines on Windows Server environments. However, connecting a Hyper-V virtual machine to a wireless network introduces its set of challenges. This article will provide an in-depth guide on enabling wireless network connectivity for your virtual machines on Windows Server 2016, 2019, and 2022, offering step-by-step instructions to navigate through this process seamlessly.
Understanding the Challenge:
By default, Hyper-V virtual machines are configured to connect to wired networks. While this configuration is suitable for many scenarios, there’s a growing demand for wireless connectivity, particularly in environments where mobility and flexibility are crucial. The challenge lies in configuring Hyper-V to recognize and utilize wireless network adapters effectively.
Enabling Wi-Fi for virtual machines (VMs) can bring several benefits, enhancing flexibility, mobility, and adaptability within virtualized environments. Here are some key advantages:
- Mobility and Flexibility:
Enabling Wi-Fi allows virtual machines to connect to wireless networks, providing greater mobility and flexibility. This is particularly beneficial for users who need to move their virtual machines between different physical locations without the constraints of wired connections. - Ease of Deployment:
Wireless connectivity simplifies the deployment of virtual machines in scenarios where running network cables may be impractical or time-consuming. This is especially useful in temporary setups, remote locations, or during events where quick and flexible deployment is crucial. - Virtualization in Portable Devices:
Enabling Wi-Fi support enables the use of virtualization on portable devices, such as laptops or tablets. This is advantageous for professionals who need to run virtual machines on the go, utilizing the convenience of wireless networks without being tethered to a wired connection. - Testing and Development:
For developers and IT professionals working on applications or services that rely on wireless connectivity, testing within a virtual environment with Wi-Fi support can accurately simulate real-world conditions. This aids in the development and testing of wireless-dependent functionalities without the need for physical hardware. - Training and Demos:
In educational settings or during product demonstrations, enabling Wi-Fi for virtual machines allows for more dynamic and interactive presentations. Users can showcase applications or services that involve wireless communication without the limitations of wired connections. - Remote Access and Troubleshooting:
Wireless connectivity enables virtual machines to connect to networks remotely. This is valuable for IT professionals performing remote troubleshooting, updates, or maintenance on virtualized systems, eliminating the need for a physical presence or wired connection. - Enhanced Virtual Desktop Infrastructure (VDI):
Wi-Fi support is beneficial in Virtual Desktop Infrastructure (VDI) environments where users access virtual desktops remotely. Enabling Wi-Fi allows for a seamless and untethered user experience, improving the overall usability of virtualized desktop environments. - BYOD (Bring Your Own Device) Environments:
Enabling Wi-Fi in virtual machines accommodates scenarios where users bring their own devices. This is relevant in modern workplaces that embrace a BYOD approach, allowing employees to access virtualized resources using their personal devices over wireless networks.
Steps to Enable Wireless Network For a Virtual Machine:
- Install Hyper-V Feature:
Ensure that the Hyper-V feature is installed on your Windows Server. You can do this by following this article : How To Install Hyper-V In Windows Server 2016/2019/2022 - Enable Wireless Feature:
Before diving into the configuration, verify that your physical machine hosting the Hyper-V virtual machines has a compatible wireless network adapter. Then read this crucial article to know How To Enable Wireless (Wi-Fi) on Windows Server 2016/2019/2022 - Create a Virtual Switch:
In Hyper-V, a virtual switch is a networking component that enables communication between virtual machines (VMs) and between VMs and the physical network. It acts as a bridge between the virtual and physical network environments, allowing data to flow between virtual machines and the external network. Key points about virtual switches in Hyper-V:
Types of Virtual Switches:- External Switch: Connects VMs to the physical network, allowing them to communicate with other machines on the same network.
- Internal Switch: Enables communication between VMs and the host machine but does not provide direct access to the external network.
- Private Switch: Isolated switch that only allows communication between VMs on the same host and doesn’t provide access to the external network.
To create a virtual switch follow the below steps :
- Open the Hyper-V Manager and navigate to the Action menu. Select Virtual Switch Manager

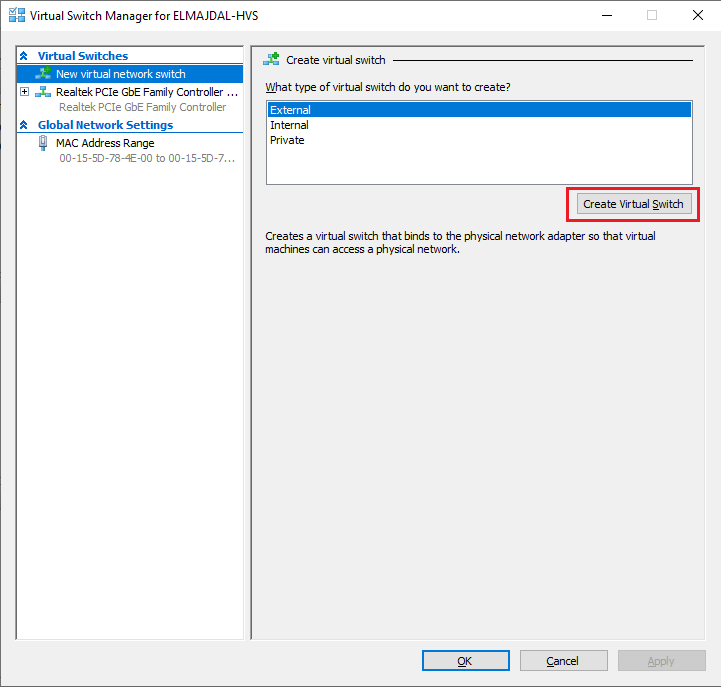
- The Virtual Switch Manager page will open, Currently on the left side pane you could have no Virtual switches, or at least the Ethernet Network Card set as a virtual switch. During the installation of Hyper-V role you are asked if you want to create a virtual switch or not. As you can see there is no Wi-Fi Virtual Switch, so we are going to create a new one. Click on the Create Virtual Switch button

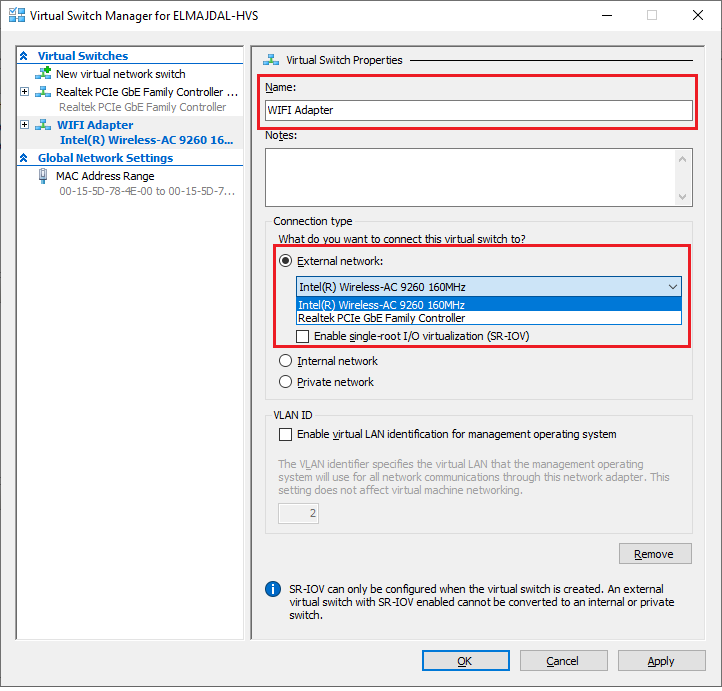
- Give a Name to the new Virtual Adapter for example WIFI Adapter, and from the Connection type choose External network and select the host server Wireless Network Adapter from the drop down list. Click OK once done.

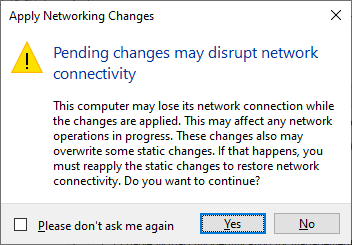
- A pop up message will be displayed informing you that pending changes may disrupt network connectivity, click Yes
 Now that we have created the virtual switch for the WIFI Adapter, it’s time to connect the virtual machines to this virtual switch.

 Now that we have created the virtual switch for the WIFI Adapter, it’s time to connect the virtual machines to this virtual switch.
- Configure Virtual Machine Settings:
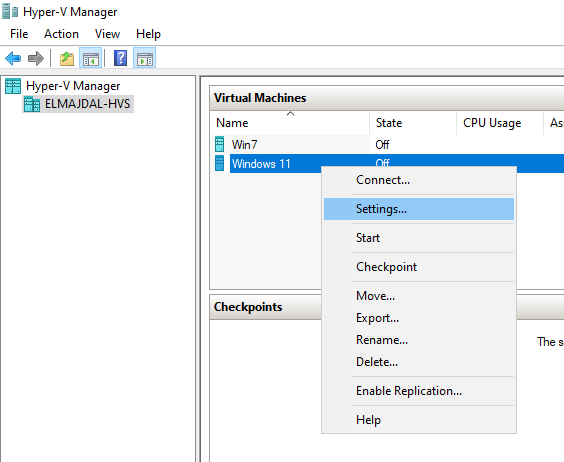
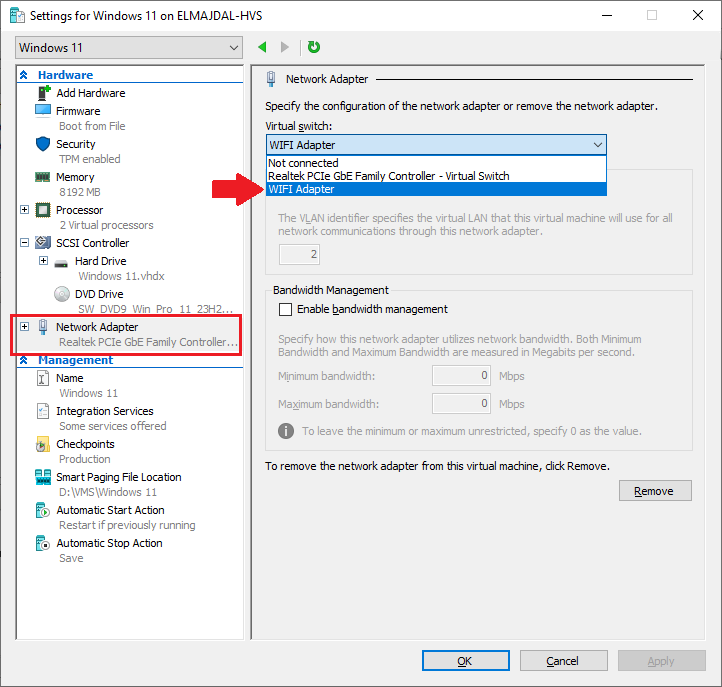
- From the Hyper-V Manager console, right click a virtual machine and click on Settings

- From the left side pane, select Network Adapter settings, and then select the Virtual switch you just created. This step ensures that the virtual machine is connected to the newly established wireless virtual switch. Then click OK

- Verify Connectivity in Virtual Machine:
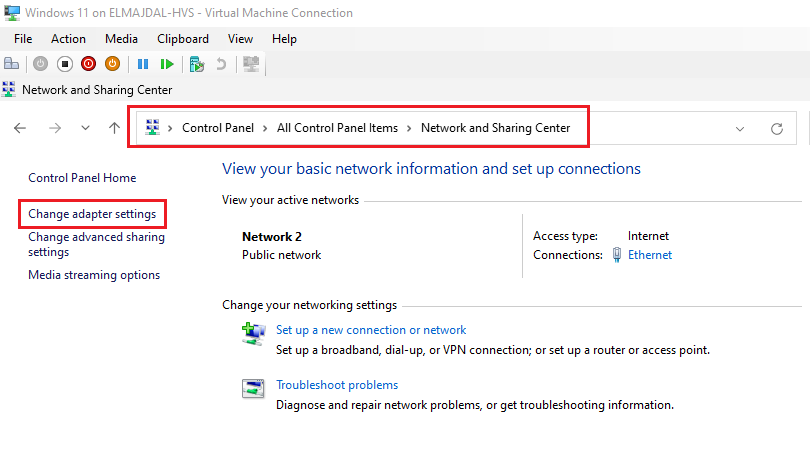
- Start your virtual machine and navigate to the Network and Sharing Center within the guest operating system.
 Click on Change adapter settings and locate the virtual network adapter. Ensure that it is enabled and connected to the virtual switch. Previously, we have created an External Switch, which connects virtual machines to the physical network ( in our case through the host’s Wi-Fi adapter), allowing VMs to communicate with other machines on the same network.

 Click on Change adapter settings and locate the virtual network adapter. Ensure that it is enabled and connected to the virtual switch. Previously, we have created an External Switch, which connects virtual machines to the physical network ( in our case through the host’s Wi-Fi adapter), allowing VMs to communicate with other machines on the same network.
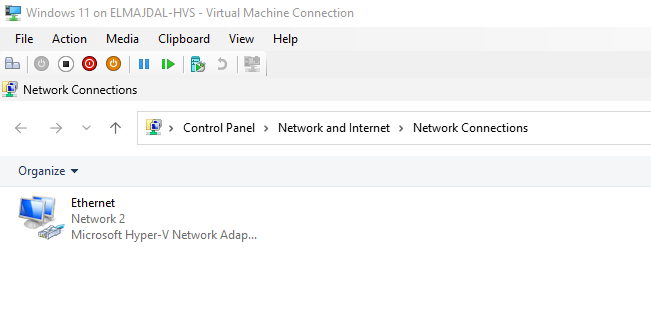
- Test Connectivity:
With the configuration complete, test the connectivity within your virtual machine. Access the internet or other network resources to ensure that the virtual machine is seamlessly connected to the host server wireless network through the virtual switch.
Conclusion:
Enabling wireless network connectivity for a Hyper-V virtual machine in Windows Server 2016, 2019, or 2022 involves a series of steps to overcome the default wired network limitations. By carefully following these guidelines, users can navigate through the intricacies of configuring Hyper-V to recognize and utilize wireless network adapters effectively. Always check for compatibility, and ensure that the virtual machine settings align with the established virtual switch to achieve a reliable and flexible wireless connection within your Hyper-V virtualized environment.