Introduction:
Many users leverage Hyper-V Manager to run Windows 11 virtually on their devices. However, a common issue arises during the installation process, leading to an error message that states, This PC can’t run Windows 11. If you find yourself encountering this error, rest assured that it can be resolved. In this article, we’ll guide you through the steps to troubleshoot and fix this issue, ensuring a seamless installation of Windows 11 on Hyper-V.
Resolving Secure Boot and TPM Configuration:
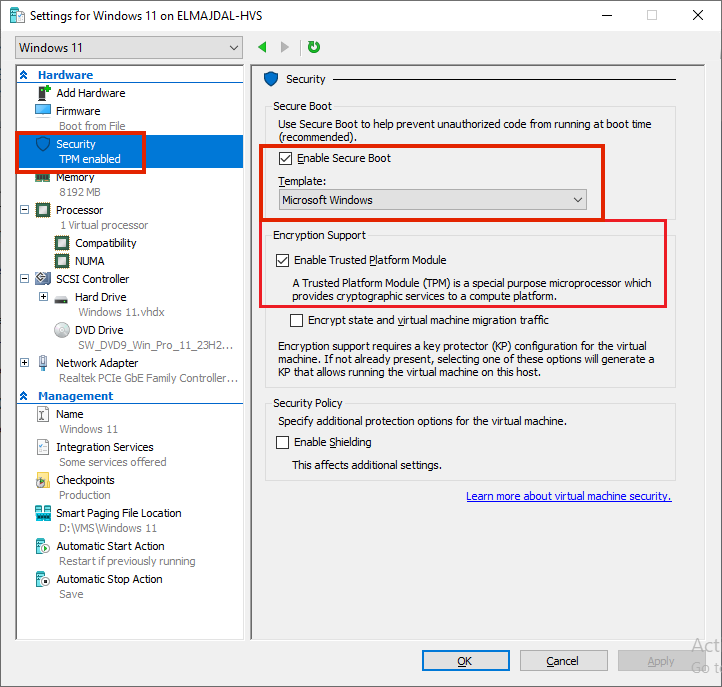
The first step in resolving the error involves checking and adjusting the Secure Boot and Trusted Platform Machine (TPM) settings in the Hyper-V Manager. Follow these steps:
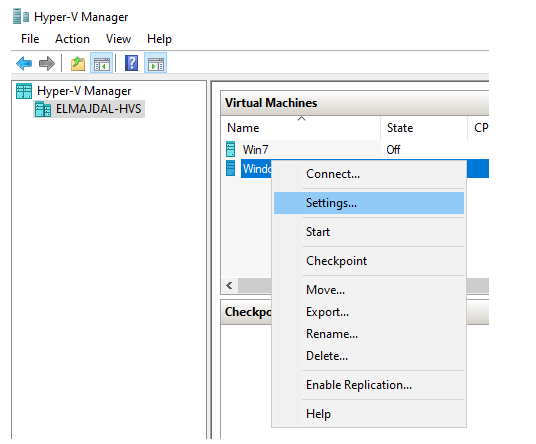
- Open the Settings window in Hyper-V Manager.

- Switch to the Security tab.
- Ensure that the boxes for Enable Secure Boot and Enable Trusted Platform Machine are checked.

- If unchecked, mark both options, click Apply, and then click OK.
Proceed to the next set of configurations.
Adjusting Virtual Processor Settings:
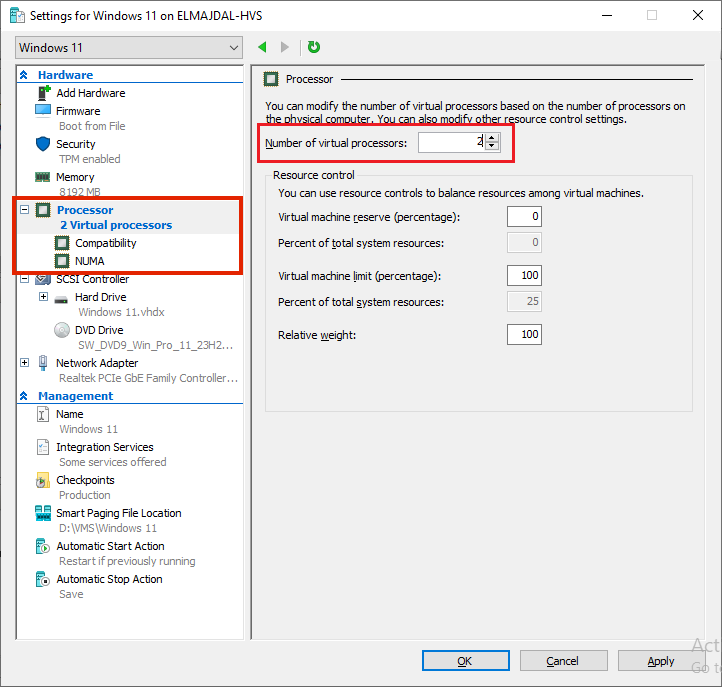
- Switch to the Processor tab.
- On the right side, confirm that the Number of virtual processors is set to at least 2.

- Click Apply and then click OK.
By following these steps, you can ensure that your virtual machine meets the necessary TPM and processor requirements for Windows 11.
Conclusion:
In conclusion, the This PC can’t run Windows 11 error in Hyper-V Manager is a common obstacle faced by users attempting to install Windows 11 virtually. By carefully adjusting the Secure Boot, TPM, and virtual processor settings, you can overcome this issue and enjoy a successful installation of Windows 11 on Hyper-V.
If you’ve been struggling with this error, follow the outlined steps, and you’ll be on your way to a seamless Windows 11 virtual experience.


