Hyper-V is a virtualization technology that allows you to create and manage virtual machines on a physical host. It is a powerful tool that enables quick deployment of computer systems, migration of virtual machines between hosts, and the ability to restore virtual machines to a previously known good state. In this tutorial, we will guide you through the process of enabling Hyper-V on your Windows 11 computer and show you how to create and manage virtual machines using the Hyper-V Manager. So, let’s get started and explore the world of Hyper-V!
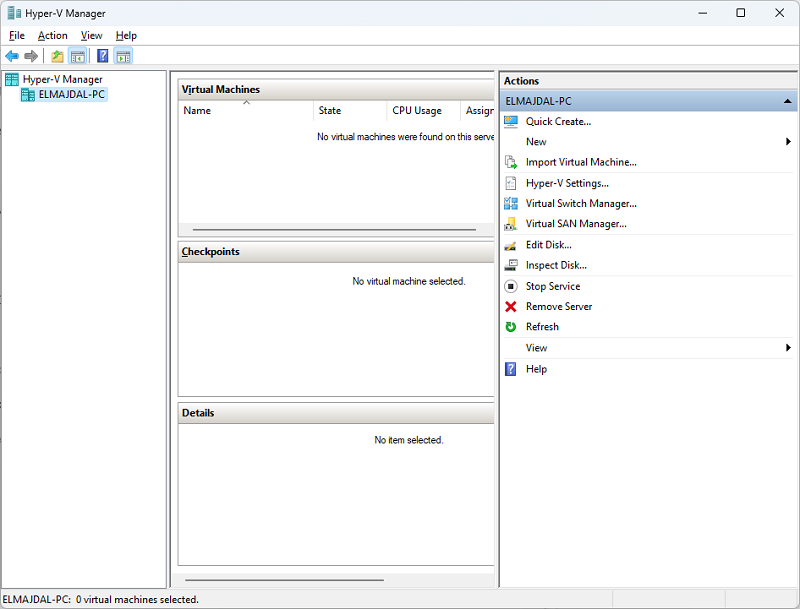
Hyper-V allows for the creation of virtual computer systems that run on a physical host, giving the appearance of a physical system but within a virtualized and isolated environment. The hypervisor software manages access to physical hardware resources, enabling easy deployment, restoration, and migration of virtual systems. This technology allows for the rapid deployment of computer systems and a straightforward way to restore them to a previously known stable state. Additionally, users can migrate their virtual systems between different physical hosts. Once Hyper-V is enabled, individual users can manage their own virtual machines using the Hyper-V Manager (virtmgmt.msc).
To run Hyper-V, your computer must meet the following system requirements:
- The operating system must be Windows 10/11 Enterprise, Pro, or Education edition.
- The processor must be 64-bit with Second Level Address Translation (SLAT).
- The computer must have a minimum of 4 GB memory.
- The CPU must have Intel (“Intel VT” or “VT-x”) or AMD (“AMD-V”) virtualization enabled in BIOS/UEFI.
- The computer’s BIOS/UEFI must have Hardware Enforced Data Execution Prevention (“Data Execution Prevention,” “XD,” “Execute Disable,” or “NX”) enabled.
In this tutorial, you will learn how to turn the Hyper-V feature for all users on Windows 11 operating system.
1. Open Control Panel: Click Start Button ![]() , type control panel
, type control panel

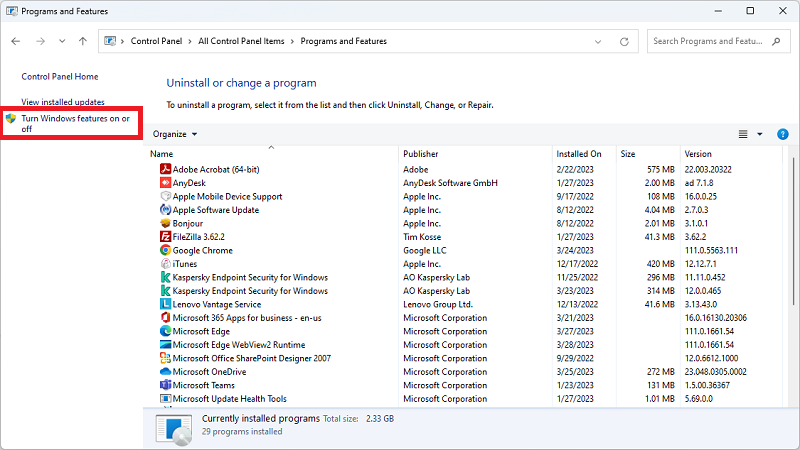
2. Click on Program and Features

3. From the left side, click on Turn Windows features on or off

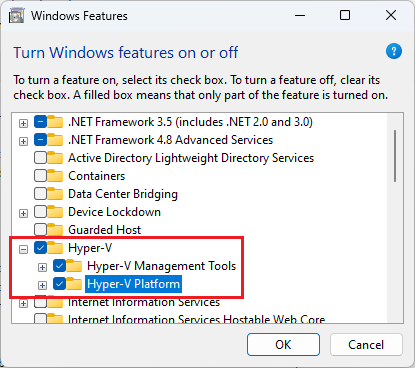
4. From the list of features, select Hyper-V , make sure both options are selected and then click OK
Hyper-V Management Tools
Hyper-V Platform

5. The selected features will be installed, and then you will be asked to restart your machine, Click Restart now


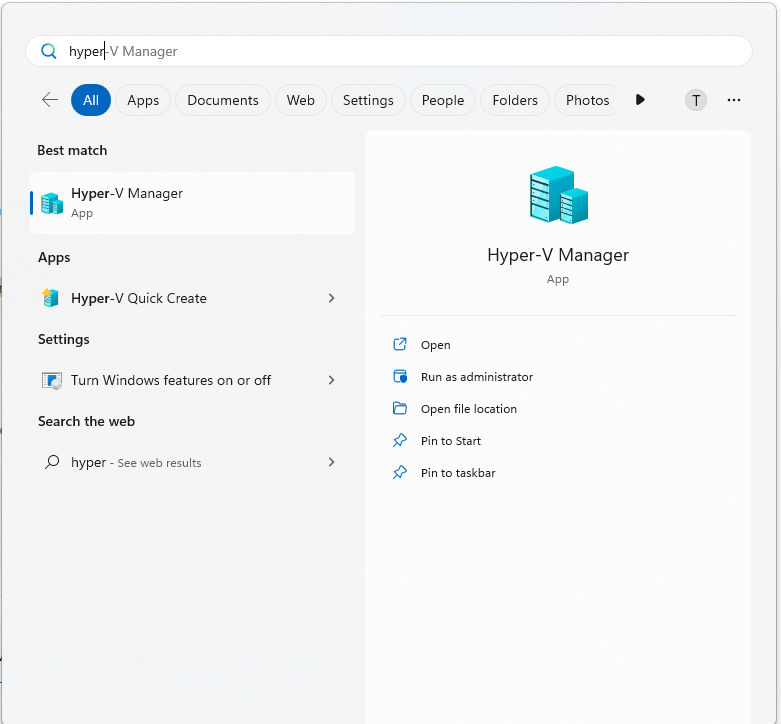
6. To open Hyper-V , Click Start and type virtmgmt.msc or simply type hyper Click on Hyper-V Manager top open it


