


Introduction
Renaming Exchange databases is a routine yet essential administrative task undertaken by organizations for diverse reasons. Whether optimizing naming conventions to enhance organizational clarity or adapting to shifts in business requirements, this task is crucial for maintaining an organized and efficient Exchange Server environment. With Microsoft Exchange Server 2019, this process is further streamlined and user-friendly, thanks to the Exchange Admin Center . This robust feature empowers administrators with a simplified and intuitive interface, allowing them to seamlessly execute database renaming tasks without the need for complex commands or intricate configurations.
In the dynamic landscape of organizational needs, the ability to modify database names efficiently becomes paramount. Exchange Server 2019 recognizes this necessity and, through the integration of the Exchange Admin Center, offers administrators a convenient solution for executing these changes. The user-friendly nature of EAC not only accelerates the renaming process but also minimizes the likelihood of errors, providing a secure and straightforward approach to maintaining an agile and responsive Exchange Server infrastructure.
Prerequisites:
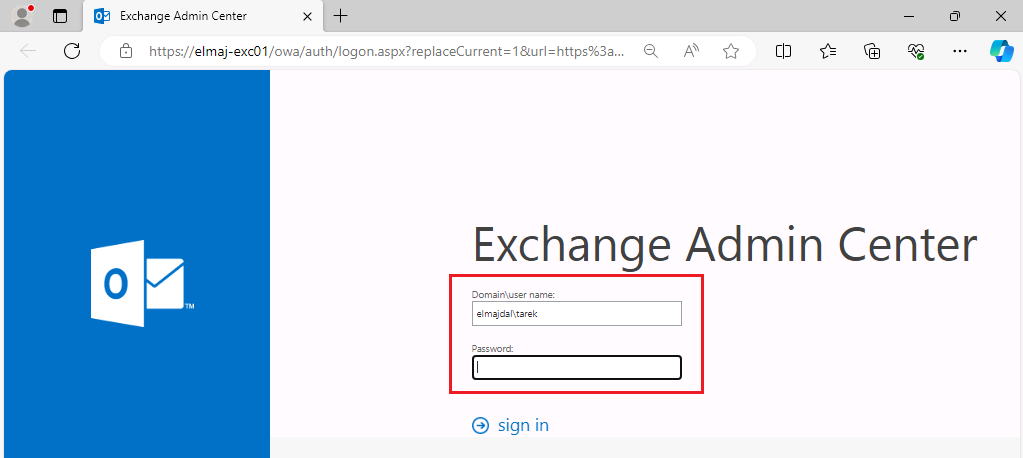
Before initiating the renaming process, ensure you have the necessary permissions and have logged in to the Exchange admin account with the required administrative rights.
- Open a web browser and navigate to the Exchange Admin Center by entering the URL. This is typically https://<ExchangeServer>/ecp, where <ExchangeServer> represents the name or IP address of your Exchange Server.

- Log in with the Exchange admin credentials.

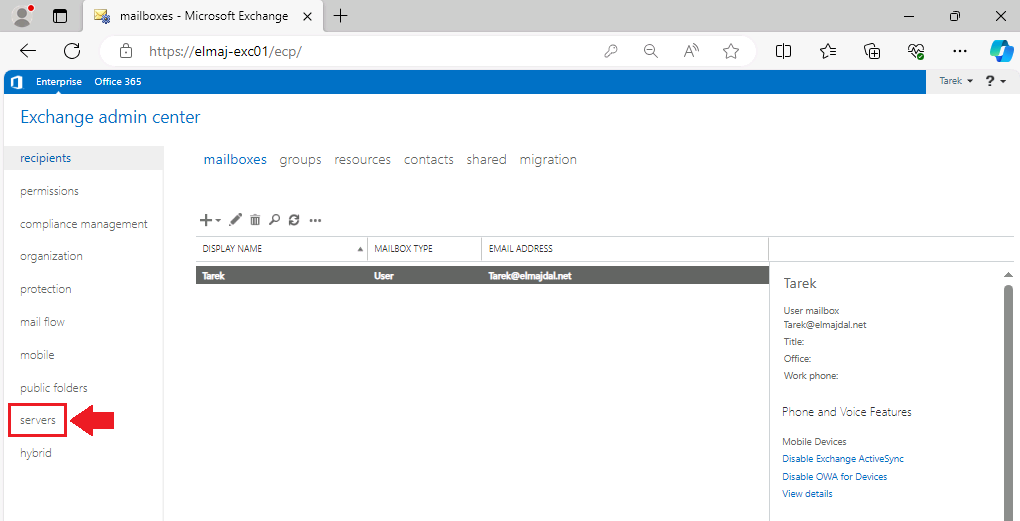
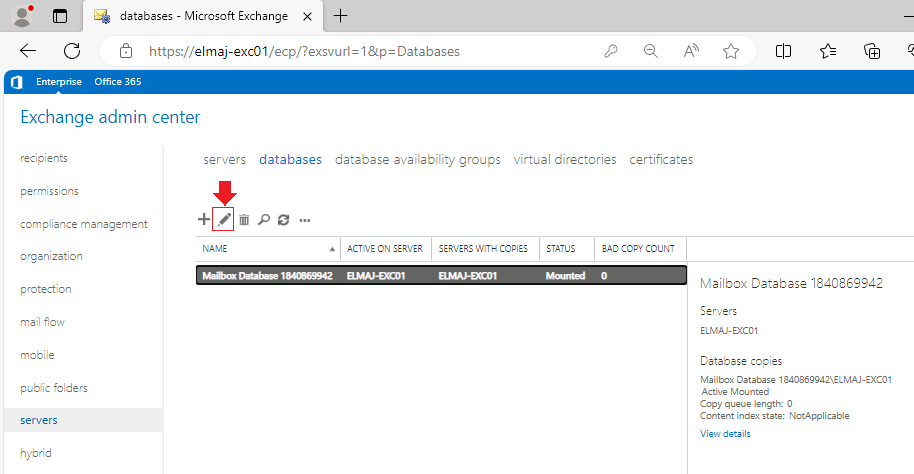
- In the ECP, go to Servers in the left navigation pane.
![]()
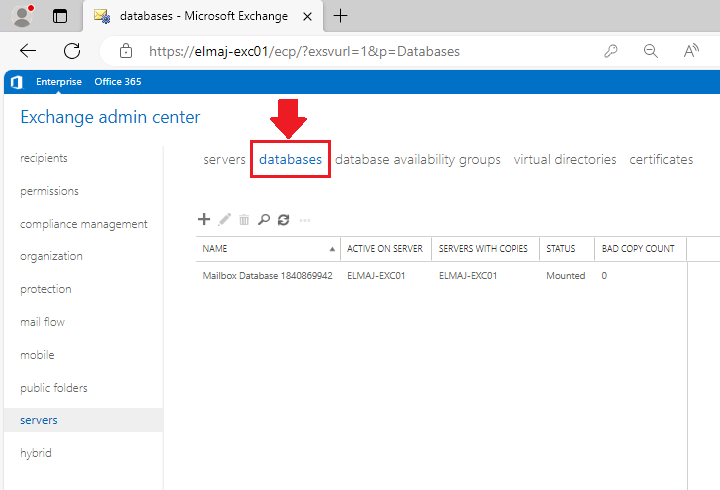
- Select Databases to view the list of existing databases.
![]()
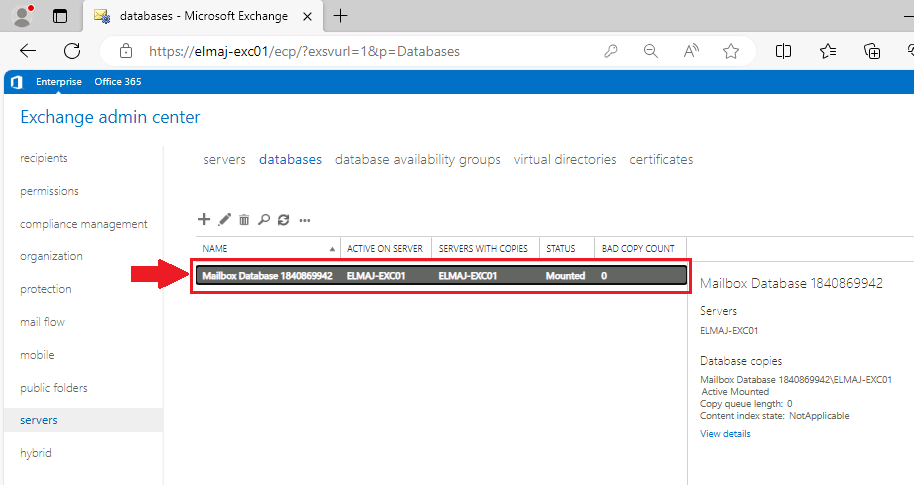
- Click on the database that you intend to rename.
![]()
- In the database details, locate and click on the Edit option.
![]()
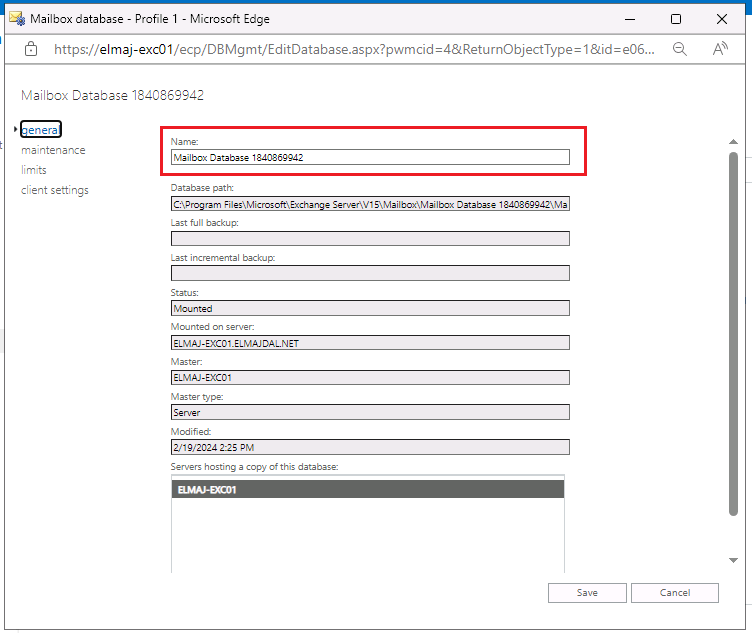
- Within the editing interface, locate the field containing the current database name.
![]()
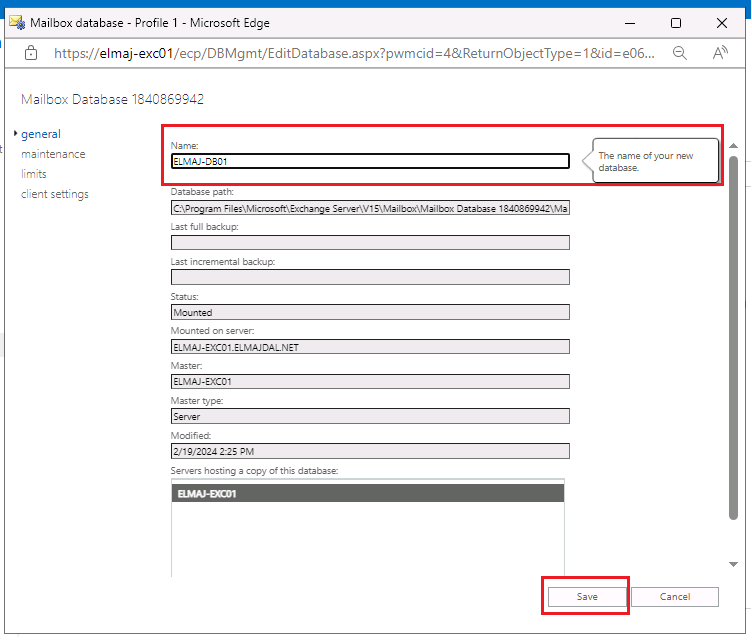
- Enter the new desired name for the database. After entering the new name, click on the Save button.
![]()
- Confirm any prompts or warnings that may appear.

Verify the Database Name Change
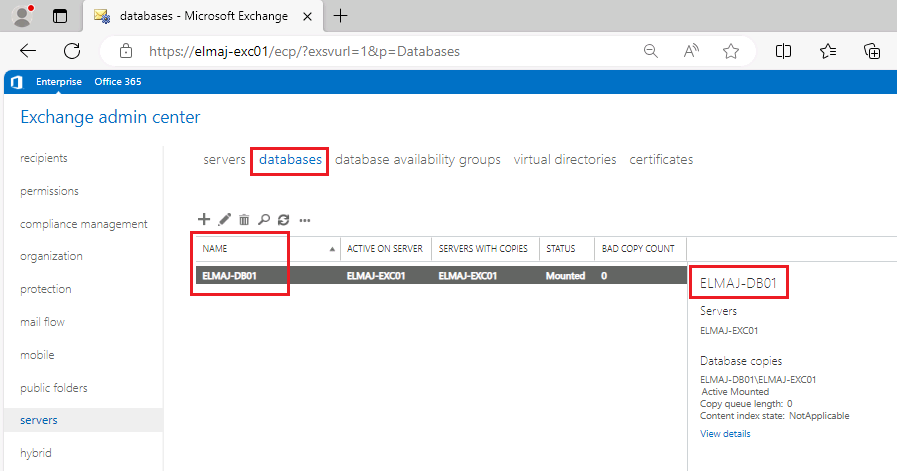
- Return to the Databases section in ECP.
- Locate the recently renamed database and ensure that the new name is reflected.
![]()
Congratulations! You have successfully renamed an Exchange database in Exchange Server 2019 using the Exchange Admin Center. This straightforward process enhances organization and aligns with evolving business needs. Always perform such administrative tasks during scheduled maintenance windows to minimize impact on users and services. In the next article, I will be showing you how to move a mailbox database from its default location to another drive.
How To Move Exchange Server 2019 Mailbox Database And Logs To Another Drive Using PowerShell