Encountering a Windows.old folder in File Explorer can be perplexing for some users, sparking questions about its significance and whether it’s safe to remove. To demystify this, let’s delve into the nature of Windows.old.
The Windows.old directory is automatically generated on your computer during a system upgrade to a newer Windows version, a tradition initiated with Windows Vista. Upon upgrading to a new Windows version through Windows update or executing an in-place Windows upgrade, the operating system generates a Windows.old folder. This repository encompasses both your previous system files and personal files, providing the option to revert to the old Windows version if desired. However, the presence of this folder on the C drive can pose an inconvenience for users who have recently upgraded their PC, as it consumes a substantial amount of space.
Contents of Windows.old
This repository, present in Windows 11, Windows 10, and other Windows iterations, preserves a historical snapshot of your prior Windows configuration. It encompasses:
– System files and directories
– Installed programs and applications
– User account settings and data
– All essential components for the operation of your former system
Functionality of Windows.old
Windows.old serves two primary purposes: shielding your computer from potential update mishaps and facilitating a rollback to the preceding system.
- Security Mechanism: Microsoft devised the Windows.old folder as a protective measure. If a system update encounters unexpected issues, the folder acts as a safety net, enabling the system to revert changes.
- Rollback Capability: In the event of a failed installation of the new system, Windows.old comes into play. Post a successful upgrade, it offers users the flexibility to easily revert to the earlier system if any complications arise or if they find the new system unsatisfactory.
In essence, Windows.old provides a straightforward means of downgrading from Windows 11 to Windows 10.
How To Delete The Windows.old Folder in Windows 11
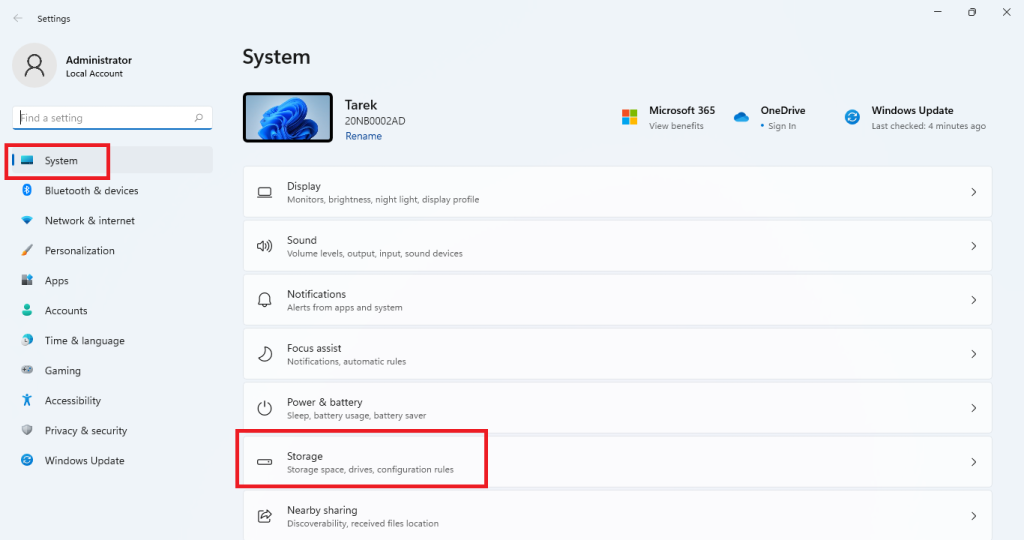
- Open Settings by clicking WIN+I on your keyboard

- From System , click on Storage

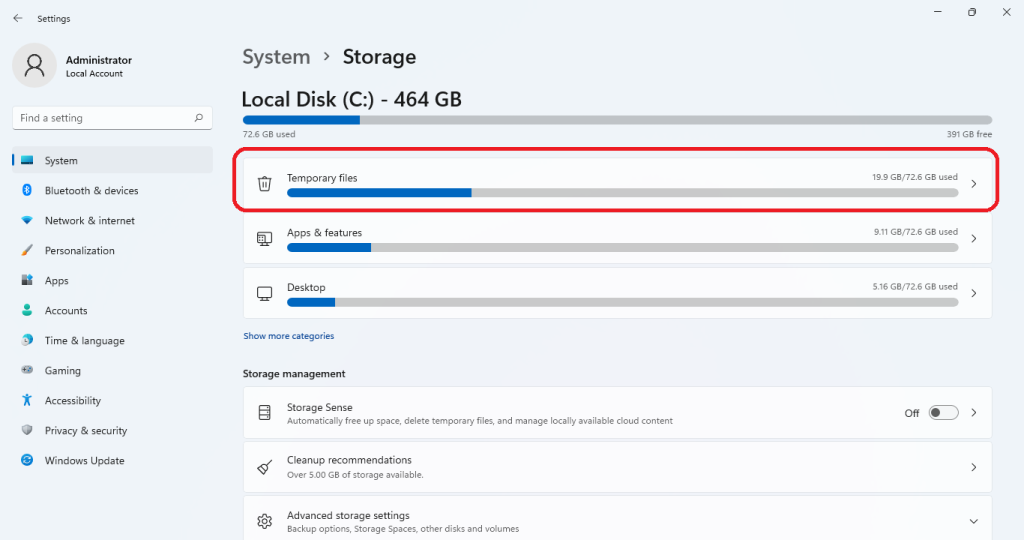
- From the System>Storage page, click on Temporary files

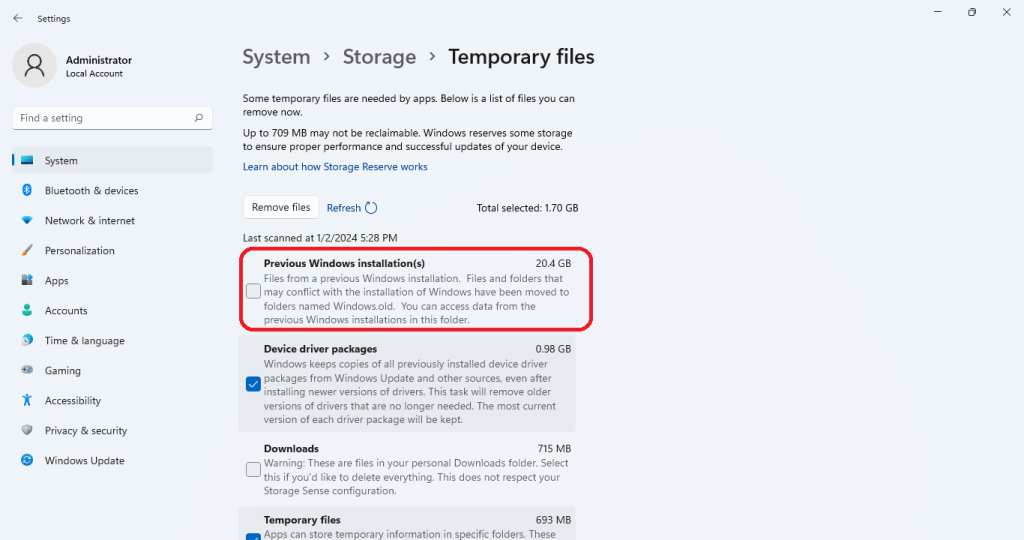
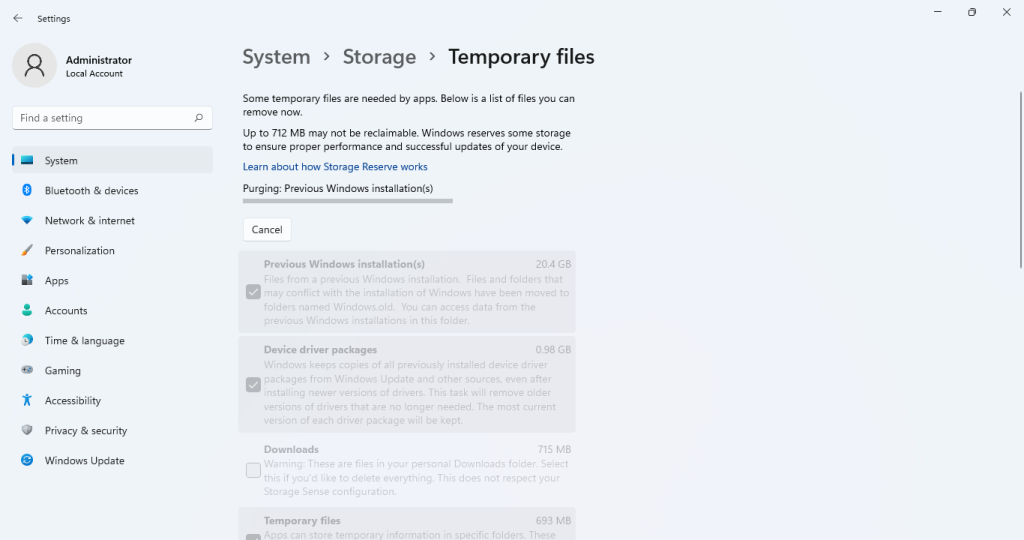
- The system will start scanning the temporary files, after scanning is completed, select Previous Windows Installation(s)

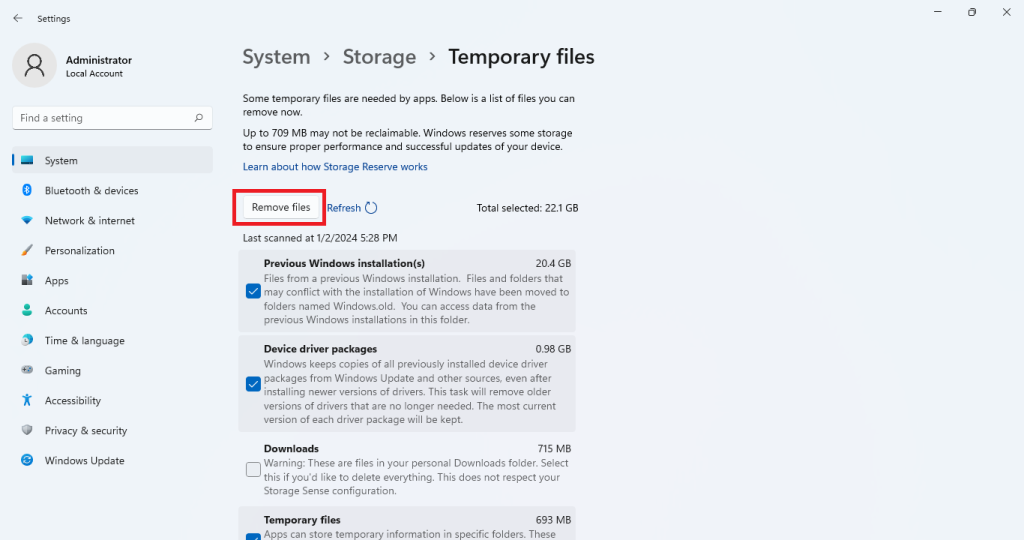
- Then click Remove files

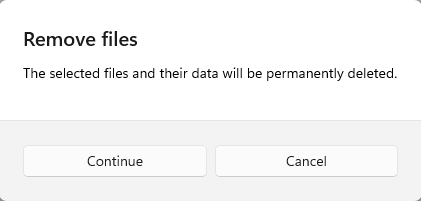
- You will receive a confirmation message to remove files, click Continue

- Purging files will start

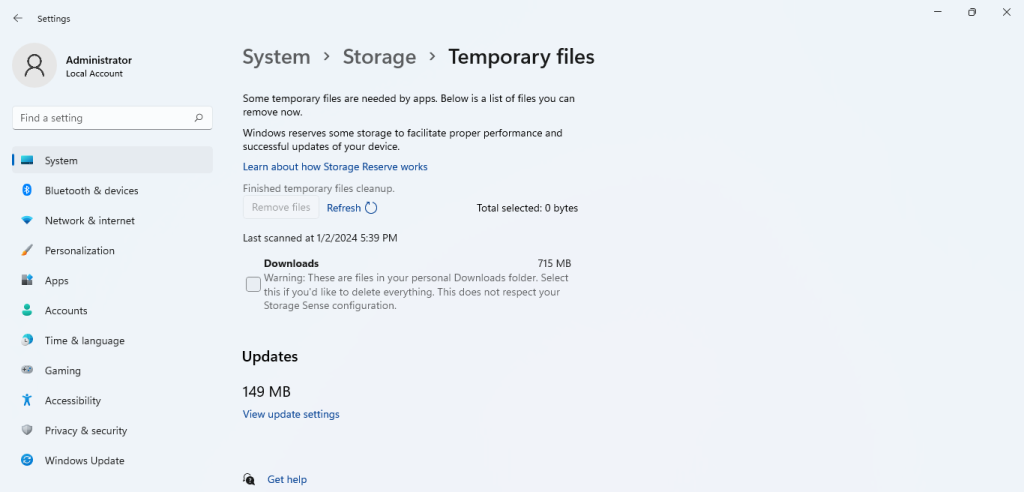
- All selected temporary files will be purged ( deleted )

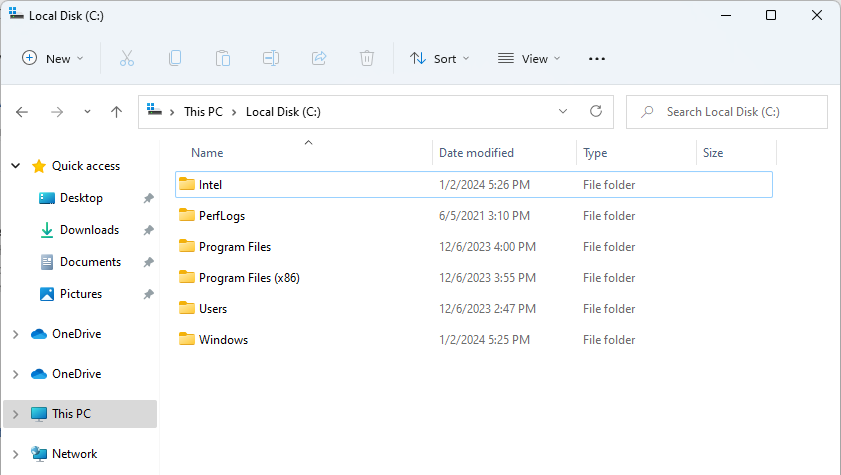
- Go and check the C: drive, you will notice that the Windows.old folder is deleted and removed.


