System Restore is a feature in Microsoft Windows that allows users to revert their computer’s state to a previous point in time. This feature is particularly useful in situations where system stability is compromised due to software installations, updates, or other changes. Here’s a brief overview of how System Restore works:
- Creating a Restore Point: Before making significant changes to the system, such as installing new software or drivers, Windows automatically creates a restore point. Users can also manually create restore points through the System Restore utility.
- Snapshot of System Settings: When a restore point is created, Windows takes a snapshot of crucial system files, system settings, and the Windows Registry. This snapshot serves as a baseline that can be used to restore the system to a stable state.
- Reverting to a Previous State: If a problem occurs, such as system instability or malfunction after a change, users can use System Restore to roll back the system to a previous state. This effectively undoes the changes made since the last restore point.
- Data Preservation: It’s important to note that System Restore primarily affects system files and settings, not personal data like documents or photos. Your files and personal data are generally unaffected by a system restore.
- Accessible Through System Protection: System Restore is part of the broader System Protection feature in Windows. To access it, users can go to the System Properties window, which can be reached through the Control Panel or by right-clicking on This PC or Computer and selecting Properties. From there, you can navigate to the System Protection tab.
- Rollback to a Healthy State: System Restore can be especially handy when troubleshooting issues caused by recent changes. By reverting to a state where the system was stable, users can identify whether the problem is related to recent modifications.
It’s important to mention that while System Restore is a valuable tool, it doesn’t replace the need for regular backups. Backing up your important files separately is still crucial for safeguarding your data in the event of hardware failures or other catastrophic events.
If you’re using Windows 11 and aren’t familiar with creating a System Restore Point, this article will guide you through the process of swiftly and easily establishing one. Additionally, it provides insights on utilizing a System Restore Point to revert to a previously stable system state on Windows 11.
Regardless of the operating system you use—whether it’s Windows, iOS, Linux, Android, Chrome, etc.—having a backup, and preferably a recent system restore point, is crucial. This ensures the ability to return to a functional system state in case of unforeseen issues or changes that can’t be manually undone.
For instance, if you install a program or modify the Windows 11 Registry in a way that impedes your computer from booting, having a system restore point enables a quick and straightforward return to a state preceding that alteration. While Windows 11 automatically generates system restore points periodically, they may not always be as up-to-date as desired. Therefore, it’s essential to know how to manually create system restore points on Windows 11 and how to utilize them.
How to Create a System Restore Point on Windows 11:
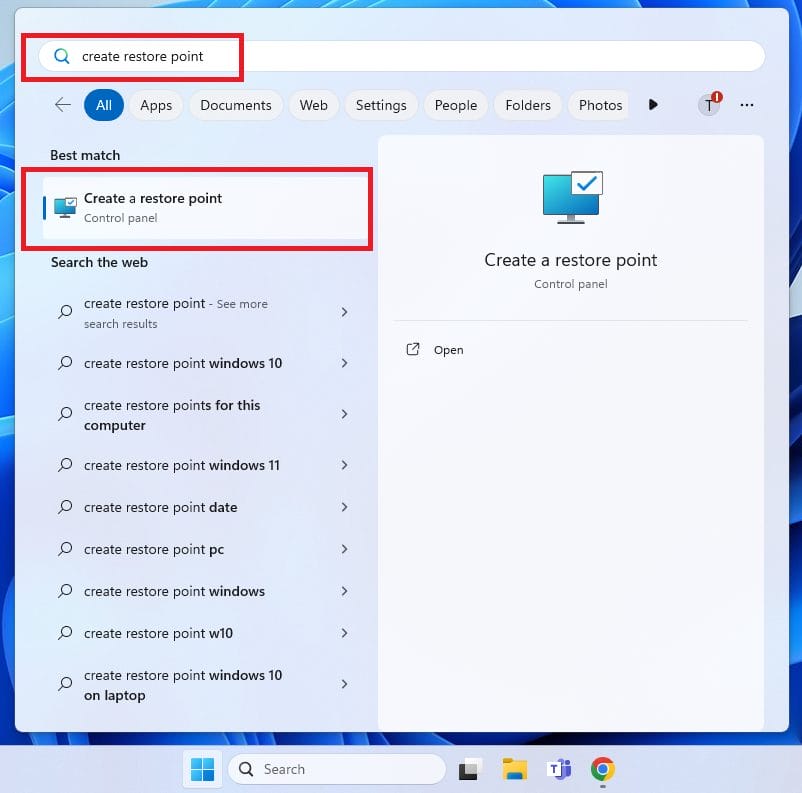
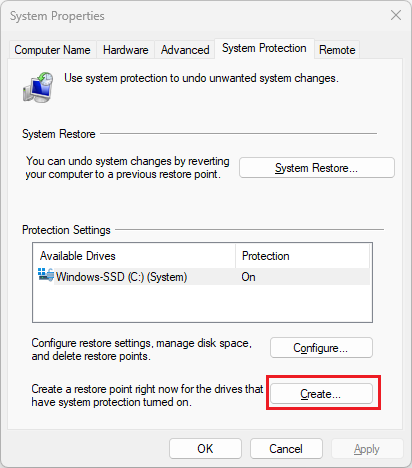
- Open the Start menu and type Create a Restore Point, then select it when it appears.

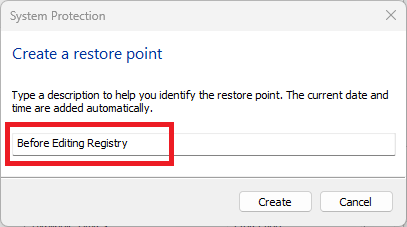
- The System Properties window will open on the System Protection tab, to create a system restore point, click Create near the bottom, enter a name for your Restore point, and follow the provided steps by Windows to complete the process. This typically takes less than a minute.


- Click Close once the restore point is created.

How to Use a System Restore Point on Windows 11:
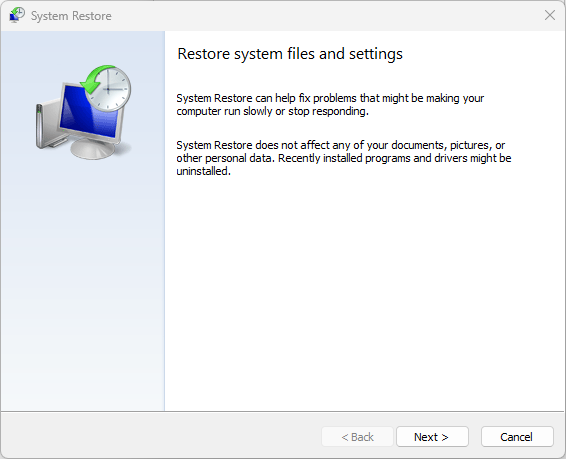
- If you need to use a System Restore Point, search Create a Restore Point again, then click System restore near the top of the window.

- A new windows will open , the System Restore window, click Next

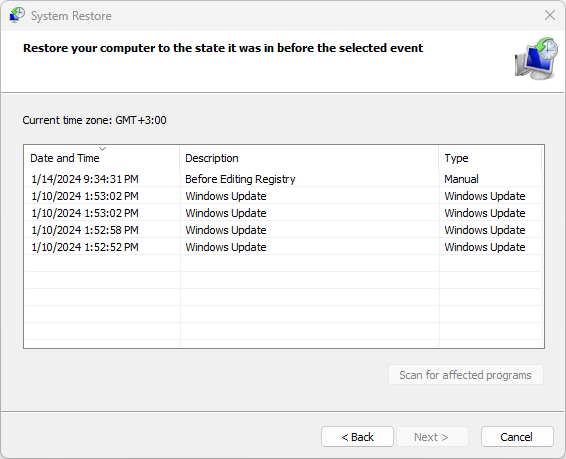
- All available restore points will be displayed, for example restore points automatically creating before Windows Updates. You can choose any restore point you want to go back to, the date the restore point was created will be displayed near each restore point name. The restore point that I created in the previous section is displayed which I named Before Editing Registry, and beside it you can see that the type of this Restore Point is Manual, meaning that the user has created it manually, and not automatically by the System. Choose the restore point you want to restore your computer to the state it was before the selected event and the click Next

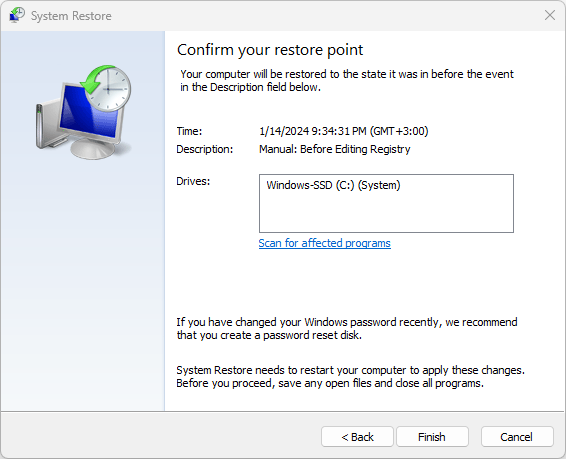
- For example I have chosen the manually created restore point which was created before I edited few registry point and noticed that the system was not functioning properly, so i decided to restore back to the state before editing the registry. Click Finish to start restoring your computer.

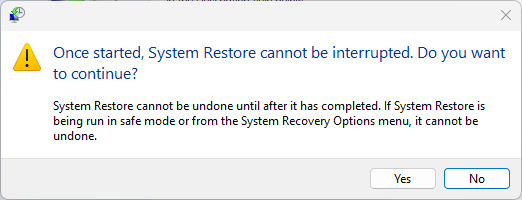
- Once you click Finish, you will receive a confirmation message asking you if you want to continue with the system restore, click Yes.
 Your computer will start preparing to restore your system and will reboot

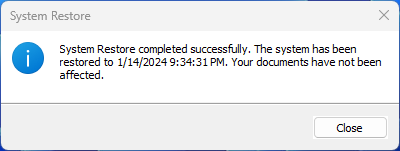
- After restoring your computer, login to your username, a message will pop up that system restore completed successfully.

Using a System Restore Point on Windows 11 When Your Computer Won’t Boot Properly:
- If you can’t boot into Windows 11 to run the System Restore tool, create a bootable Windows 11 USB drive.
- From BIOS, set your computer to boot from the USB drive (this process varies among PCs).
- Once your computer boots from the USB device, click the Repair this computer option and follow the displayed steps.

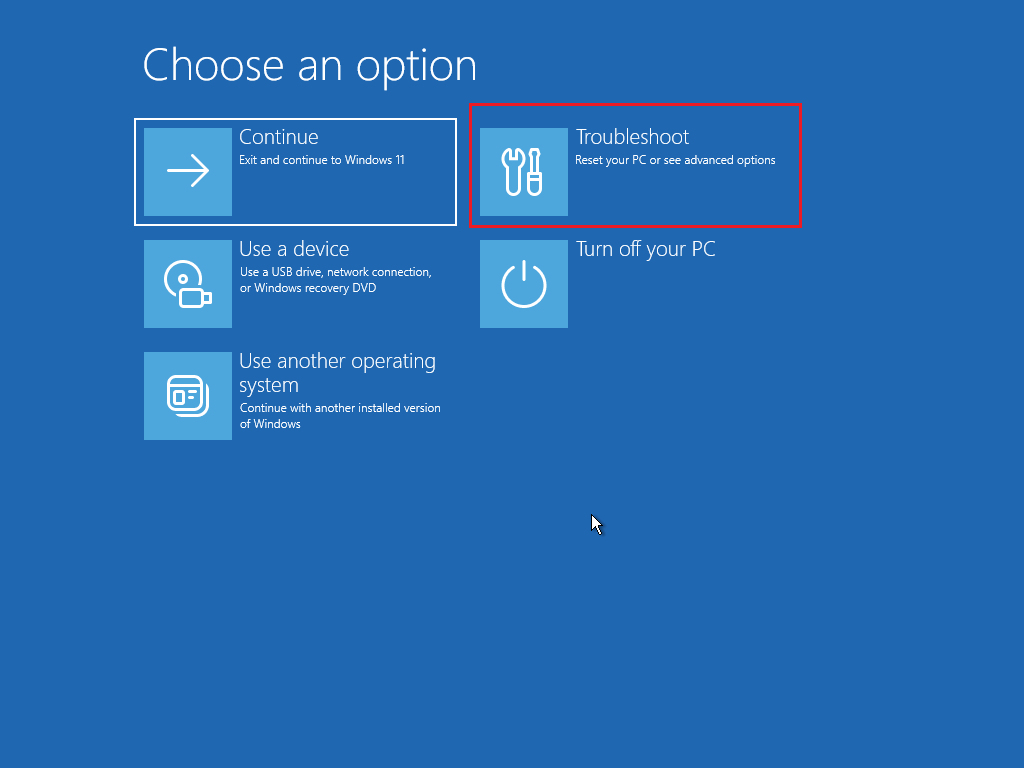
- Click Troubleshoot and then click Advanced options


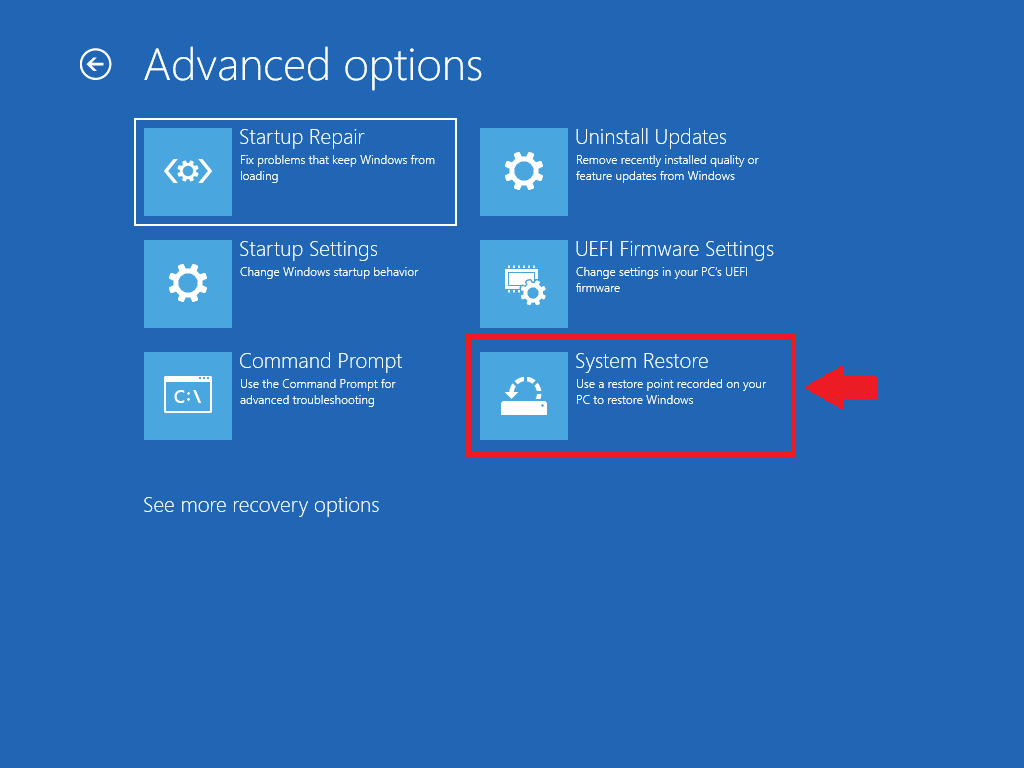
- In the Advanced options page, click System Restore and choose the restore point you want to restore your computer to it




 Your computer will start preparing to restore your system and will reboot
