Introduction:
In the fast-paced world of technology, efficiency is key. One way to enhance your productivity is by configuring your computer to automatically launch essential applications upon startup. This tutorial will guide you through the step-by-step process of adding an application to run automatically at startup in Windows 10, ensuring that your favorite tools are ready to go from the moment you log in.
Step 1: Open the Startup Folder
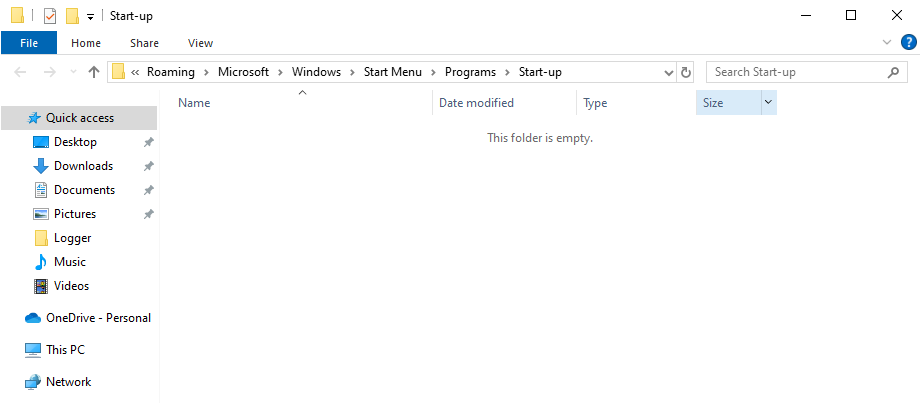
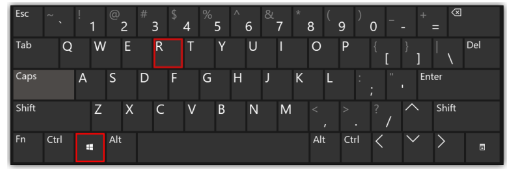
- Press the Windows key + R to open the Run dialog box.
 2. Type shell:startup and press Enter. This will open the Startup folder.


Step 2: Locate the Application Shortcut
- Find the shortcut of the application you want to add to startup.
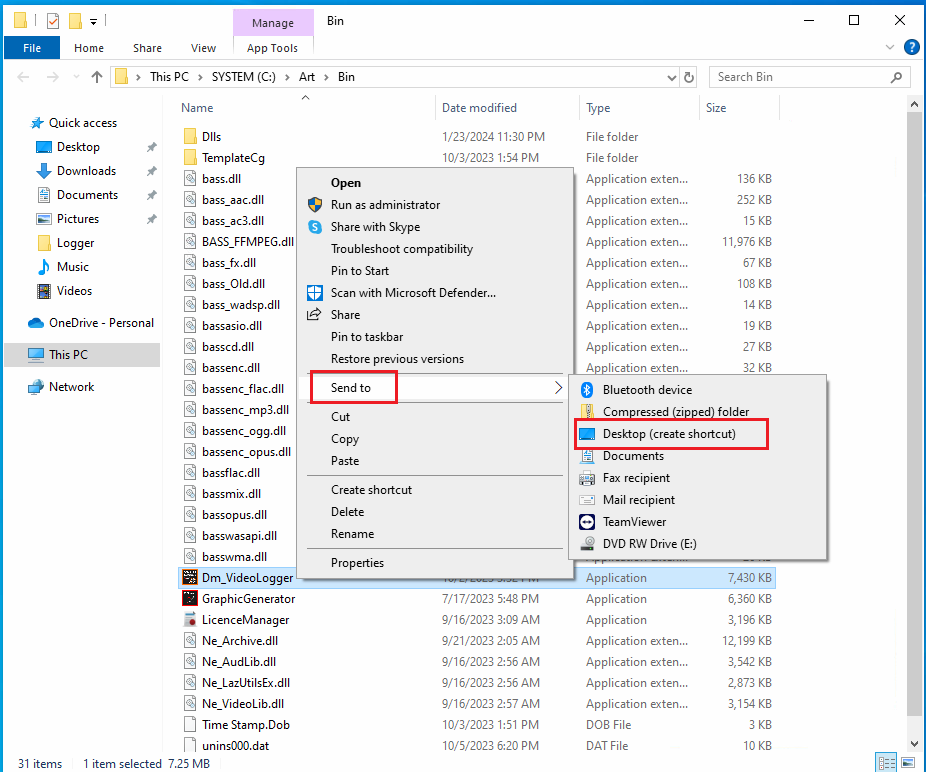
- If the shortcut isn’t in the Startup folder, you can create one by right-clicking the application executable file, selecting Send to, and then choosing Desktop (create shortcut). Once created, drag the shortcut to the Startup folder.

Step 3: Copy the Shortcut to the Startup Folder
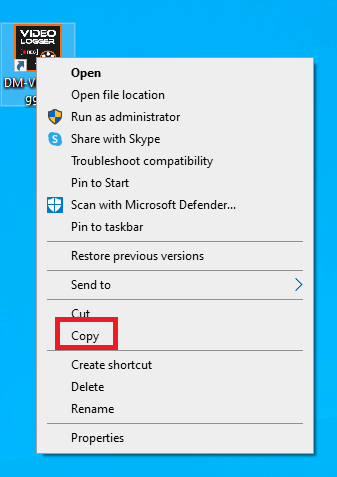
- Right-click on the shortcut of the desired application.
- Select Copy from the context menu.

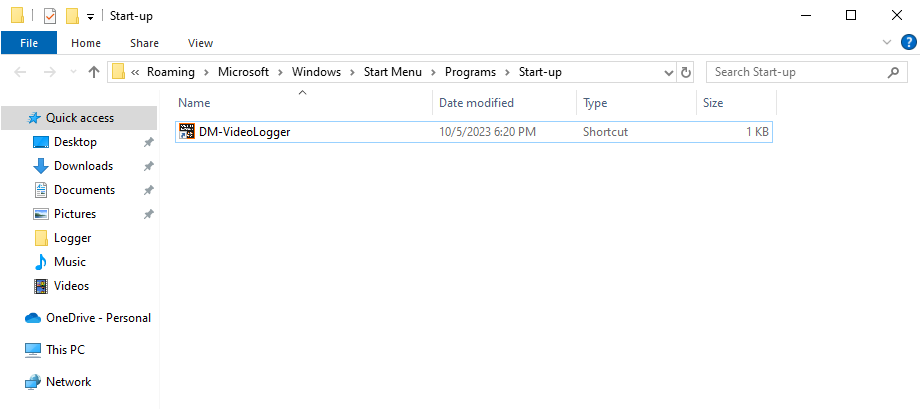
- Go to the Startup folder, right-click within the folder, and choose Paste.

Step 4: Confirm Auto-Startup
1. Restart your computer or log out and log back in to test the auto-startup functionality.
2. The application should now launch automatically when Windows starts.
Alternative Method: Using Task Manager
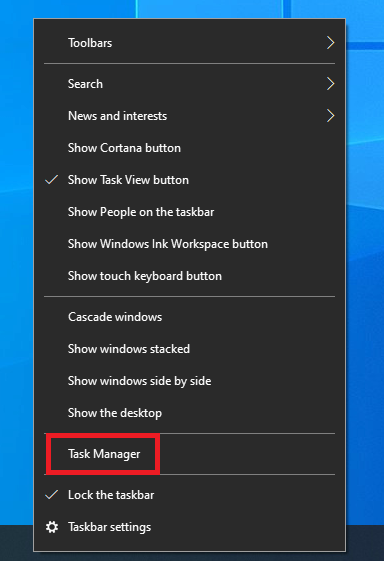
- Right-click on the taskbar and select Task Manager.

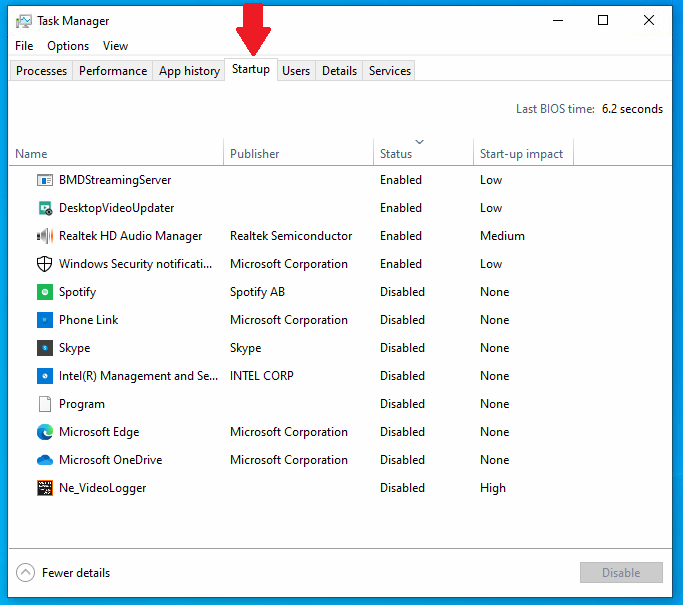
- Navigate to the Startup tab.

- Locate the application you want to add to startup.
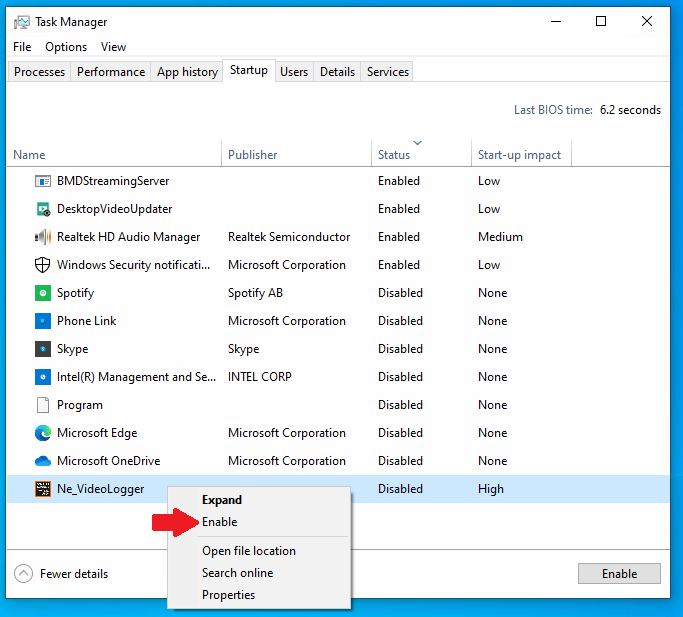
- Right-click on it and choose Enable.

Conclusion:
Adding an application to run automatically at startup in Windows 10 is a straightforward process that can enhance your computing experience by providing quick access to essential tools. By following the steps outlined in this tutorial, you can customize your system to suit your preferences and optimize your workflow from the moment you log in. Save time and streamline your daily tasks by ensuring your frequently used applications are ready to go as soon as your computer boots up.


 2. Type shell:startup and press Enter. This will open the Startup folder.
