Close Menu
ElMajdal.netElMajdal.net
    Facebook X (Twitter) Instagram YouTube
    Facebook X (Twitter) Instagram YouTube
    ElMajdal.netElMajdal.net
    Contact Us
    • Home
    • Windows
      • Windows 11
      • Windows 10
      • Windows 8
      • Windows 7
    • Servers
      • Windows Server
      • Windows Server 2008
      • Exchange Server
    • MAC OS
    • ISA/TMG
    • About Tarek
    ElMajdal.netElMajdal.net
    Home » Enable or Disable Snipping Tool Auto Save Screenshots in Windows 11
    Windows 11

    Enable or Disable Snipping Tool Auto Save Screenshots in Windows 11

    TarekBy Tarek1 Min Read
    WhatsApp Facebook Twitter Telegram Reddit Email
    blank
    Share
    WhatsApp Facebook Twitter Telegram Reddit Email

    This guide demonstrates the process of enabling or disabling the automatic saving of screenshots in the Snipping Tool application for your Windows 11 account.

    The Snipping Tool application comes equipped with an integrated screen recorder, enabling swift capture and annotation of screenshots, photos, and various images using your pen, touch, or mouse. You can conveniently save, paste, or share these captures with other applications .

    As of version 11.2209.2.0 of the Snipping Tool app, your screenshots will be automatically saved to the Screenshots folder within the Pictures directory (e.g., “%UserProfile%\Pictures\Screenshots”) for your account by default.

    Here’s how you disable/enable automatically saving screenshots:
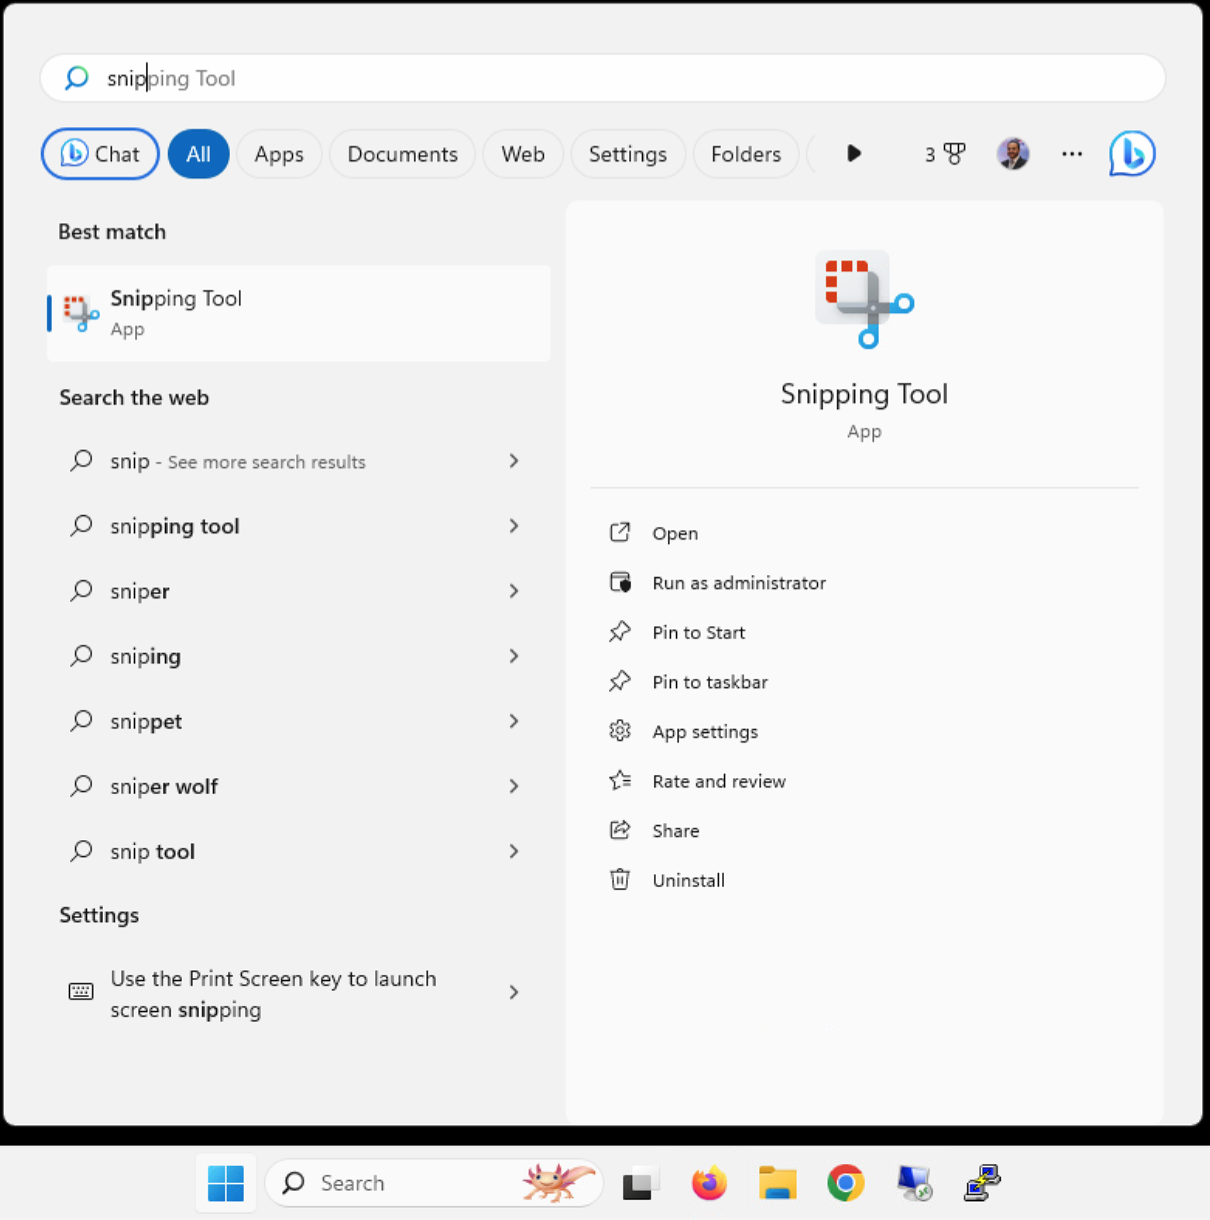
    1. Click Start Button  , then type Snipping Tool
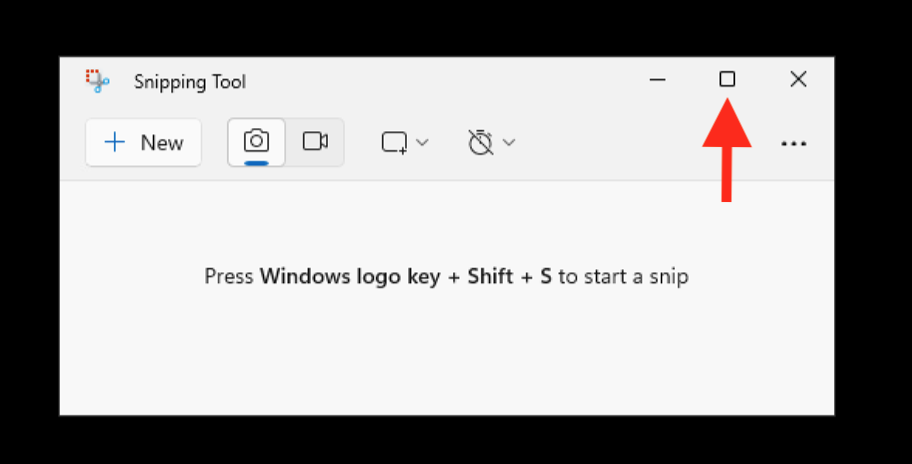
    2. Maximize the snipping tool
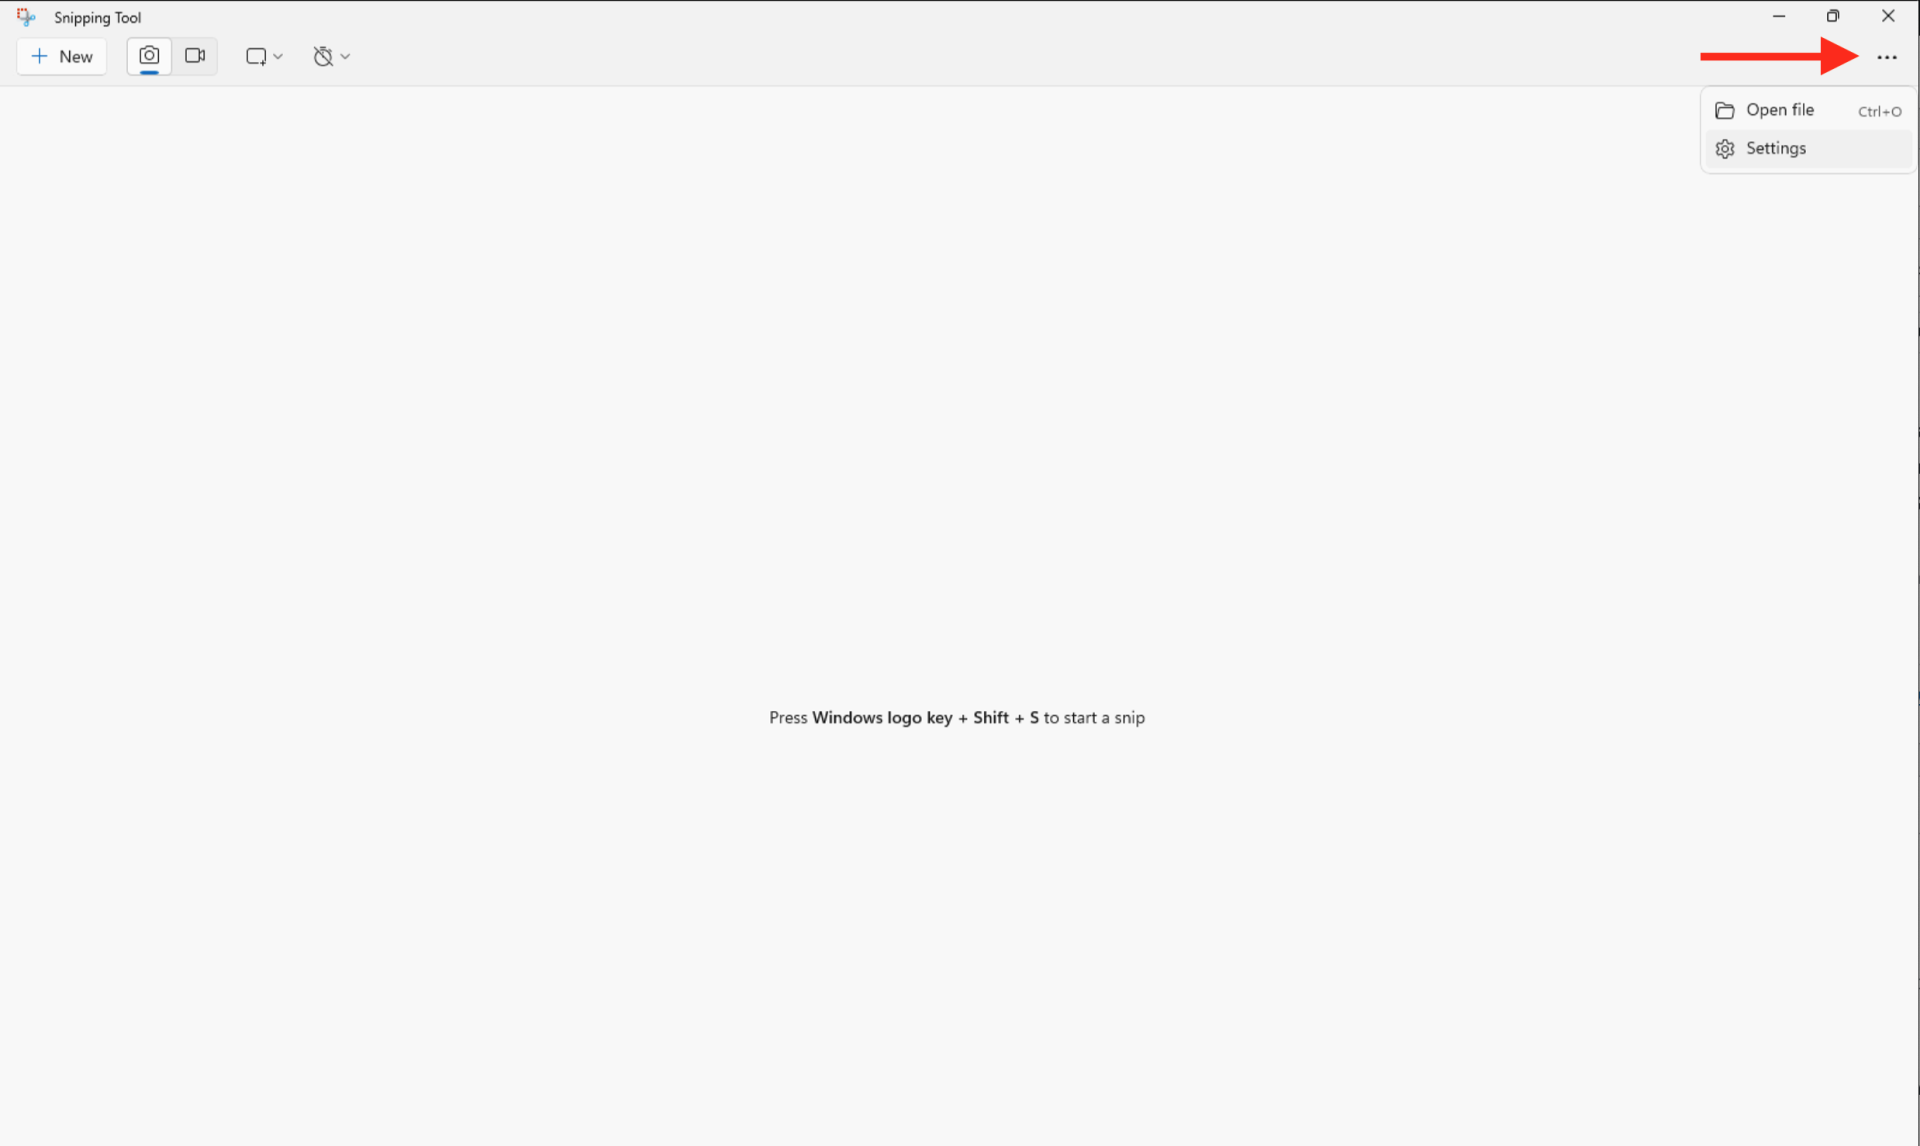
    3. Click on the See more (3 dots) button, and select Settings
    4. Toggle the switch beside Automatically save screenshots to either On (default) or Off based on your preference for automatically saving screenshots. 
    5. You can now close the Snipping Tool app if you like.
    Share. WhatsApp Facebook Twitter Telegram Reddit Email
    Previous ArticleHow To Find Out Microsoft Exchange Server 2016 Build Number And What Cumulative Updates (CU) Installed
    Next Article How to Delete User Profile of an Account in Windows 10
    Tarek
    • Website
    • Facebook
    • X (Twitter)
    • Instagram

    Tarek Majdalani is an accomplished Windows Expert-IT Pro MVP, honored by Microsoft for eight consecutive years from 2007-2015. Holding a B.E. in Computer Engineering from the Lebanese American University, he pursued further education while working, earning various certificates showcased in his MVP profile. Tarek is currently serving as the Director of Engineering & Technology at Alrai Media Group in Kuwait. Since 2006, he has been actively contributing to the community by writing tutorials featuring tips and tricks, amassing over 300 tutorials on diverse systems.

    Related Article

    How To Check The Health Of Your Laptop’s Battery In Windows

    How to Show Hidden Files and Folders in Windows 11

    How To Set Up Fingerprint In Windows 11

    Leave A Reply Cancel Reply

    Latest Posts

    How To Enable Active Directory Recycle Bin On Windows Server

    How To Check The Health Of Your Laptop’s Battery In Windows

    How To Transfer FSMO Roles In Active Directory Using PowerShell

    How To Check Active Directory Forest And Domain Functional Level In Windows Server

    Advertisement

    For any Feedback, click on the Contact Us link

    Facebook X (Twitter) Instagram YouTube
    Quick Links
    • Contact Us
    • About Tarek
    • Windows 11
    • Windows 8
    • Windows 10
    • Windows 7
    • Windows Server
    • Windows Server 2008
    • Exchange Server
    • macOS
    • ISA Server
    • Privacy Policy
    Visitors
    • Contact Us
    • About Tarek
    • Windows 11
    • Windows 8
    • Windows 10
    • Windows 7
    • Windows Server
    • Windows Server 2008
    • Exchange Server
    • macOS
    • ISA Server
    • Privacy Policy
    © ElMajdal 2007-2025

    Type above and press Enter to search. Press Esc to cancel.

    ×