Introduction:
Printing content to a PDF file using the “Microsoft Print to PDF” feature is a convenient and useful function in Windows 10. However, if you find that this feature is not working as expected, there are steps you can take to troubleshoot and resolve the issue. In this guide, we’ll walk you through the process of enabling the Microsoft Print to PDF feature on Windows 10 so you can effortlessly create PDFs from any document.
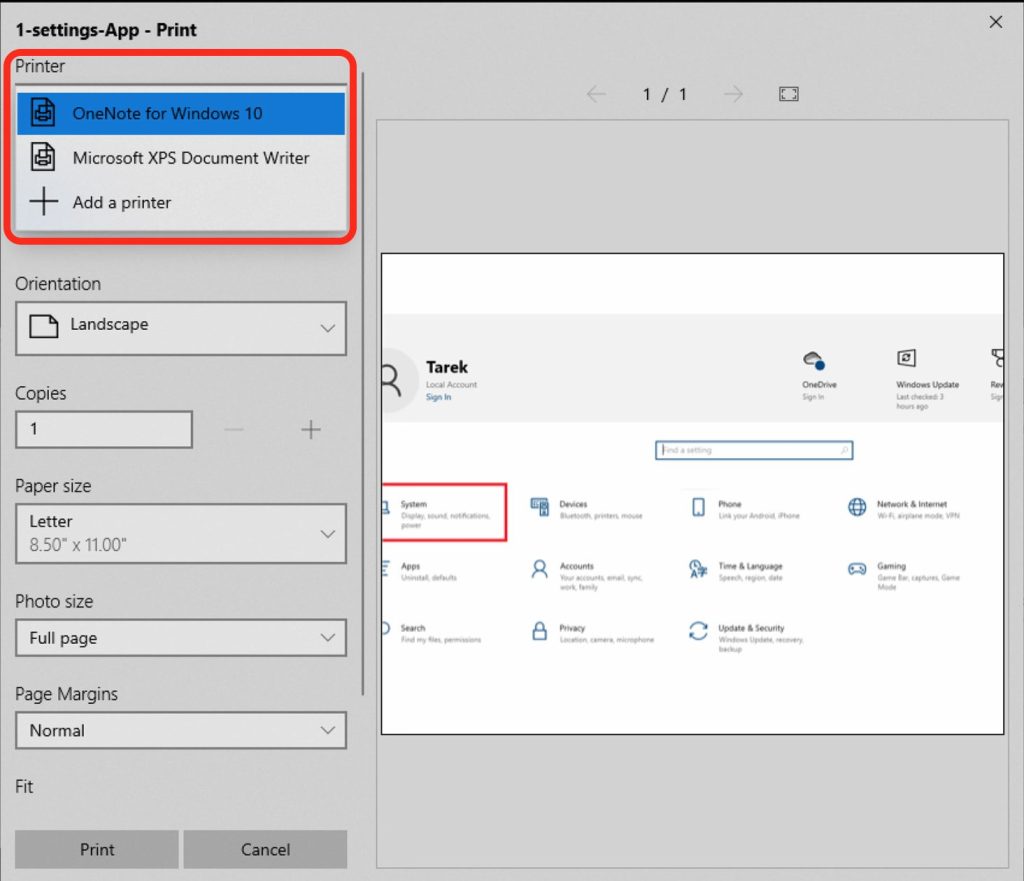
If the Microsoft Print to PDF feature is not working or missing in your Windows 10 system, follow these steps to enable it manually:
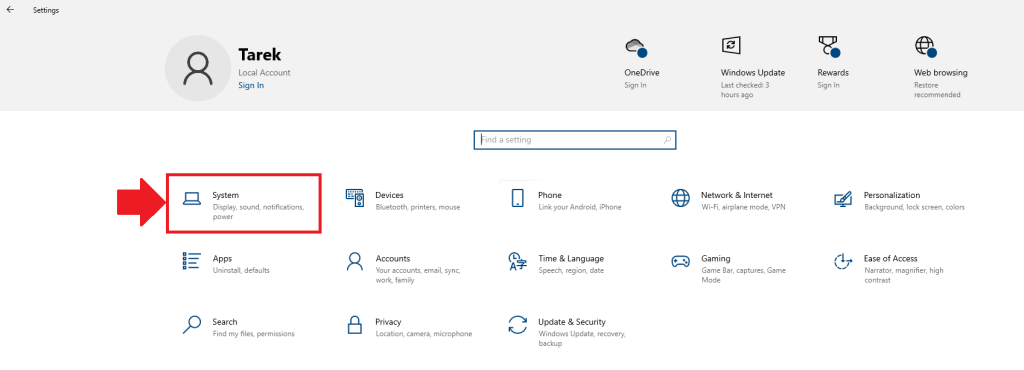
- Navigate to the Start menu and click on the gear icon to open the Settings app. Alternatively, you can press
Win + Ito open Settings directly.

- Inside the Settings window, locate and click on the System category.

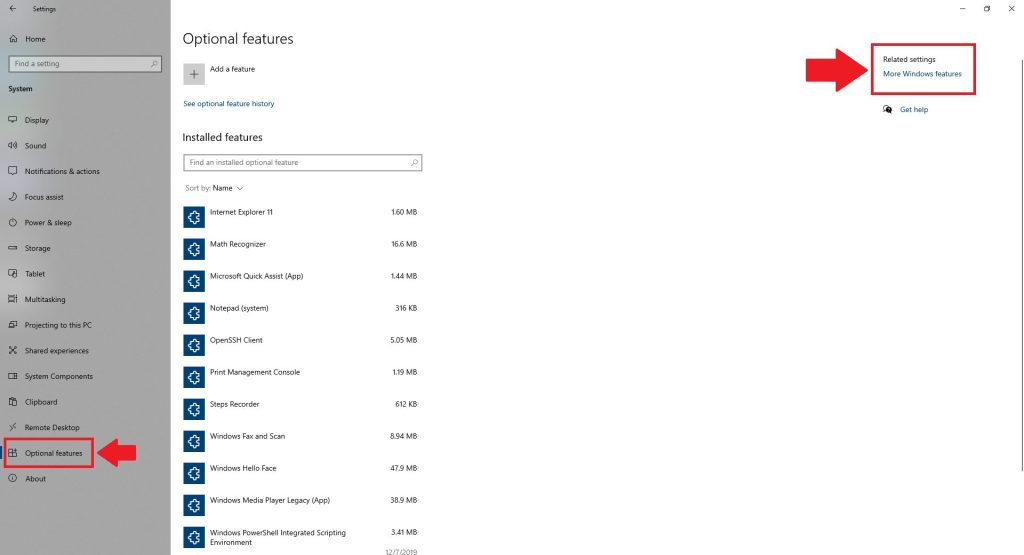
- Click on the Optional features tab on the left sidebar, and then under Related settings, click on More Windows features

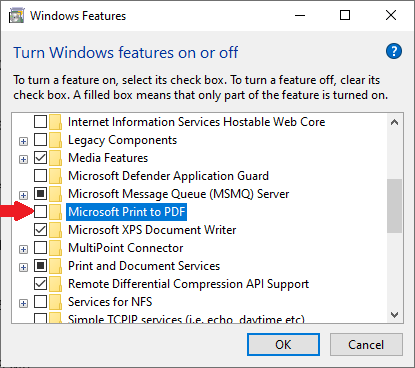
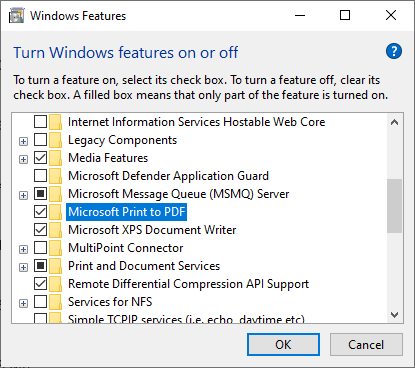
- In the list of features, look for Microsoft Print to PDF. Check the box next to it to enable this feature.

- After selecting Microsoft Print to PDF, click the OK button to apply the changes.

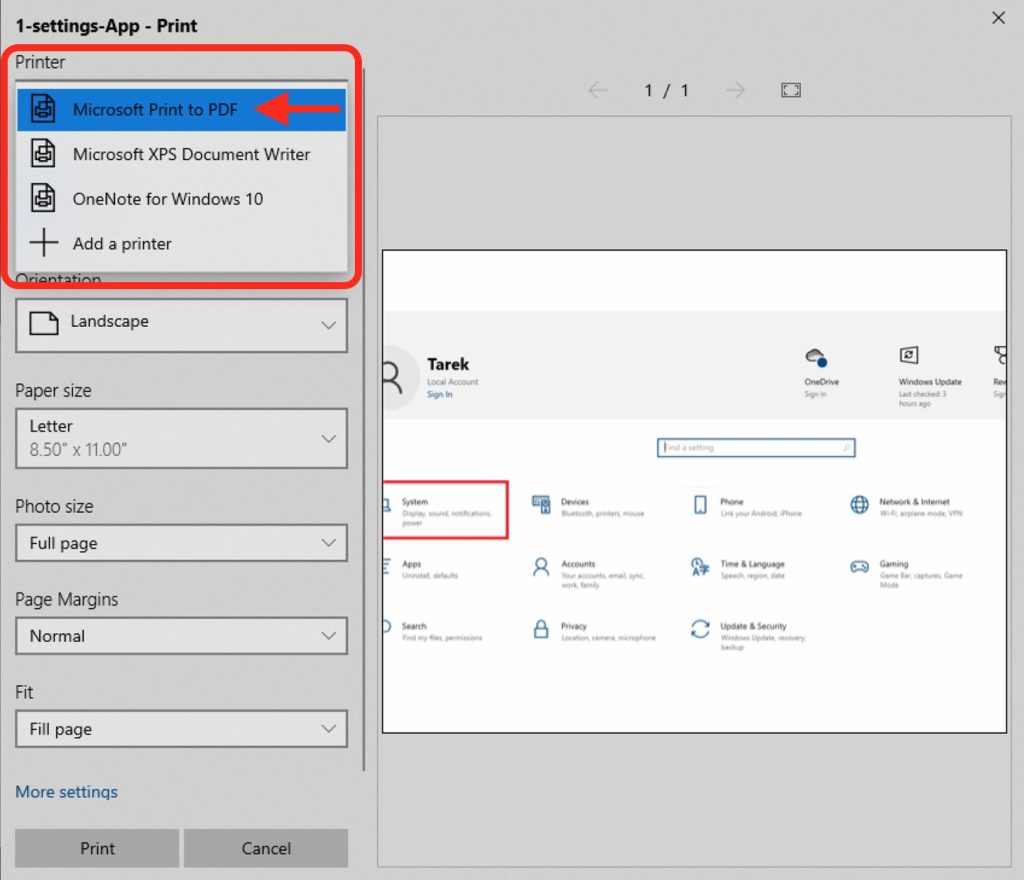
Now try to print anything and check the list of available printers, you will be able to select Microsoft Print to PDF, and convert your file as a PDF.
By completing these steps, you have successfully enabled the Microsoft Print to PDF feature on your Windows 10 system. You should now be able to use this feature to print documents, web pages, or any content to a PDF file.
Conclusion:
The Microsoft Print to PDF feature is a valuable tool for creating PDF files from various sources. If you encounter issues with this feature not working on your Windows 10 system, the steps outlined above should help you enable it and get it back on track. Following these instructions ensures a seamless experience when you need to convert files to PDF format, providing a versatile and easily shareable document solution.


