

Introduction
By default, with Exchange Server 2010, you can only send and receive emails to mailboxes from the same organization. However, if you want to send emails to the external world, then you will need to create a send connector.
Exchange 2010 transport servers require Send Connectors to deliver messages to the next hop on the way to their destination
The Send Connector is created only on the Hub Transport or Edge Server role. Send connectors that are created on Hub Transport servers are stored in Active Directory and are available to all Hub Transport servers in the organization. If a Send connector is configured to send messages to an external domain, any Hub Transport server in the organization will route a message for that domain to a source server for that connector to be relayed to the destination domain.
I have a typical Exchange Server installation, that consist of the Client Access, Hub Transport, and Mailbox server roles, along with the Exchange Management Console on a single server. So I will be creating the Send Connector on the Hub Transport.
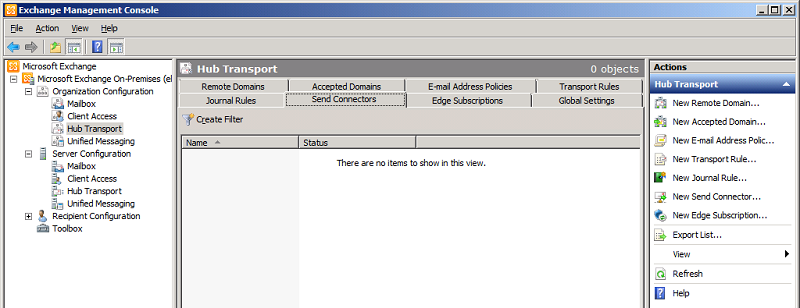
1. Open Exchange Server Management Console and Expand the Organization Configuration node from the left side pane
![]()
2. Click on Hub Transport, and then click on the Send Connectors Tab
As you can see, by default there is no Send Connectors available.
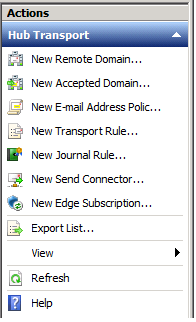
3. To create a new Send Connector, you will need either to
Right click on Hub Transport and select New Send Connector…
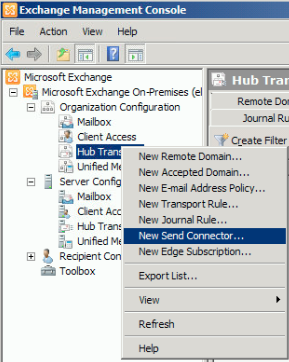
Or under the Send Connectors Tab, right click any empty area and select New Send Connector…
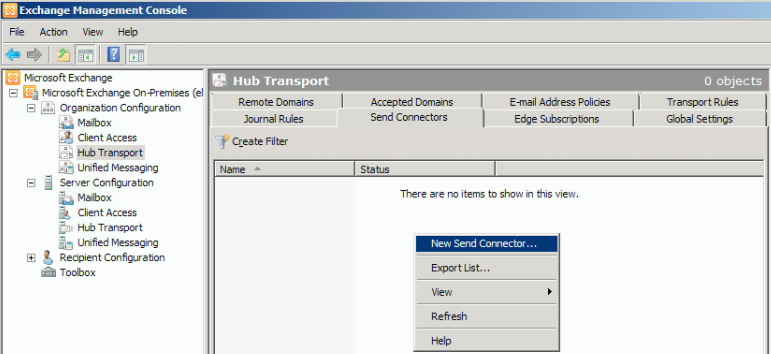
Or from the right side pane, under Actions, click on New Send Connector…
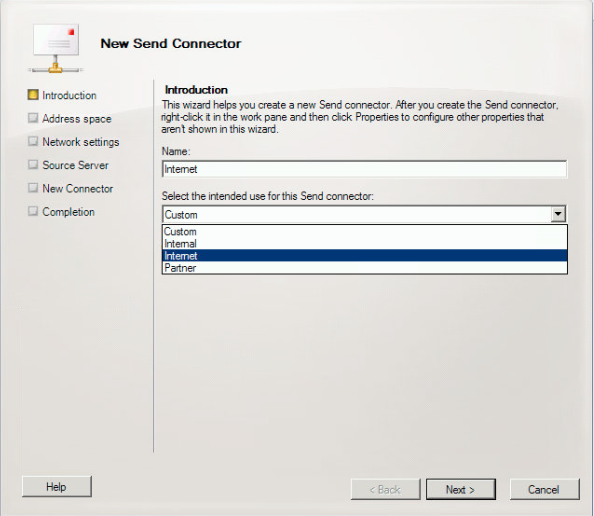
4. The New Send Connector wizard will open, on the Introduction page, you will need to give the Send Connector a name and then select its type.
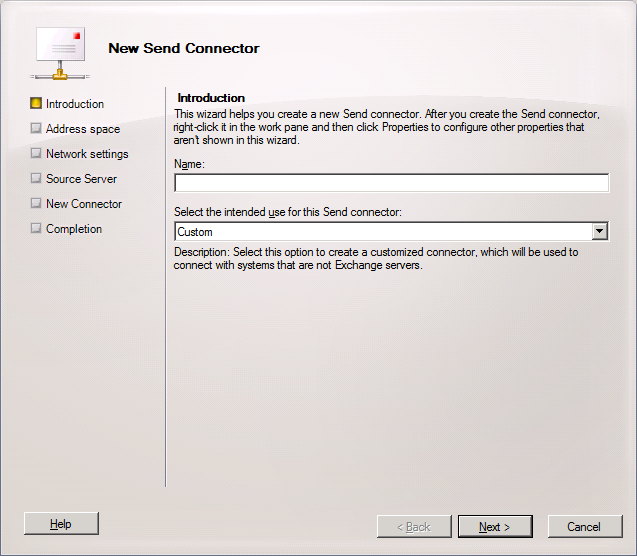
The usage type determines the default permission sets assigned on the connector and grants those permissions to trusted security principals.
The following usage types are available:
Custom : Select this option to create a customized connector to connect with systems that aren’t servers running Exchange 2010.
Internal : Internal Send connectors send e-mail to servers in your Exchange organization. This connector is configured to route e-mail to your internal Exchange servers as smart hosts.
Internet : Internet Send connectors send e-mail to the Internet. This connector is configured to use Domain Name System (DNS) MX records to route e-mail.
Partner : Partner Send connectors send e-mail to partner domains. This connector is configured to only allow connections to servers that authenticate with Transport Layer Security (TLS) certificates for SMTP domains included in the list of domain-secured domains. You can add domains to this list by using the TLSSendDomainSecureList parameter in the Set-TransportConfig command.
I will be creating an Internet Send Connector, so I will select the type as Internet
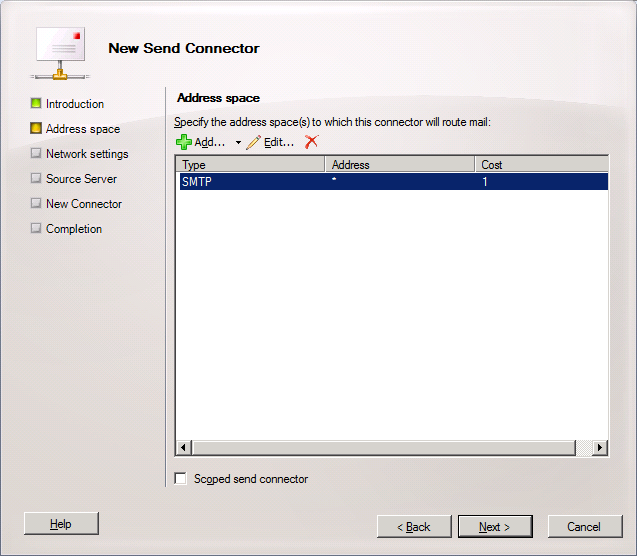
5. On the Address Space page, click Add
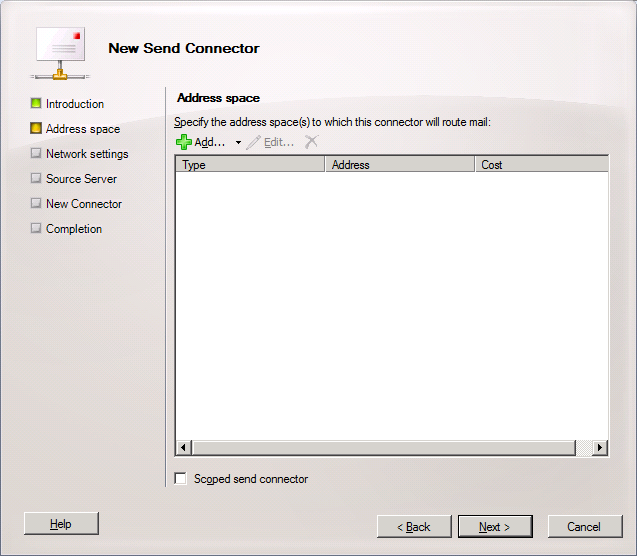
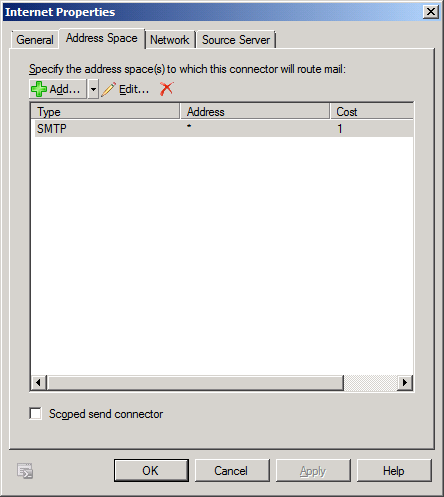
The following are valid entries for the SMTP address space of a Send connector:
* : All domains that don’t have an explicit address space entry on another Send connector entry or that aren’t an included subdomain of an address space on another Send connector.
elmajdal.net : All recipients with e-mail addresses in the elmajdal.net domain.
*.elmajdal.net : All recipients with e-mail addresses in the elmajdal.net domain or any subdomain of elmajdal.net. In the EMC, select Include all subdomains to set this configuration.
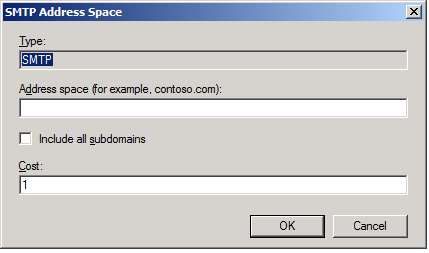
So to send to ALL Other Domains, type * then click OK
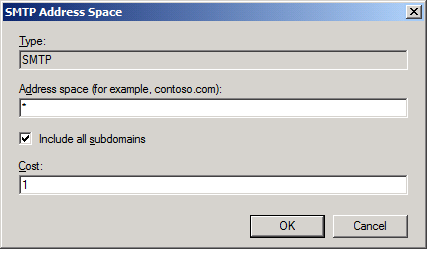
The filled address space will be displayed, click Next
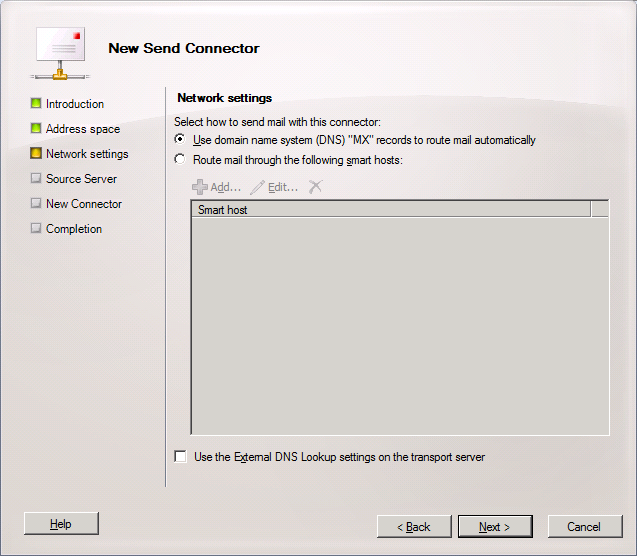
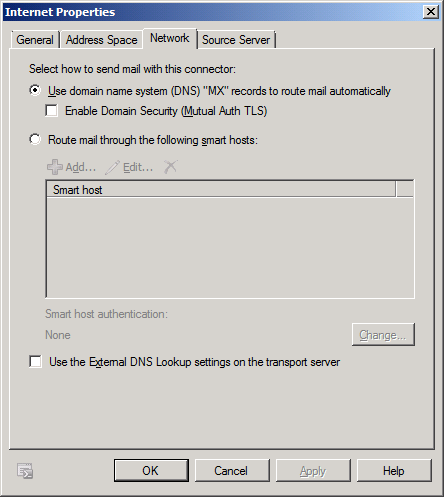
6. On the Network Settings page, select Use domain name system (DNS) “MX” records to route mail automatically
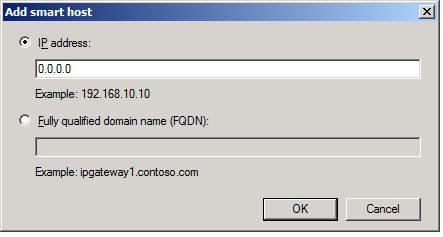
Or, If you have a smart host, for example you have a Barracuda anti spam , you can select the option Route mail through the following smart hosts and then click on Add and fill the IP address of the smart host.
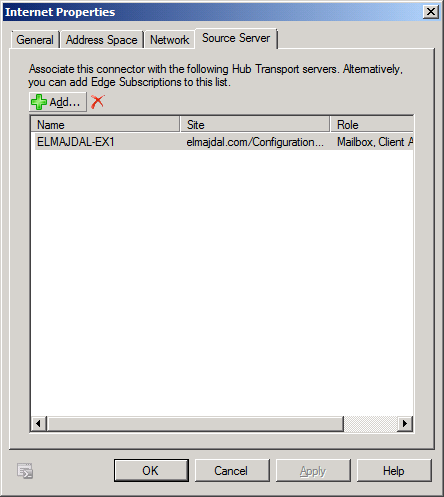
7. On the Source Server page, your Hub Transport Sever will be automatically selected. If you need to select any other server , then click on Add and make your selection.
![]()
8. The Configuration summary will be displayed. Review it and if you need to make any changes then click Back and adjust the required configuration, else click NEW to start creating the new Send Connector

9. The wizard will be completed , click Finish
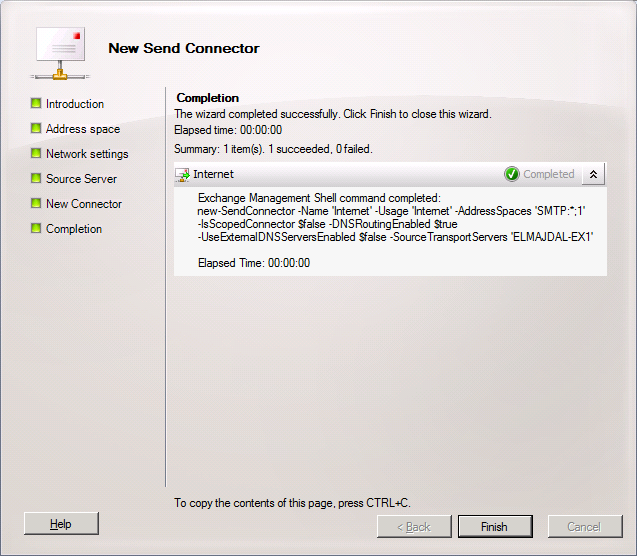
10. The Send Connector will be displayed.
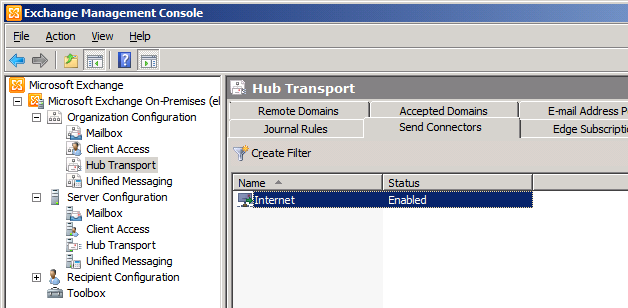
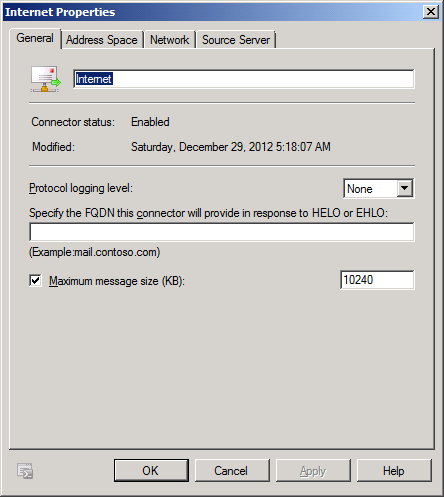
You can right click on it and then click on Properties, and do any changes you need later if needed
 |
 |
 |
 |
Now open Outlook Web App (OWA) and try to send an email to an external domain, you will find out that the email will be sent successfully.