Close Menu
ElMajdal.netElMajdal.net
    Facebook X (Twitter) Instagram YouTube
    Facebook X (Twitter) Instagram YouTube
    ElMajdal.netElMajdal.net
    Contact Us
    • Home
    • Windows
      • Windows 11
      • Windows 10
      • Windows 8
      • Windows 7
    • Servers
      • Windows Server
      • Windows Server 2008
      • Exchange Server
    • MAC OS
    • ISA/TMG
    • About Tarek
    ElMajdal.netElMajdal.net
    Home » How To Enable Telnet Client in Windows Server 2016/2019/2022
    Windows Server

    How To Enable Telnet Client in Windows Server 2016/2019/2022

    TarekBy Tarek2 Mins Read
    WhatsApp Facebook Twitter Telegram Reddit Email
    blank
    Share
    WhatsApp Facebook Twitter Telegram Reddit Email

    Introduction:
    Telnet is a simple text-based protocol that allows remote access to a server’s command-line interface. While Telnet is considered insecure and is not recommended for production environments, there may be situations where you need to enable the Telnet client for troubleshooting or specific requirements. In this tutorial, we’ll guide you through the process of enabling the Telnet client on Windows Server 2016, 2019, and 2022 using Server Manager.

    To Enable Telnet in Windows Server, follow the below step:

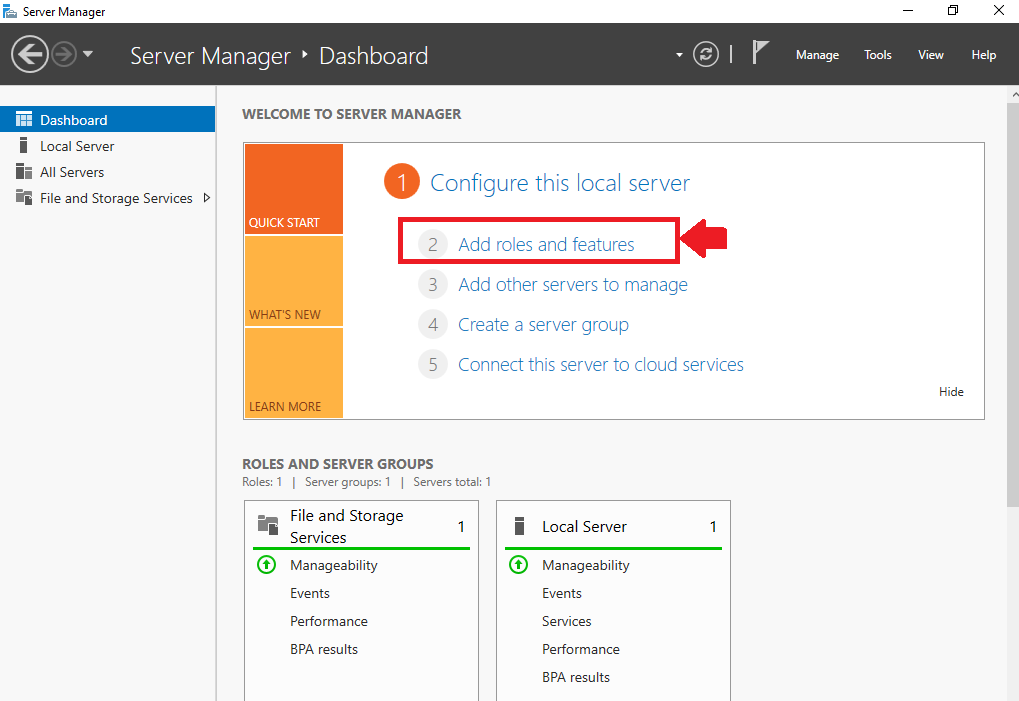
    1. Initiate the process by launching Server Manager. Click Start and then Server Manager
    2. Once Server Manager is open, Click Add Roles and Features. This action initiates the Add Roles and Features Wizard.
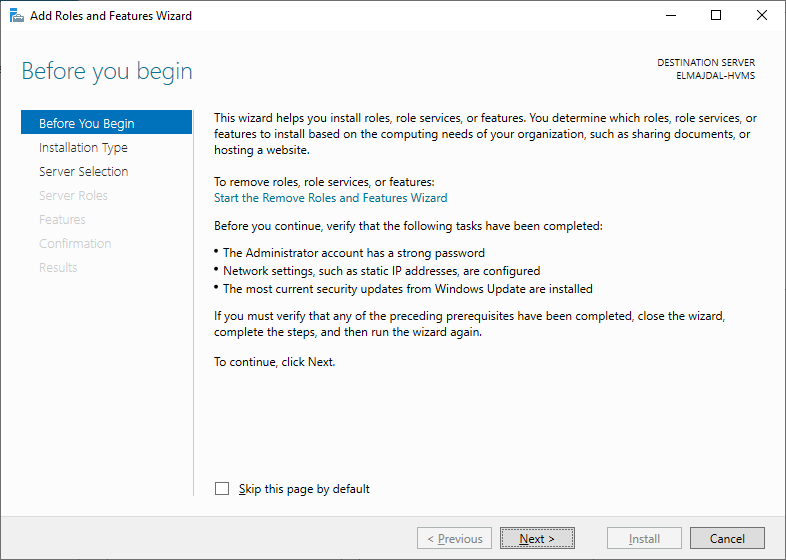
    3. In the Before you begin page, click Next
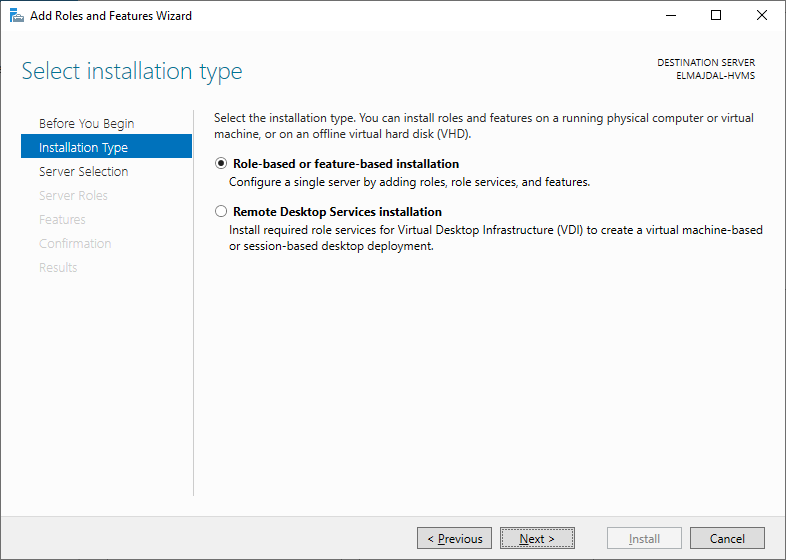
    4. In the Installation Type page, choose Role-based or feature-based installation and proceed by clicking Next.
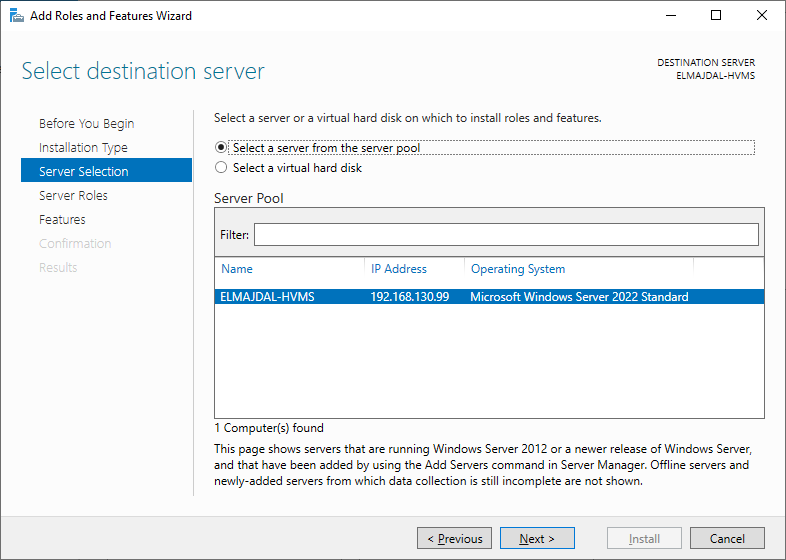
    5. In the Server Selection page, ensure Select a server from the server pool is selected, then choose your server from the list. Click Next to continue.
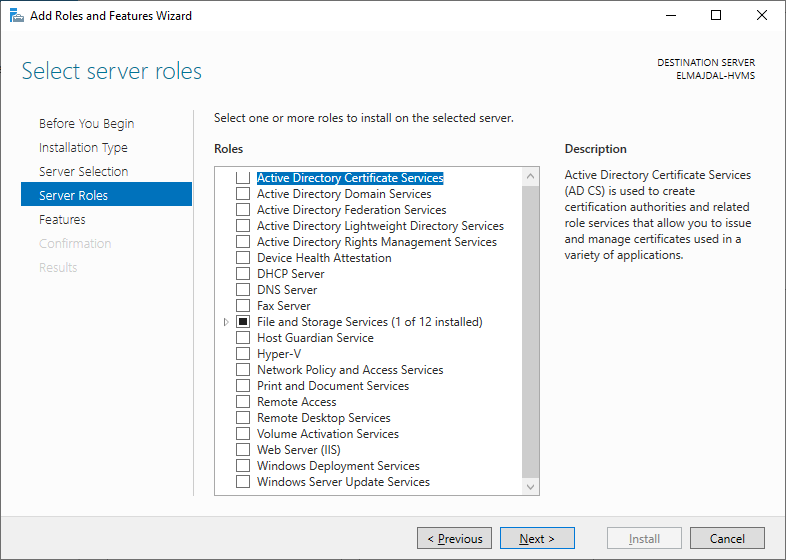
    6. On the Server Roles page, we will not be selecting anything from here, so click Next
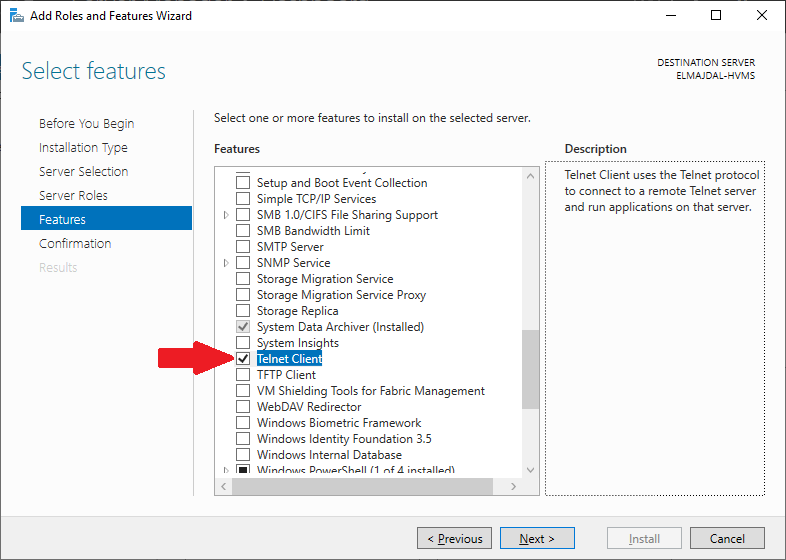
    7. On the Features page, scroll down till you see Telnet Client, select the checkbox beside it and click Next
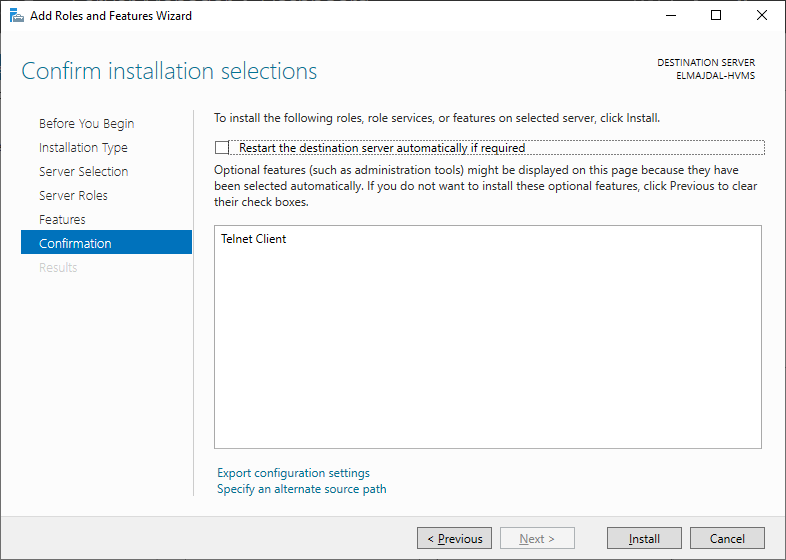
    8. Review your selections, ensuring that Telnet Client is listed. Telnet Client does not require to restart the server once installation is completed, so no need to select the Restart the destination server automatically if required. Click Install
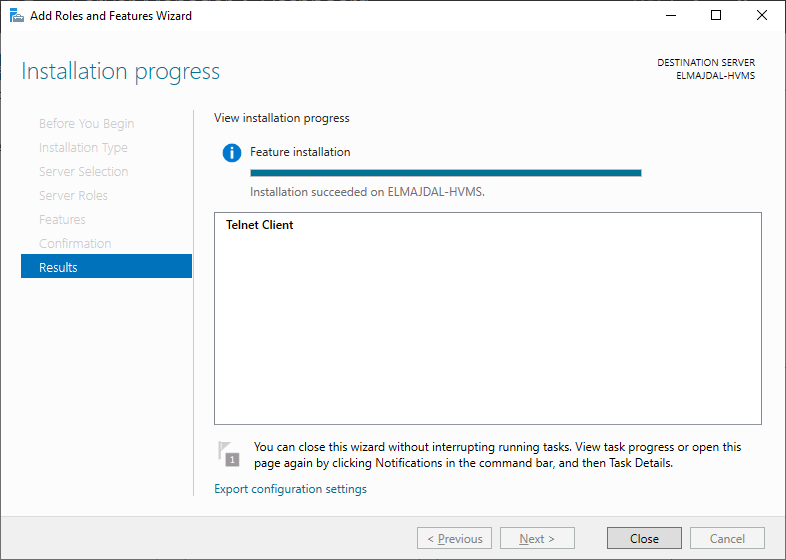
    9. Keep an eye on the installation progress displayed on the Results page. After the installation concludes, click on Close.

    To Verify Telnet Client Installation

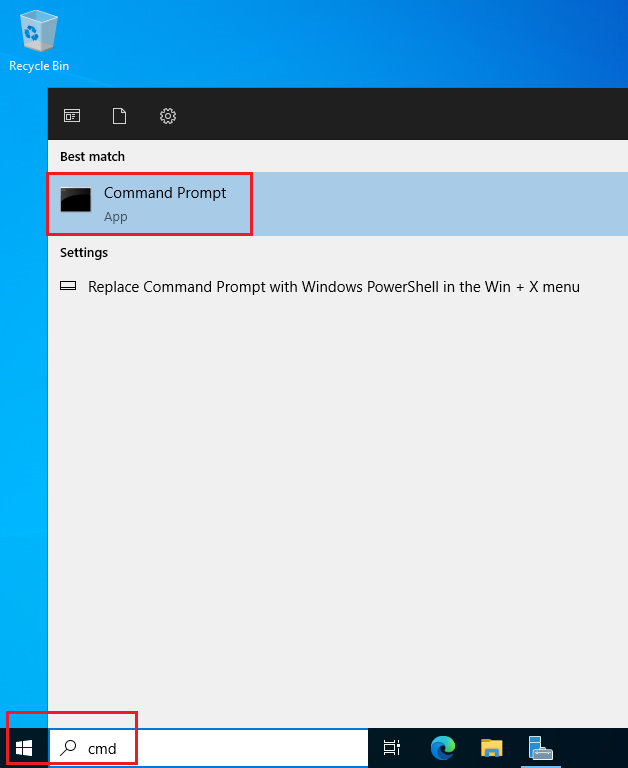
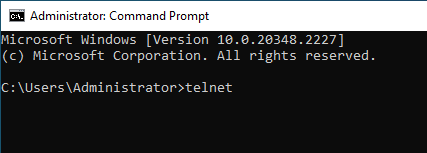
    1. Open a command prompt
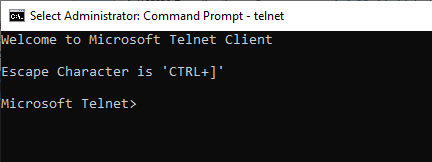
    2. In the command prompt, type the telnet and click Enter
    3. If Telnet is installed, the command prompt will display the Telnet prompt, indicating a successful installation.

    Congratulations! You have successfully enabled the Telnet Client on your Windows Server 2016, 2019, or 2022 using Server Manager. Keep in mind that while Telnet can be useful for specific tasks, it is generally recommended to use more secure alternatives, such as Secure Shell (SSH), for remote access to servers.

    Share. WhatsApp Facebook Twitter Telegram Reddit Email
    Previous ArticleHow To Identify And Upgrade Hyper-V Virtual Machine Configuration Versions In Windows Server 2016/2019/2022
    Next Article How To Identify If Hyper-V Virtual Machine is Generation 1 Or Generation 2
    Tarek
    • Website
    • Facebook
    • X (Twitter)
    • Instagram

    Tarek Majdalani is an accomplished Windows Expert-IT Pro MVP, honored by Microsoft for eight consecutive years from 2007-2015. Holding a B.E. in Computer Engineering from the Lebanese American University, he pursued further education while working, earning various certificates showcased in his MVP profile. Tarek is currently serving as the Director of Engineering & Technology at Alrai Media Group in Kuwait. Since 2006, he has been actively contributing to the community by writing tutorials featuring tips and tricks, amassing over 300 tutorials on diverse systems.

    Related Article

    How To Enable Active Directory Recycle Bin On Windows Server

    How To Transfer FSMO Roles In Active Directory Using PowerShell

    How To Check Active Directory Forest And Domain Functional Level In Windows Server

    Leave A Reply Cancel Reply

    Latest Posts

    How To Enable Active Directory Recycle Bin On Windows Server

    How To Check The Health Of Your Laptop’s Battery In Windows

    How To Transfer FSMO Roles In Active Directory Using PowerShell

    How To Check Active Directory Forest And Domain Functional Level In Windows Server

    Advertisement

    For any Feedback, click on the Contact Us link

    Facebook X (Twitter) Instagram YouTube
    Quick Links
    • Contact Us
    • About Tarek
    • Windows 11
    • Windows 8
    • Windows 10
    • Windows 7
    • Windows Server
    • Windows Server 2008
    • Exchange Server
    • macOS
    • ISA Server
    • Privacy Policy
    Visitors
    • Contact Us
    • About Tarek
    • Windows 11
    • Windows 8
    • Windows 10
    • Windows 7
    • Windows Server
    • Windows Server 2008
    • Exchange Server
    • macOS
    • ISA Server
    • Privacy Policy
    © ElMajdal 2007-2025

    Type above and press Enter to search. Press Esc to cancel.

    ×