In previous iterations of Hyper-V (pre-Windows Server 2012 R2), the ability to initiate a Virtual Machine boot from a SCSI Virtual Hard Drive was unavailable. Additionally, copying files from a Hyper-V Host to virtual machines was not feasible without establishing a network connection within the virtual machine.
To elaborate, the Hyper-V BIOS lacked awareness of SCSI Controllers unless the Integration Services component was installed. Virtual Machines operating on Windows Server 2012 and earlier exclusively relied on legacy drives like the IDE Controller and Legacy Network Adaptors supported by the Hyper-V BIOS. This limitation restricted virtual machines to boot only from a Legacy IDE Controller.
However, with the advent of Windows Server 2012 R2 and subsequent operating systems such as Windows Server 2016/2019/2022, there emerged two Hyper-V Boot architectures: Hyper-V BIOS and Hyper-V Unified Extensible Firmware Interface (UEFI) BIOS.
Hyper-V, starting from Windows Server 2012 R2 and onwards, accommodates two Generation Virtual Machines: Generation 1 and Generation 2. Read this article for comprehensive comparison : What Is the Difference Between Hyper-V Generation 1 And Generation 2 Virtual Machines
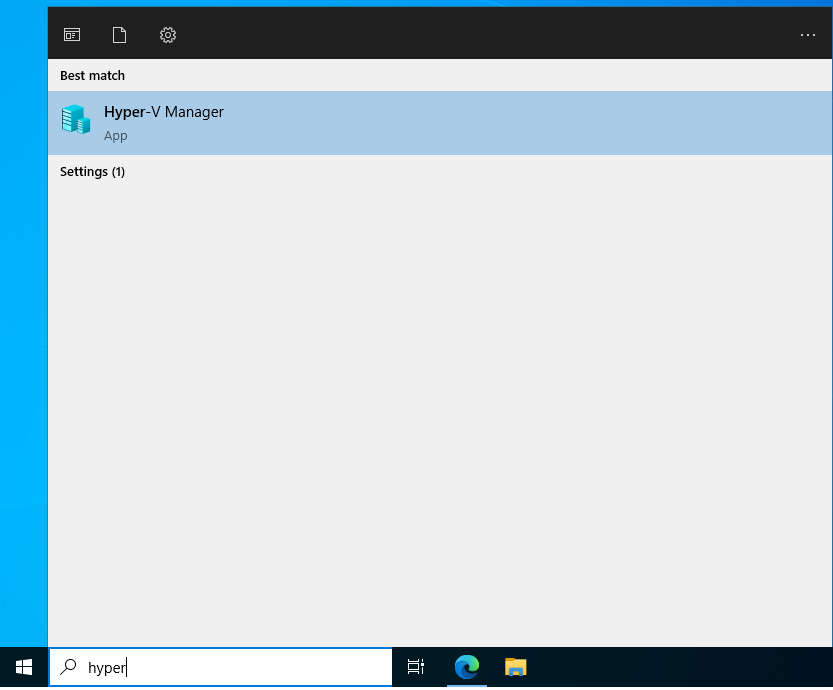
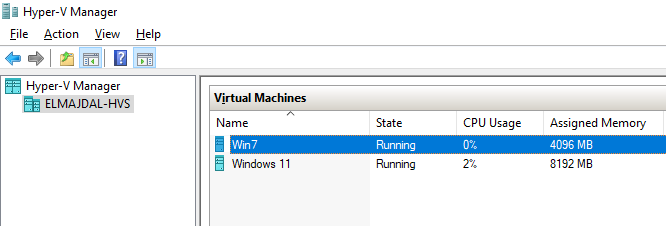
To view the generation of a Hyper-V Virtual Machine in Hyper-V Manager :
- Launch Hyper-V Manager.

- Select the Hyper-V virtual machine you wish to identify the generation of from the top of the central pane. Note : Whether the virtual machine is in an off or running state is inconsequential.

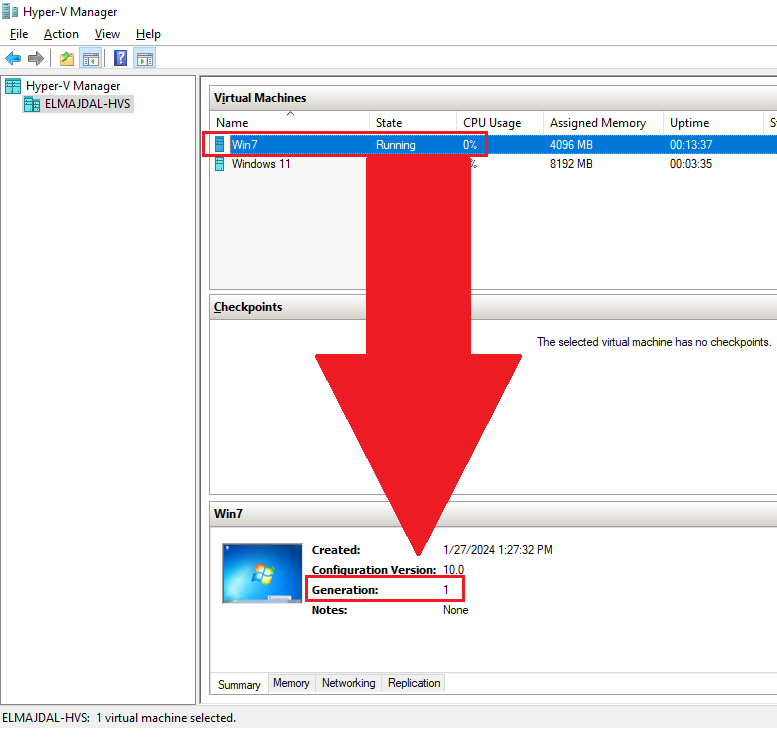
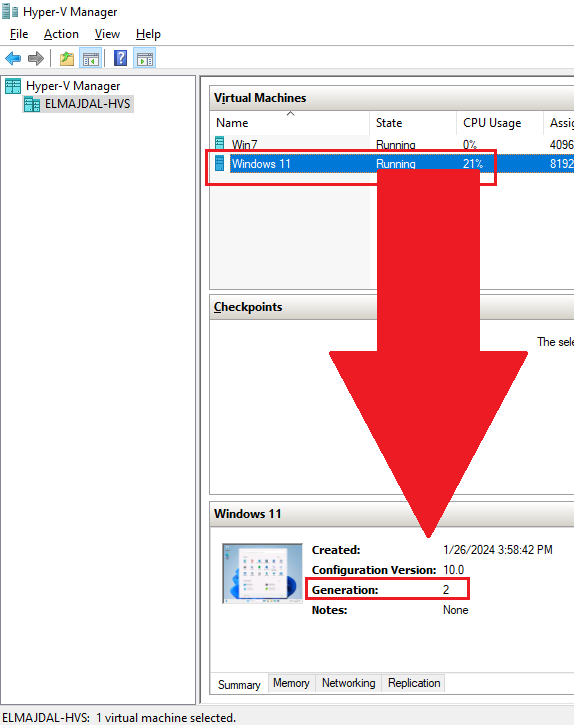
- The bottom of the central pane will now display the generation information for this Hyper-V virtual machine.
In the below screenshots, you can see for example the Hyper-V generation for the virtual machine that is named Win7 is Generation 1, and for the virtual machine named Windows 11 is Generation 2.

Related Article:
How To Identify And Upgrade Hyper-V Virtual Machine Configuration Versions In Windows Server 2016/2019/2022


