XPS, which stands for XML Paper Specification, is a file format developed by Microsoft as a competitor to Adobe’s PDF (Portable Document Format). It was introduced with Windows Vista and continued to be supported in Windows 7 and Windows 8.1. The primary purpose of XPS is to provide a standardized way of representing electronic documents, ensuring consistent formatting and layout across different devices and software applications.
Key features and reasons for using XPS include:
- Document Structure and Content: XPS files encapsulate information about a document’s structure and content. This includes details about layout, fonts, images, and other elements that contribute to the document’s appearance.
- Consistency Across Platforms: Similar to PDF, XPS is designed to maintain document consistency across various platforms and applications. This ensures that the document will look the same regardless of the device or software used to view it.
- Print Capabilities: XPS is optimized for printing, allowing documents to be printed with high fidelity. This makes it a suitable format for documents intended for physical reproduction.
- Digital Signatures: XPS supports digital signatures, enhancing document security and integrity. Digital signatures can be used to verify the authenticity of the document and ensure that it has not been altered.
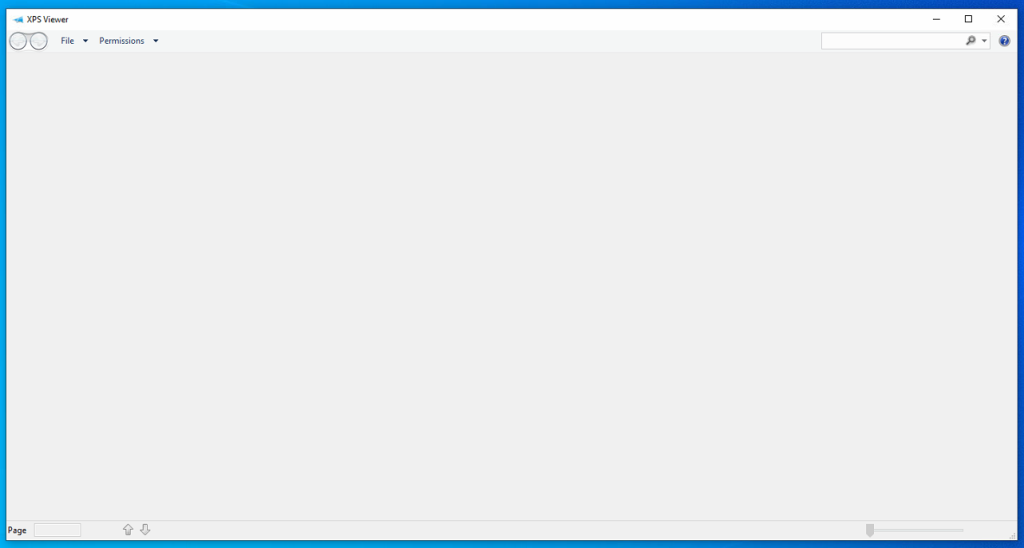
- XPS Viewer: Microsoft provides the XPS Viewer tool, allowing users to view and edit XPS files. The viewer facilitates easy access to the content and layout of XPS documents.
Despite these features, XPS has not achieved the same level of widespread adoption as PDF. PDF remains the more commonly used format for sharing and presenting electronic documents, partly due to its long-established presence and support across various platforms and devices.
Microsoft has phased out support for the XPS file format, and the XPS Viewer app is no longer included in new installations since the Windows 10 April 2018 Update (version 1803). In essence, Windows 10 and 11 do not accommodate the XPS file viewer.
I often encounter queries such as “How do I open an XPS file in Windows?” and “What programs can open XPS files?” Many individuals might not be familiar with the purpose of XPS files and their usage, so let’s see how to install XPS Viewer in Windows 10:
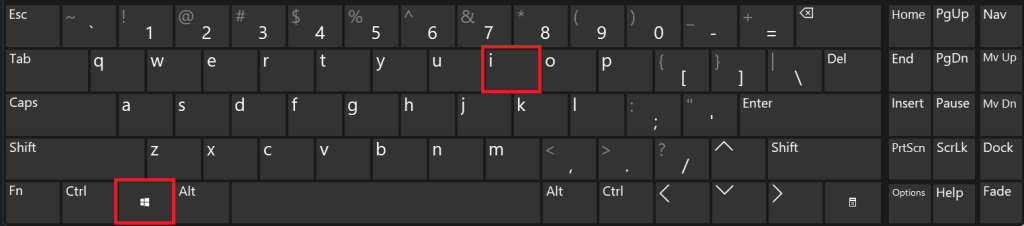
- Using your keyboard, click Win+I to open the Windows Settings

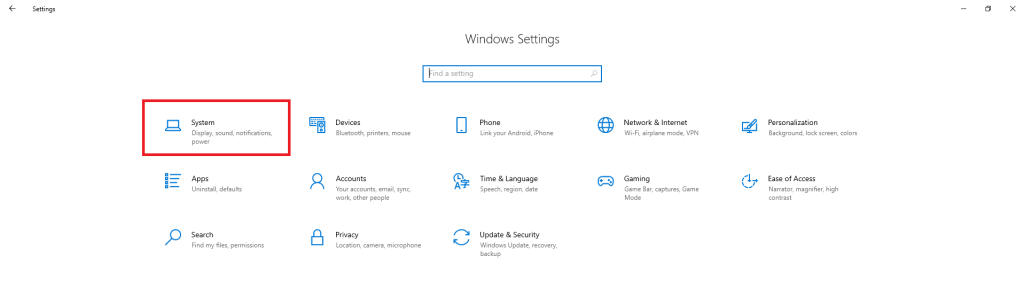
- The Windows Settings will open, click on System

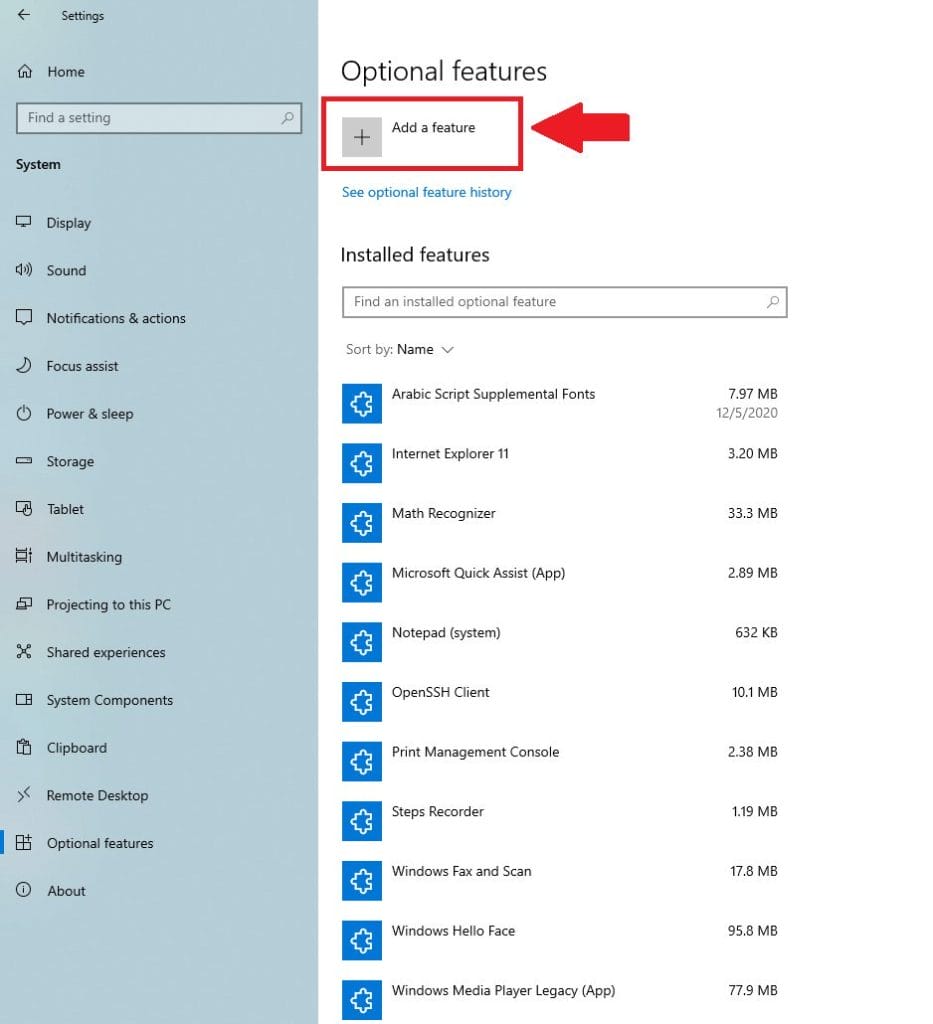
- From the left pane menu, click on Optional Features

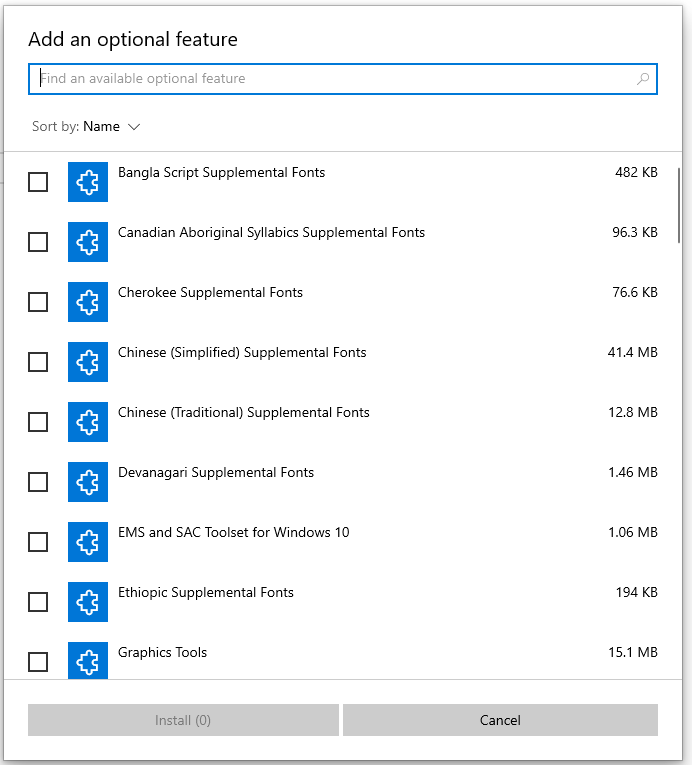
- Click on Add a feature

- A list of optional features that you add will be displayed

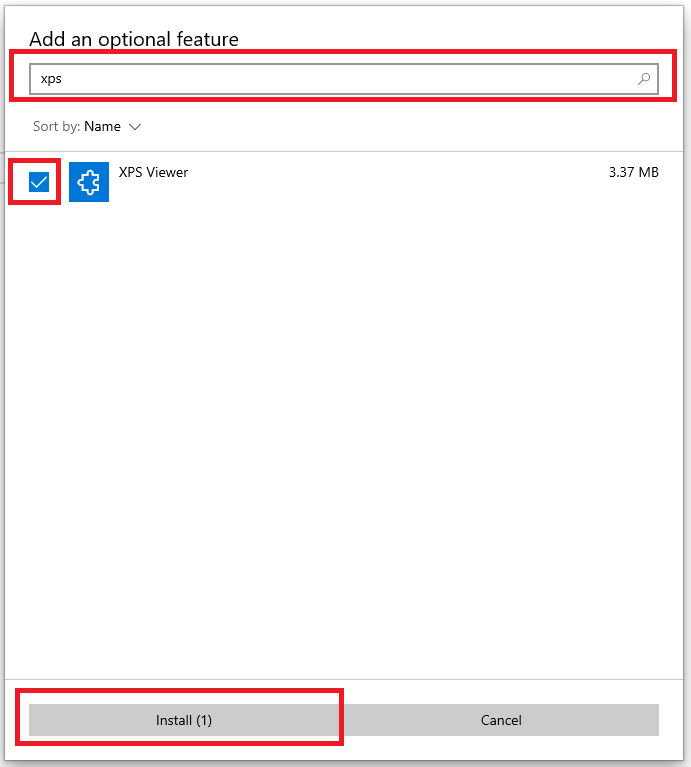
- In the search bar, type xps and choose XPS Viewer , then click Install

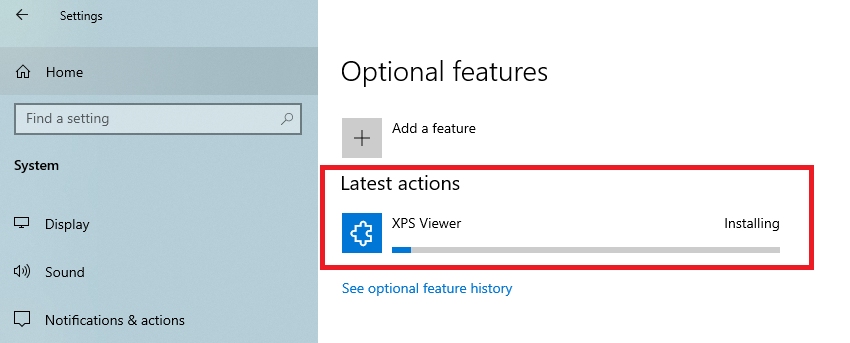
- Installing the XPS Viewer feature will start

- Once the installation is completed, the XPS Viewer feature will be listed under the Optional Features


That’s it, you can close the Windows Settings now.
To open XPS Viewer, click on Start and type xps