Setting up a Domain Controller on Windows Server 2016, 2019, and 2022 follows identical steps across all Active Directory versions starting from Windows Server 2016.
Introduction:
Setting up your first Active Directory Domain Controller (AD DC) with Windows Server 2022 is a crucial step in creating a centralized network management system.
Active Directory Domain Services (AD DS) offers essential benefits for Windows Server environments:
1. Centralized Authentication: Enables single sign-on for users across the network.
2. Authorization and Access Control: Centralized management of security policies and access permissions.
3. Hierarchical Organization: Organizes resources in a structured hierarchy using organizational units (OUs).
4. Single Namespace: Provides a consistent and organized namespace for network resources.
5. Group Policy Management: Ensures consistent configurations and settings across the network.
6. DNS Integration: Integrates with DNS for seamless name resolution.
7. Scalability and Replication: Supports fault tolerance, scalability, and redundancy through multi-master replication.
8. Security Features: Implements Kerberos authentication, data encryption, and auditing capabilities.
9. Application Integration: Many applications seamlessly integrate with AD DS for authentication and authorization.
10. Efficient Management Tools: Provides tools like Active Directory Users and Computers for streamlined administration.
11. Trust Relationships: Enables controlled access and resource sharing between domains.
12. Simplified Resource Location: Users can easily locate and access network resources through an organized directory structure.
13. Grouping and Nesting: Supports flexible grouping and nesting of users and computers within organizational units and security groups.
In summary, Active Directory Domain Controllers are essential for maintaining a well-organized, secure, and efficiently managed network environment in Windows-based networks. They provide a centralized platform for user authentication, resource management, and security policies.
In this tutorial, we’ll walk through the process, providing detailed steps to ensure a smooth installation.
Prerequisites:
- A server machine with Windows Server 2022 installed. If you haven’t installed Windows Server 2022 yet, check this article : Step-by-Step Guide To Install Windows Server 2022
- Administrative access to the server.
- Give a unique name for your Server. Read this article to know how to change your computer name : How To Change or Rename The Computer Name In Windows Server 2016/2019/2022
- A static IP address for the server. it’s crucial to use a static IP address that is within the appropriate range for your network and to configure DNS settings correctly, especially if the Domain Controller is also functioning as a DNS server. Additionally, ensure that these changes align with your overall network configuration and do not conflict with any existing IP addresses.
Step 1 : Install Active Directory Domain Services (AD DS) Role:
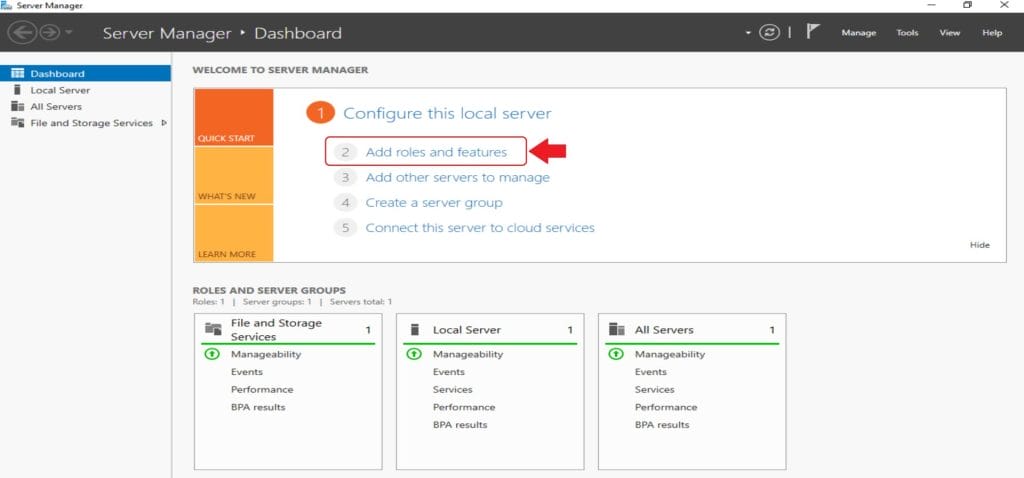
- Open Server Manager : Click Start and then click on Server Manager
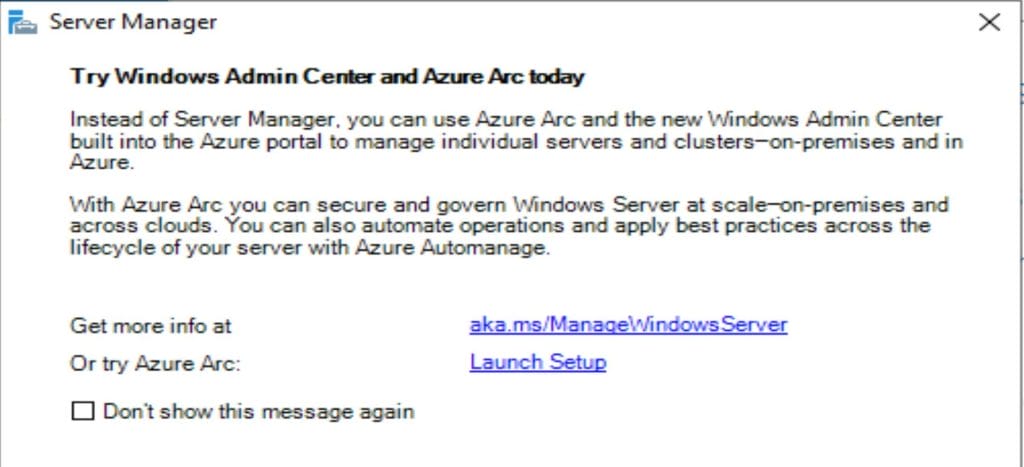
- If you have the the Try Windows Admin Center and Azure Arc today window opened, close it .

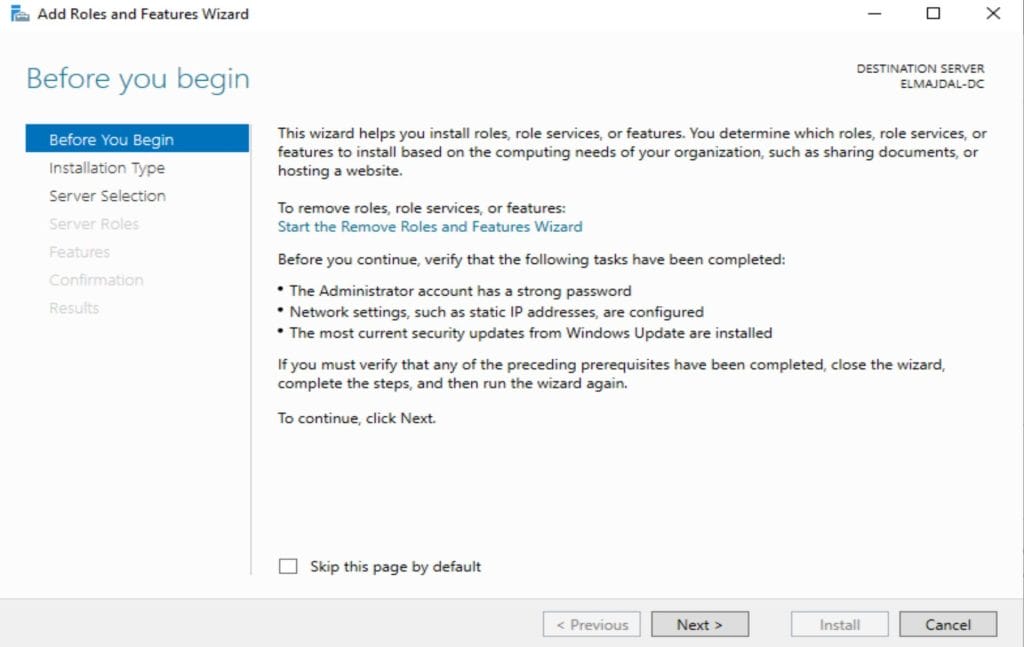
- Select Add Roles and Features

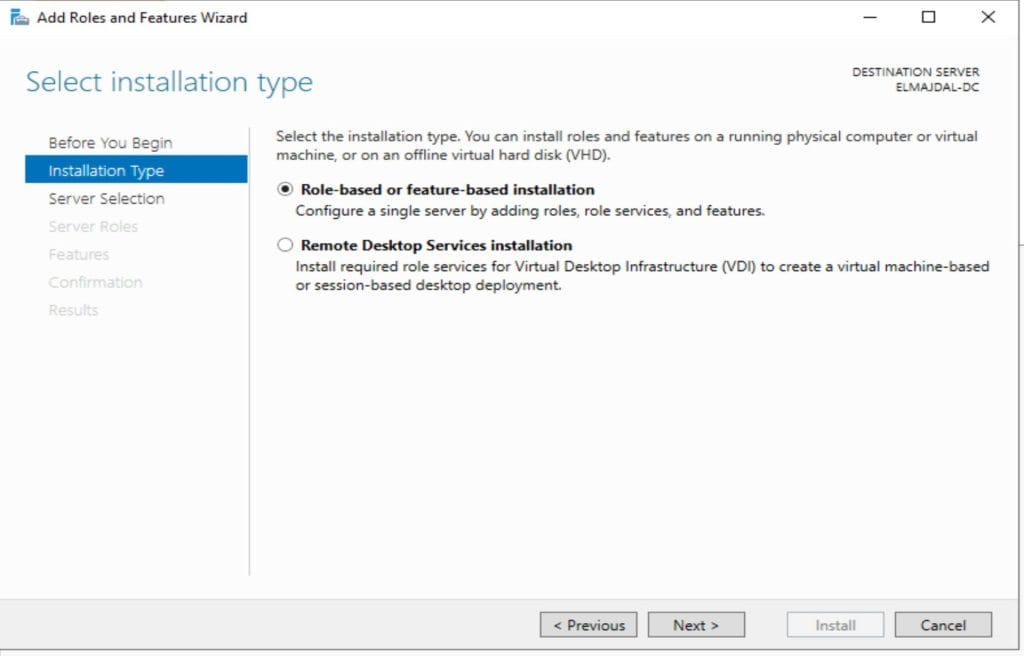
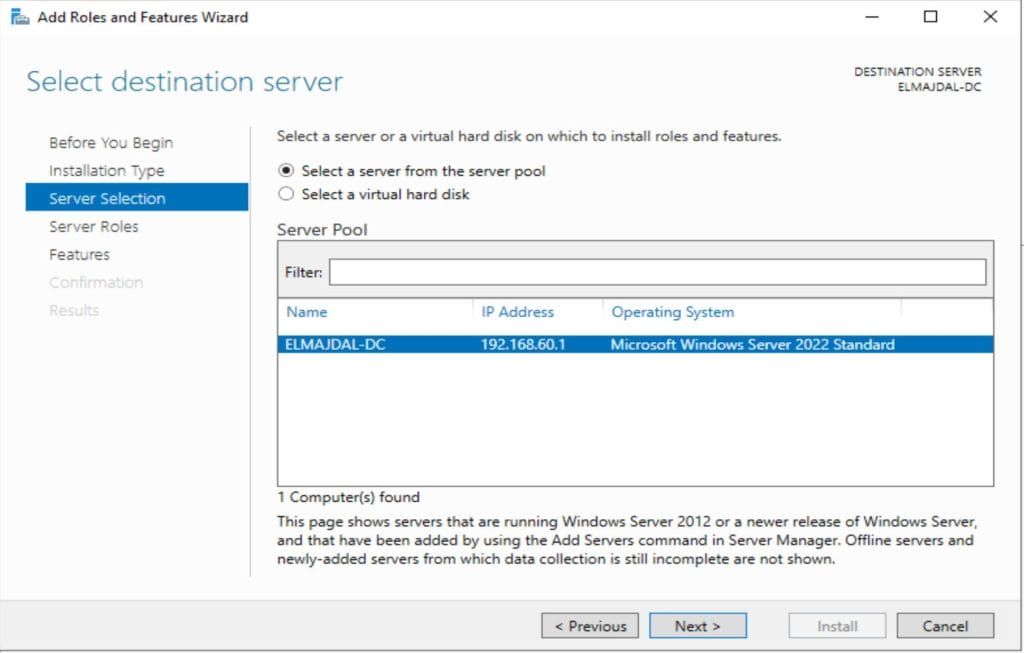
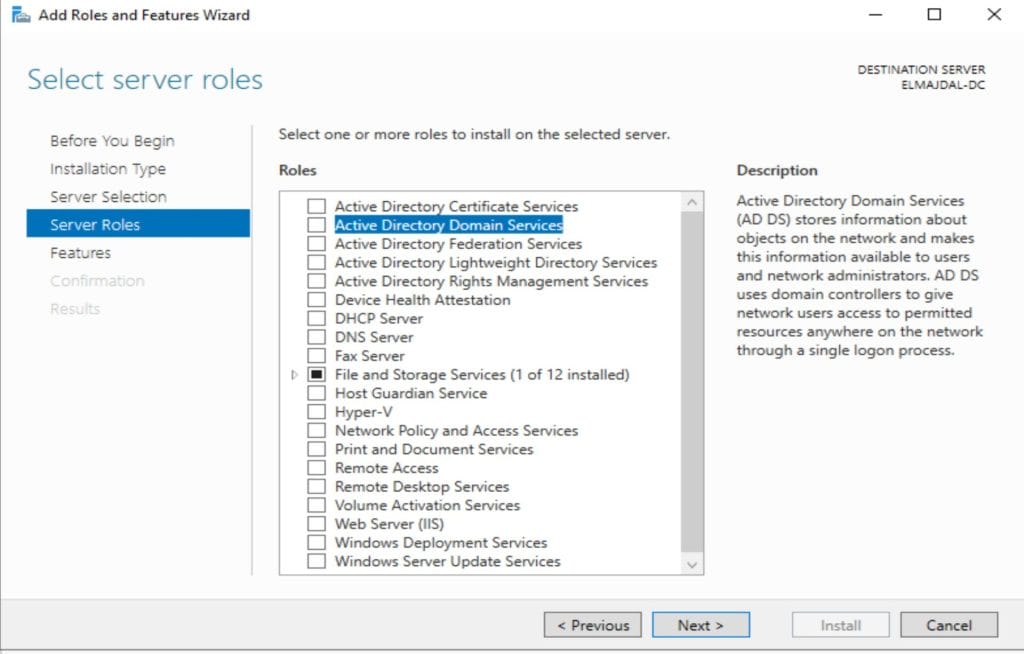
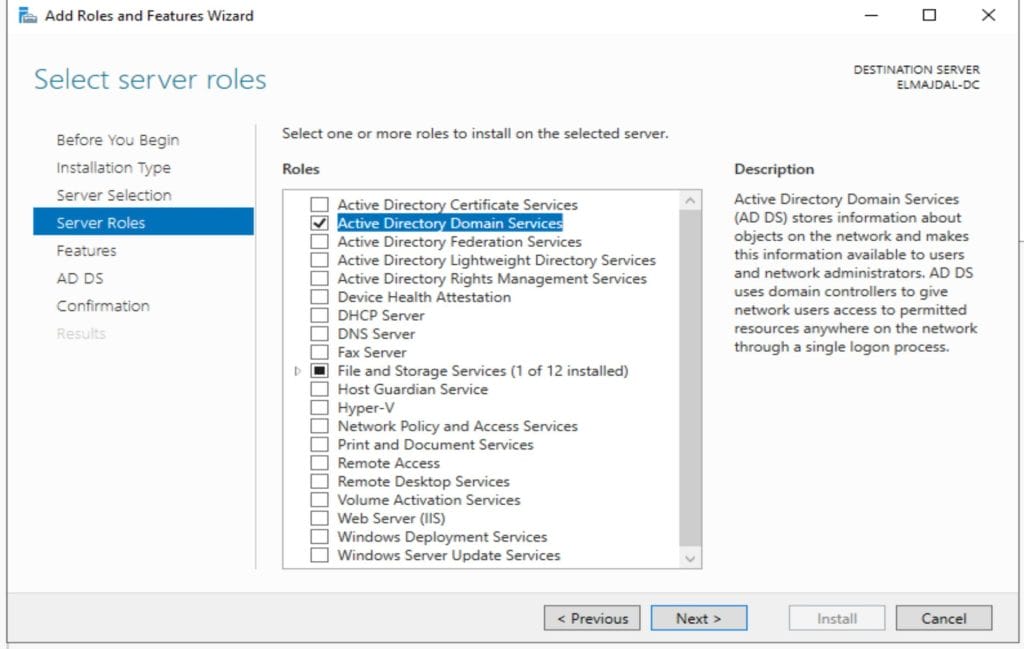
- Click Next until you reach the Select server roles screen.


- Check Active Directory Domain Services .

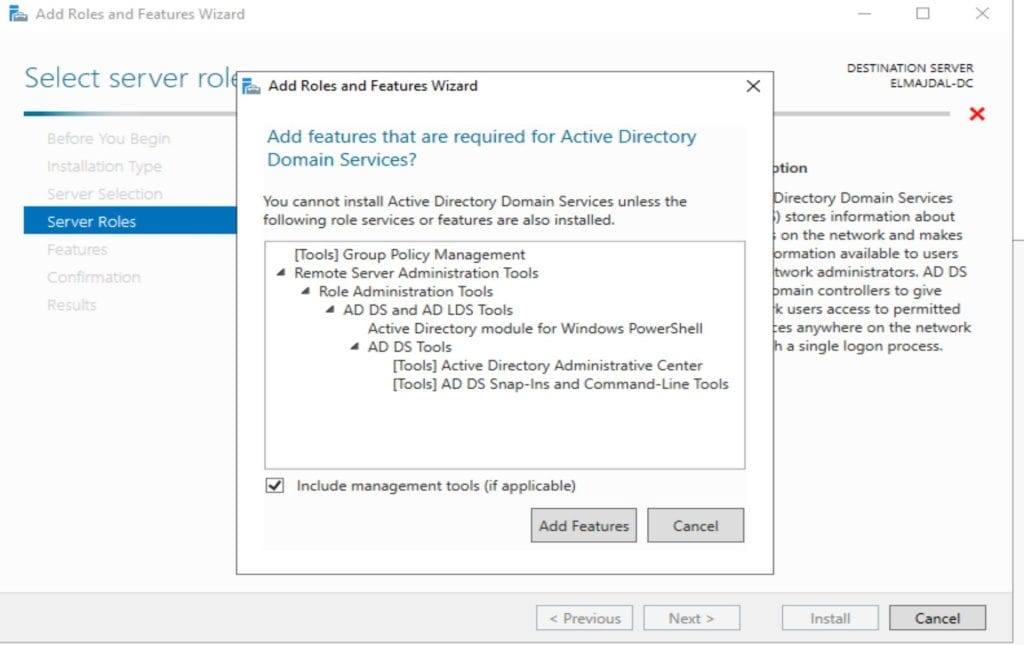
- The wizard will list the roles and features that are required for the Active Directory Domain Services , and they are :
1. Group Policy Management:
– Purpose:
– Manages policies across an Active Directory network.
– Controls user and computer configurations, security settings, and software deployments.
– Usage:
– Essential for maintaining a consistent and secure computing environment.
2. Remote Server Administration Tools (RSAT):
– Purpose:
– Enables remote management of Windows Server roles and features.
– Includes tools for Active Directory, DNS, DHCP, and more.
– Usage:
– Useful for managing multiple servers from a remote machine. In summary, Group Policy Management enforces policies, and RSAT allows remote management of Windows servers, enhancing efficiency in Active Directory environments. Both are often installed alongside AD DS.
Click Add Features to continue the wizard
- You will get back to the Select serve roles page, click Next

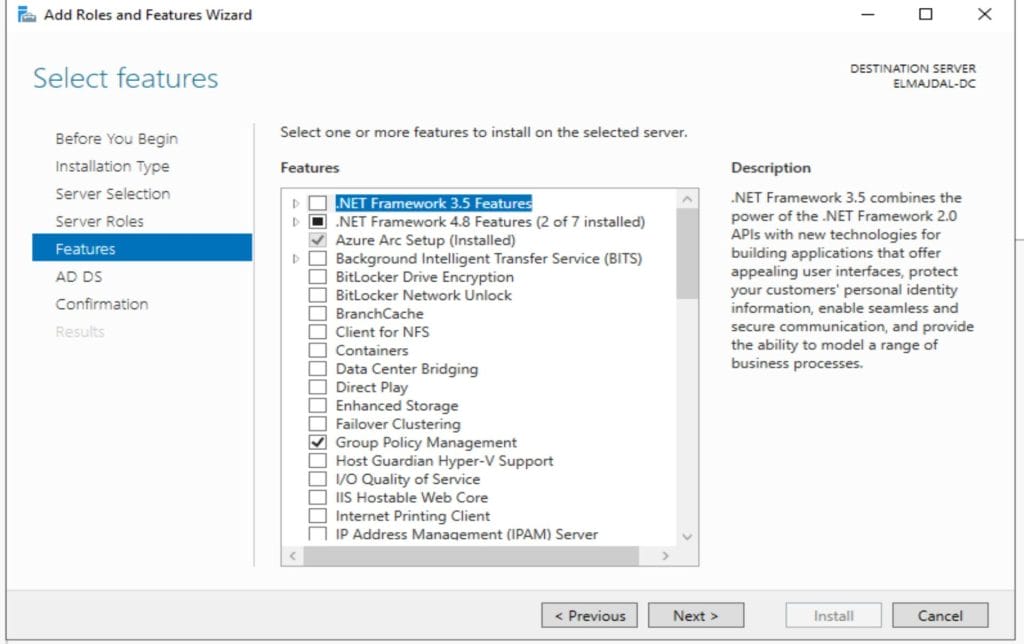
- On the Select features page, you will see the required features selected . Click Next

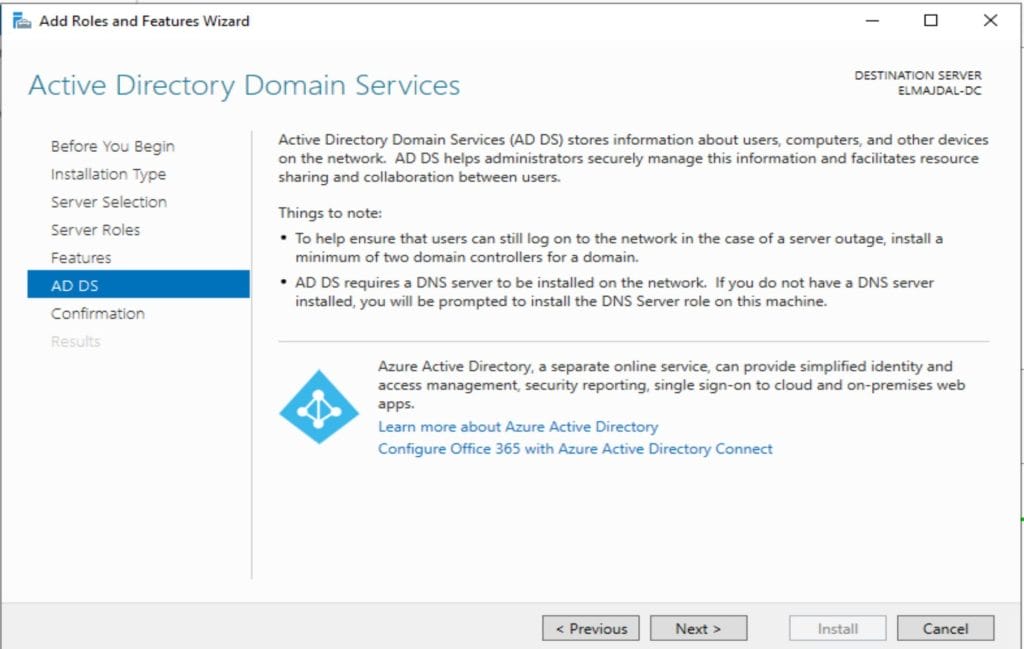
- On the Active Directory Domain Services page, it just gives your small notes, click Next to proceed

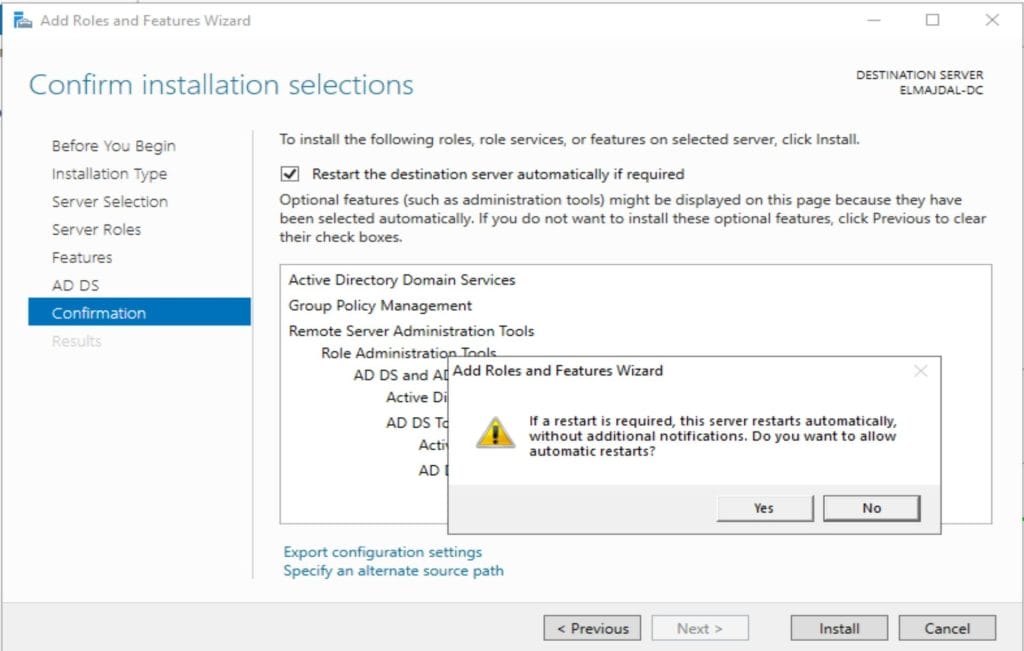
- On the Confirm installation selections page, optionally click the checkbox beside Restart the destination server automatically if required .
 Once selected, the wizard will give you a pop up message that the server will restart automatically without additional notification, click Yes

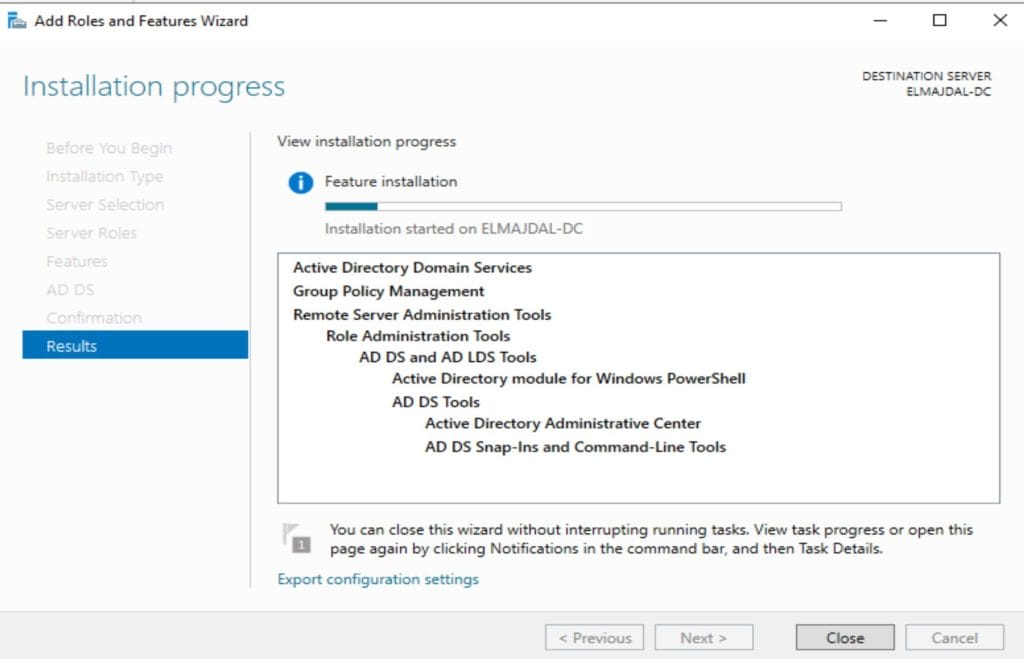
- Click Install to begin the installation.
Note : Do not click Close after this step , keep the wizard open as we will continue the next step from this page.

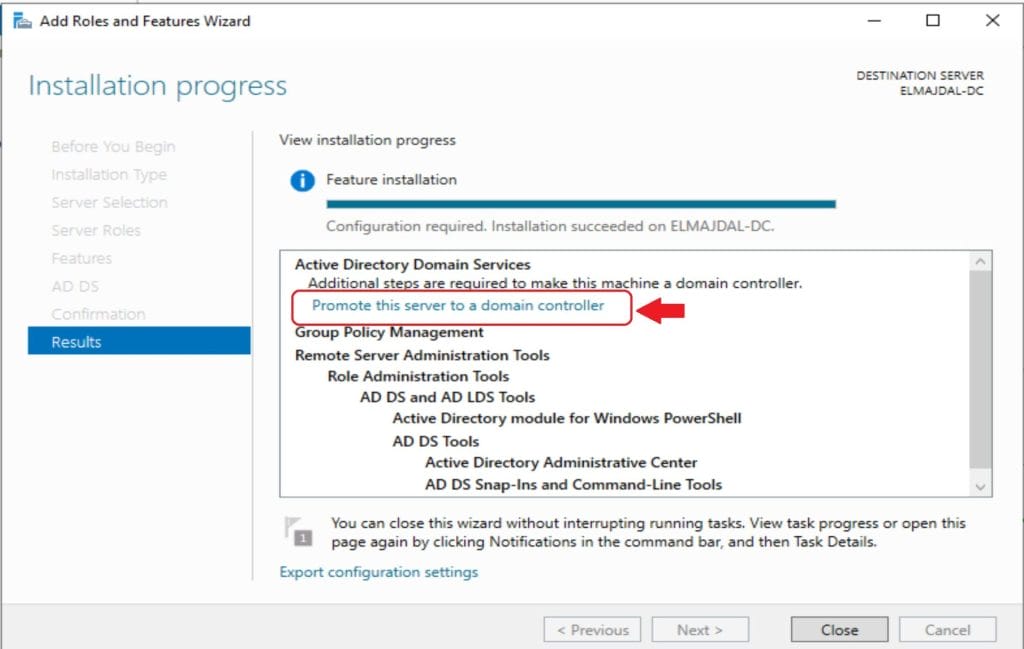
Now that you have installed Active Directory Domain Services (AD DS) Role, its time to promote your server to be a domain controller.
Step 2: Promote the Server to a Domain Controller:
- After the installation is complete, a notification will appear. Click on Promote this server to a domain controller

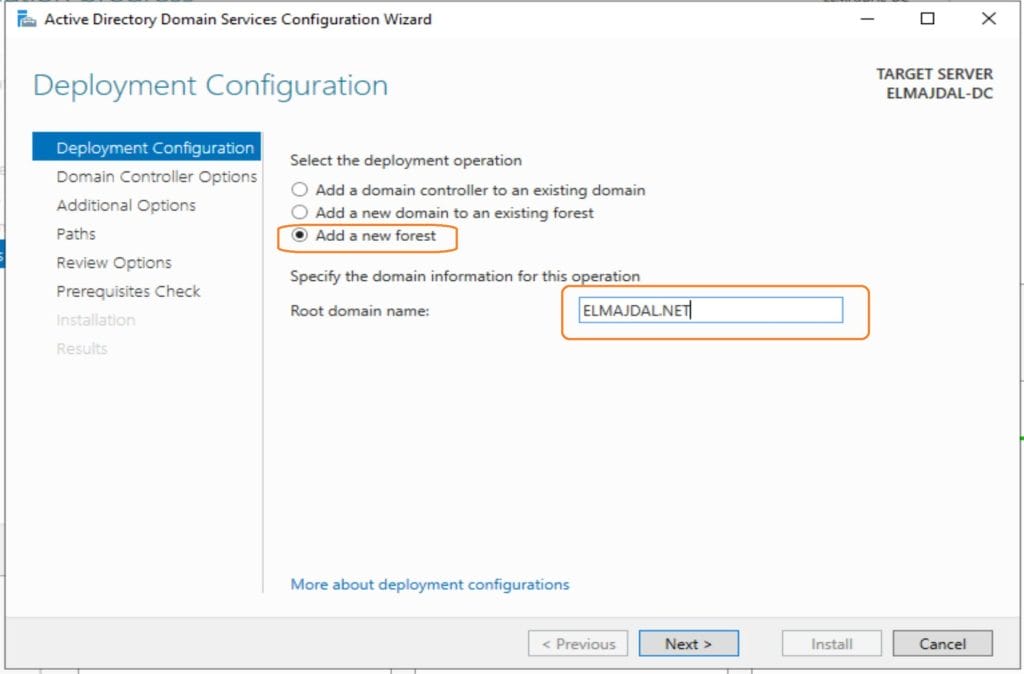
- Choose Add a new forest and enter your desired root domain name. My domain name will be ELMAJDAL.NET

- Set the forest and domain functional levels. It is recommended to choose the latest level if compatibility allows. By default this Domain Controller will be serving as a DNS server as well, hence the Domain Name System (DNS) server checkbox will be selected as well.
Enter a strong Directory Services Restore Mode (DSRM) password. This password is crucial for recovering the domain controller in case of emergencies. Then click Next
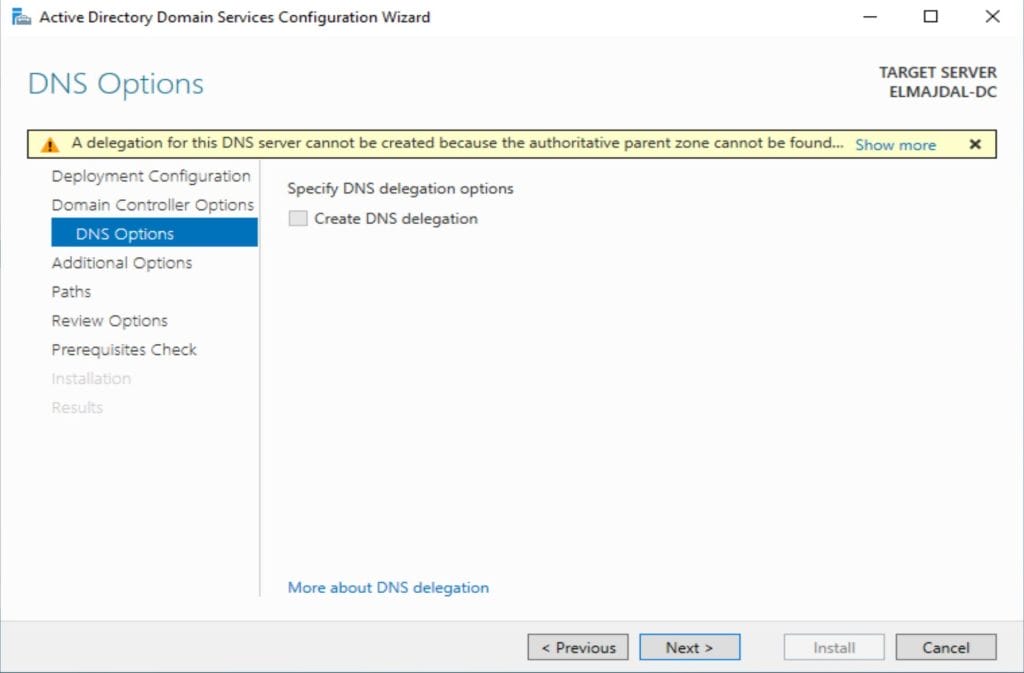
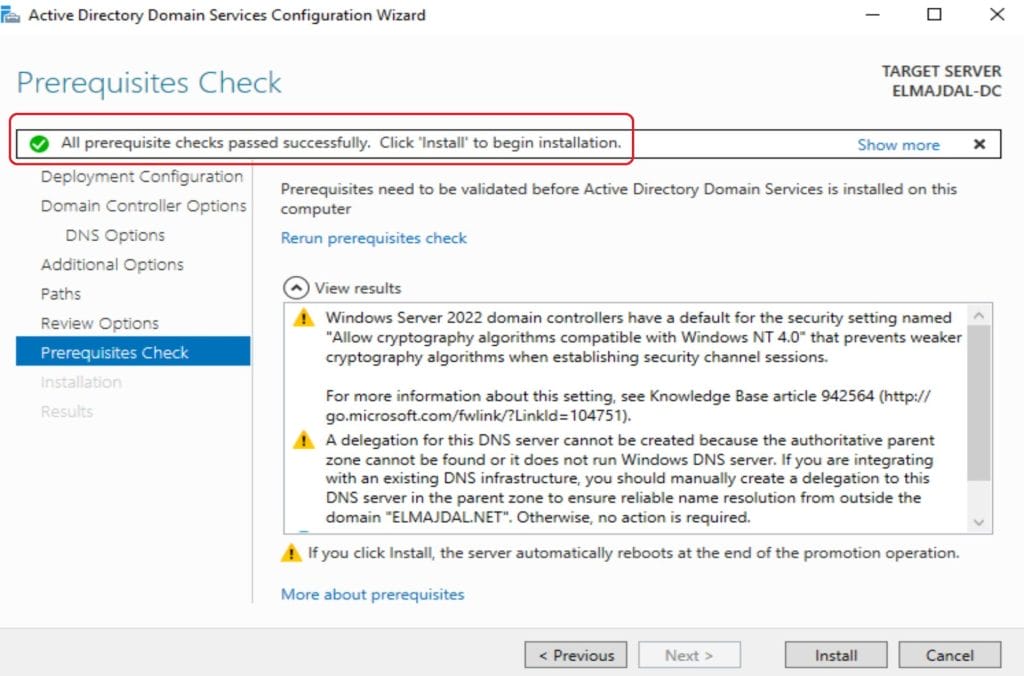
 As there currently no DNS Server, the wizard will inform you that a delegation for this DNS server can’t be created. Ignore this as its a same alarm. This is our first domain controller in a new forest. And the wizard later will installed DNS on this domain controller. So you can safely ignore DNS warnings.

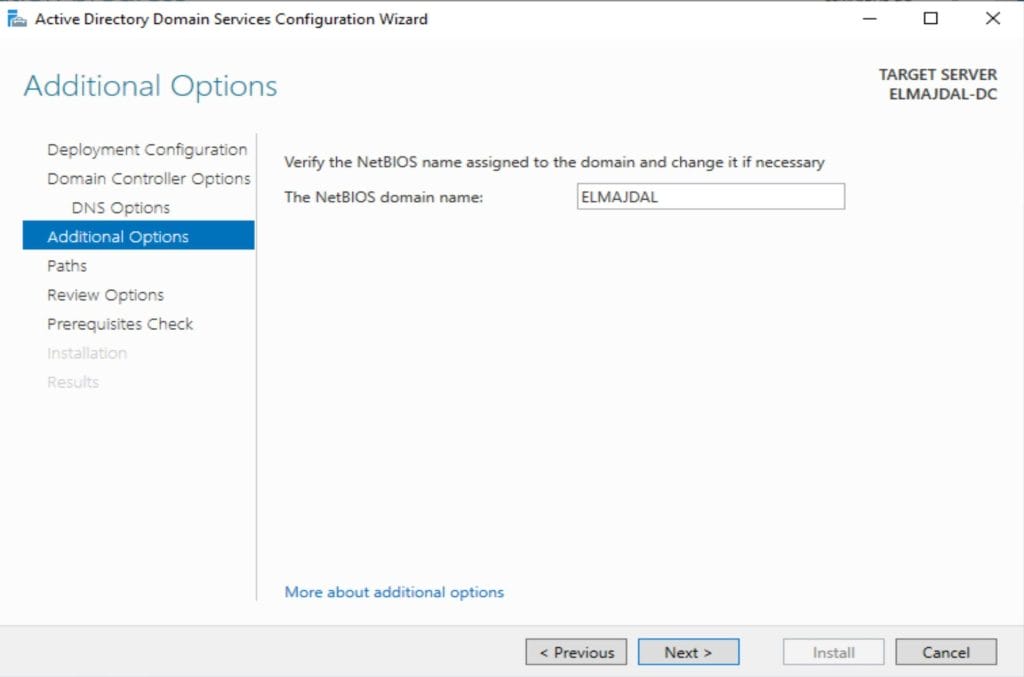
- Review the NetBIOS domain name and click Next

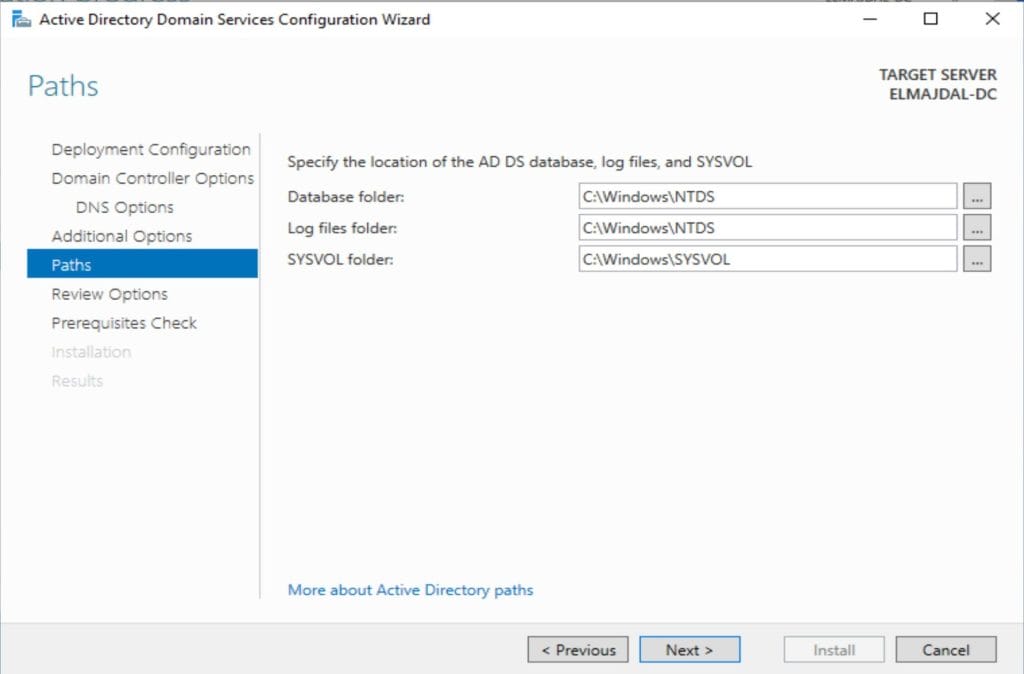
- Choose the default paths for the AD DS database, log files, and SYSVOL

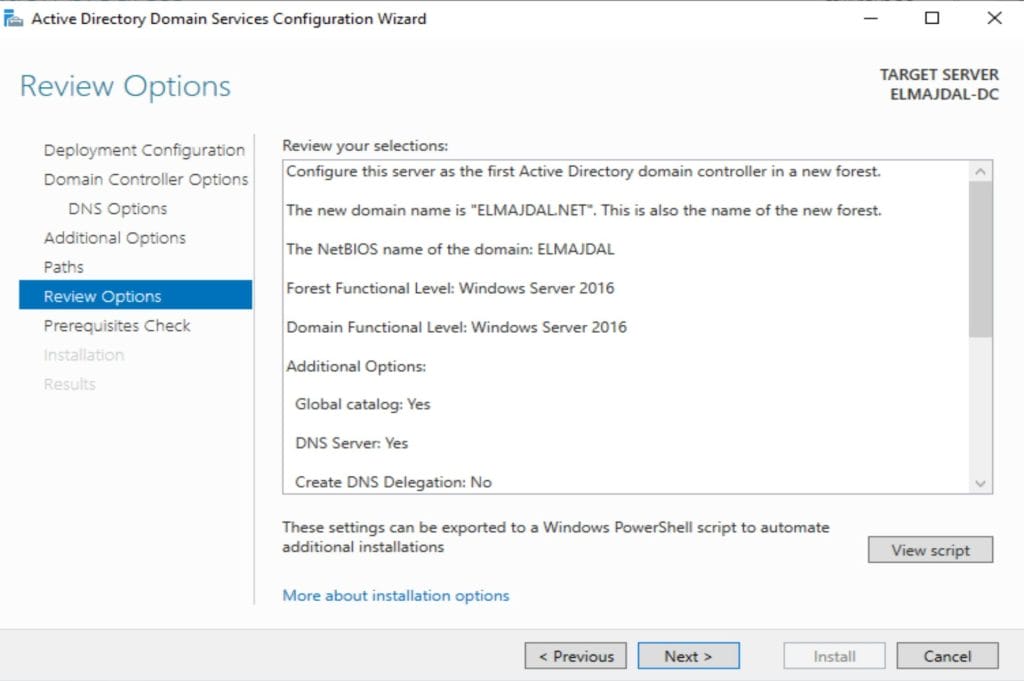
- Click Next to review your selections. Carefully review the settings and configurations before proceeding with the domain controller promotion. Make adjustments if needed, and click Next

- On the Prerequisites Check, as the prerequisites are checked and passed , click Install to initiate the installation.

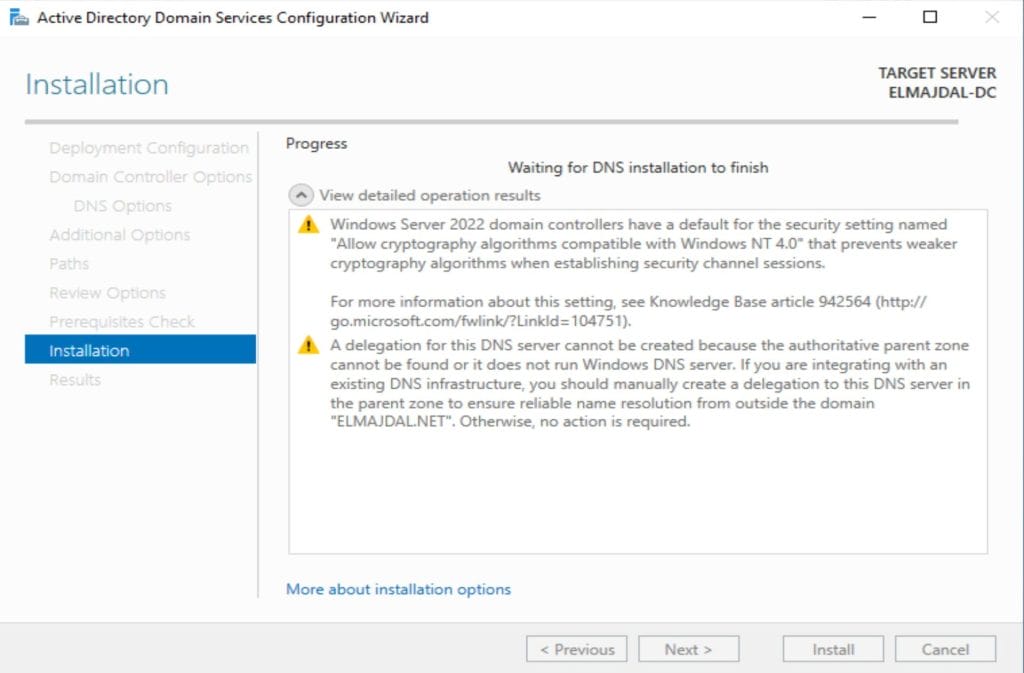
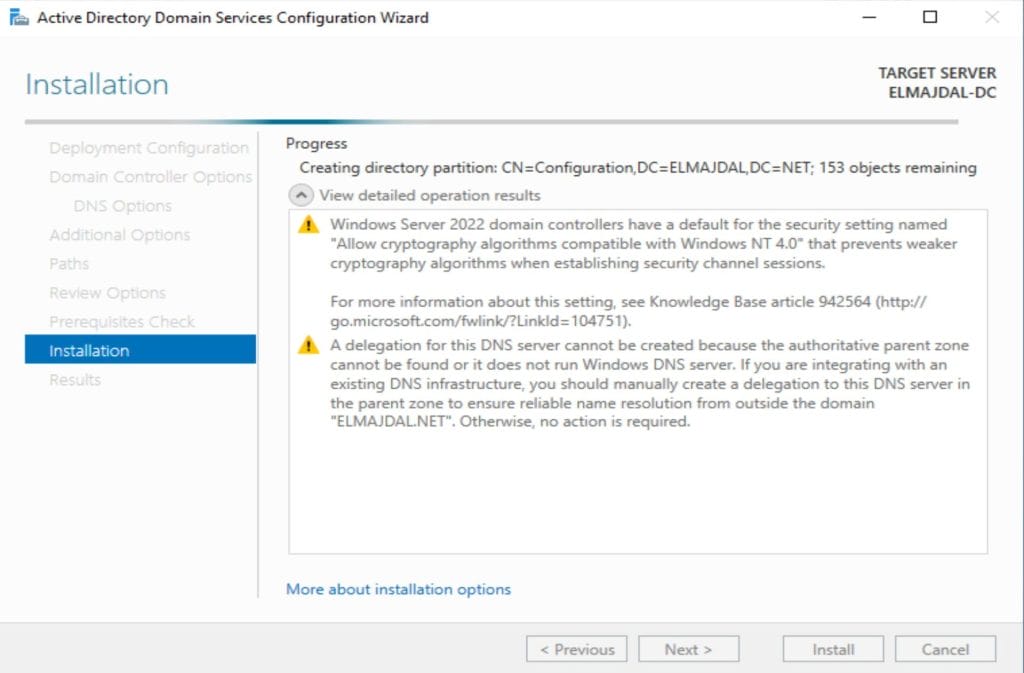
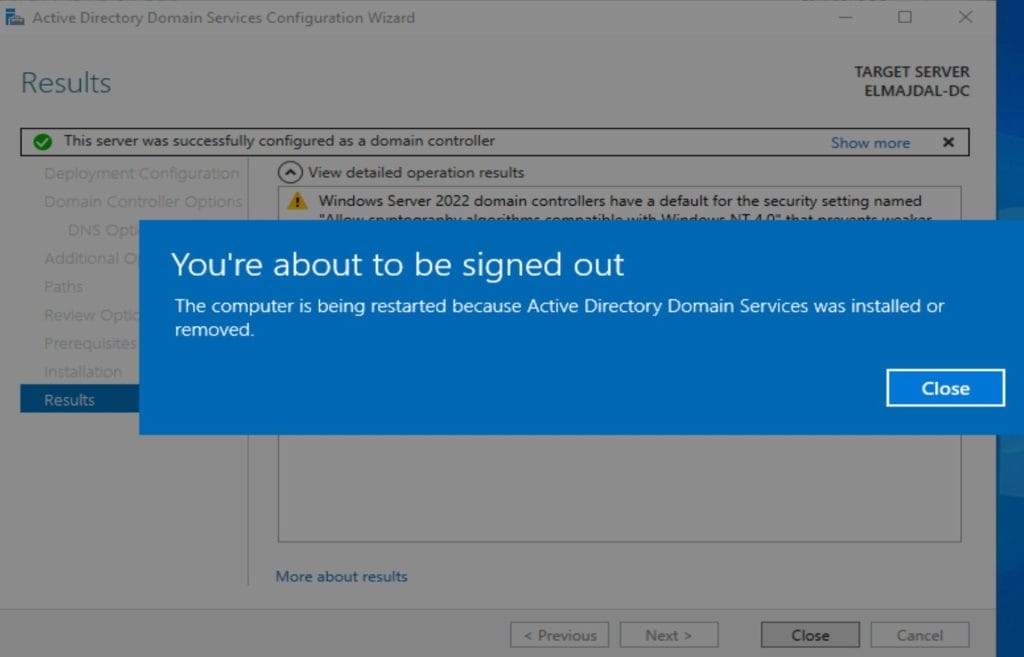
- Promoting your Doman Controller will start, with installing the DNS and required prerequisites . The Server will restart Automatically once completed


Step 3: Active Directory Configuration:
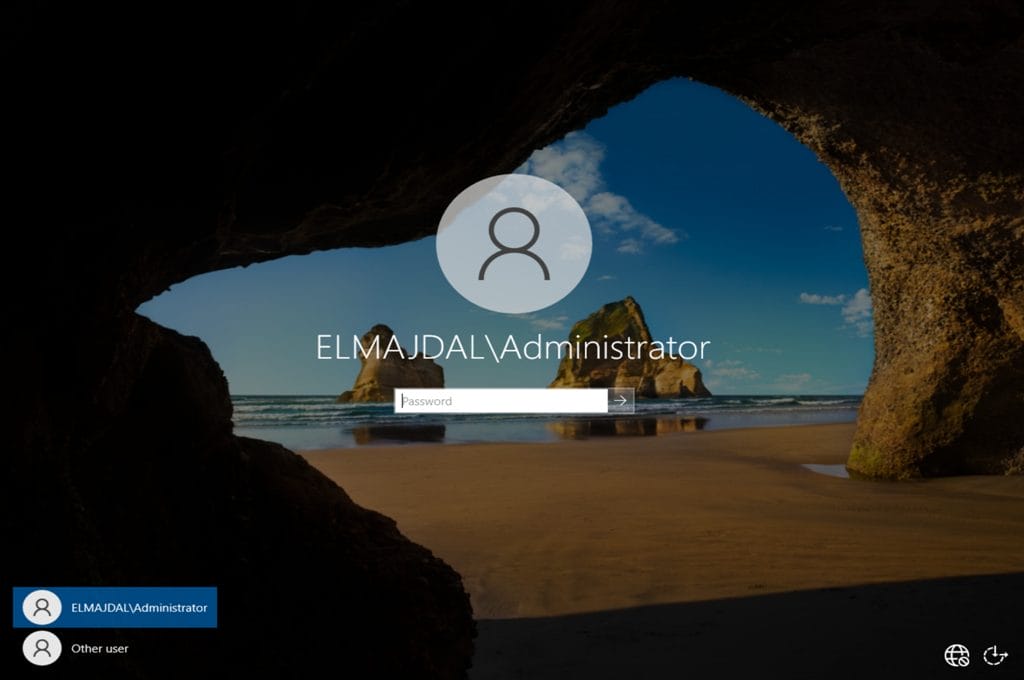
- Log in using your domain credentials.
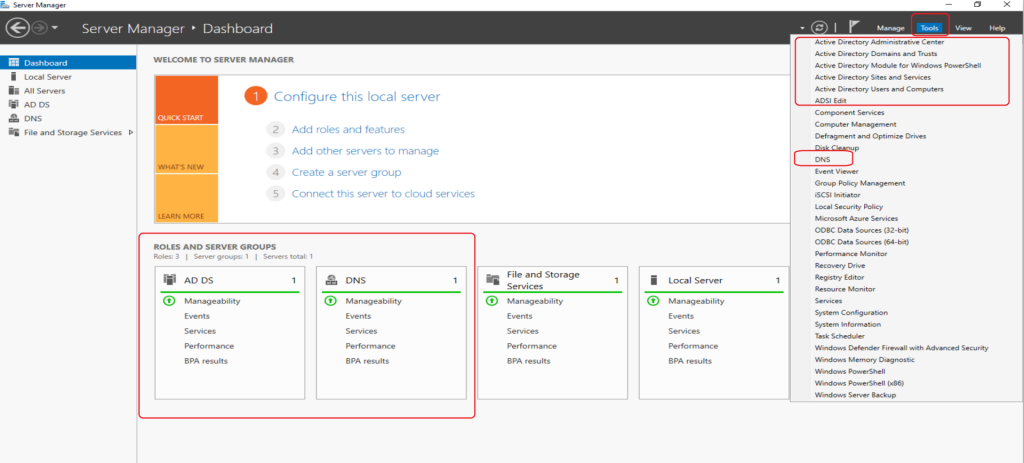
- Open Server Manager and verify the Active Directory Domain Services role is installed and running. Open Server Manager, click on Tools, and you will be able to access several management consoles are used for domain management, each serving specific administrative purposes within the context of Active Directory.

Congratulations! You have successfully set up your first Active Directory Domain Controller with Windows Server 2022. This foundational step will enable you to manage users, computers, and other network resources efficiently. Remember to secure your domain controller and regularly back up your Active Directory for optimal performance and disaster recovery.


 Once selected, the wizard will give you a pop up message that the server will restart automatically without additional notification, click Yes
 As there currently no DNS Server, the wizard will inform you that a delegation for this DNS server can’t be created. Ignore this as its a same alarm. This is our first domain controller in a new forest. And the wizard later will installed DNS on this domain controller. So you can safely ignore DNS warnings.