


Hyper-V, a hypervisor developed by Microsoft, serves as a robust platform for efficiently handling virtual machines on Windows Server. It plays a crucial role in contemporary IT setups, offering a straightforward means of deploying and overseeing virtualized workloads. This blog post guides you through the entire procedure of installing Hyper-V on your Windows Server 2019/2022, covering everything from prerequisites to step-by-step instructions and optimal practices for setting up and overseeing virtual machines.
Hyper-V stands out as an advanced hypervisor technology, empowering users to generate and manage numerous virtual machines (VMs) on a sole physical server operating Windows Server. This technology allows for the coexistence of multiple operating systems on a single machine, each benefiting from its dedicated resources, applications, and environment. The platform facilitates the dynamic allocation and supervision of CPU, memory, and storage resources, in addition to the configuration of virtual networks and switches. Its widespread adoption in contemporary cloud environments and data centers is attributed to its cost-effectiveness in hardware utilization, enhancing business agility and scalability.
Benefits of Utilizing Hyper-V:
- Server Consolidation: Hyper-V enables the seamless operation of multiple virtual machines on a single physical server, facilitating workload consolidation and significant reduction in hardware costs.
- Cost-Effective: Packaged with Windows Server, Hyper-V presents a cost-effective solution in comparison to proprietary hypervisors like Oracle VM Server, Citrix Hypervisor, and IBM PowerVM.
- Enhanced Security: Hyper-V ensures heightened security through virtual machine isolation, providing a secure environment for your workloads.
- High Availability and Disaster Recovery: Hyper-V incorporates features such as live migration and replication, delivering high availability and effective disaster recovery mechanisms for virtual machines.
- Scalability: Supporting the evolving requirements of organizations, Hyper-V facilitates easy expansion and scalability to accommodate growing workloads.
- Flexibility: Hyper-V offers the versatility necessary to address the unique needs of your organization, providing a flexible and adaptable virtualization solution.
Installation Requirements:
Prior to initiating the installation process, ensure the presence of the following:
- A 64-bit processor with Second Level Address Translation (SLAT) support.
- A minimum of 4GB of RAM.
- Adequate disk space to accommodate both the operating system and virtual machines.
- Virtualization support activated in the BIOS or UEFI.
- The server should be fully updated with the latest security and critical updates. It is advisable to execute Windows Update and verify the installation of all available updates before Hyper-V installation.
- Possession of administrative privileges on the server is necessary to carry out the Hyper-V installation.
Installing Hyper-V
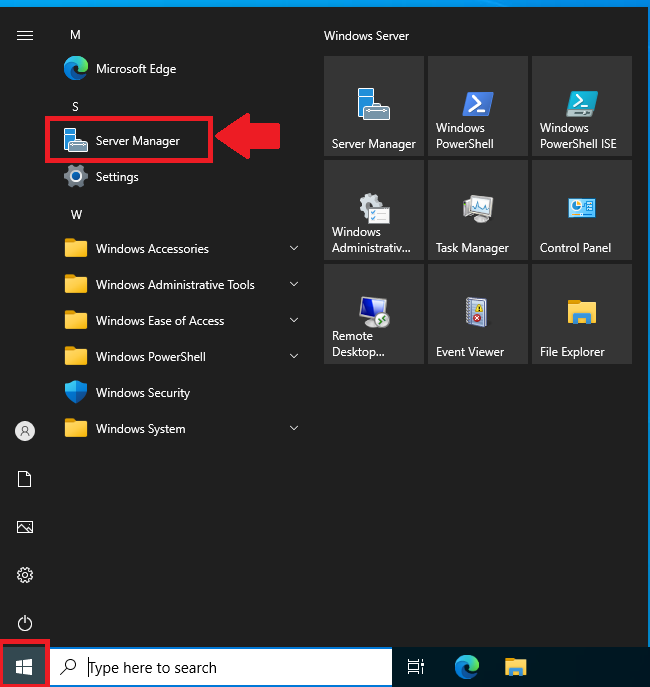
- Initiate the process by launching Server Manager. Click Start and then Server Manager

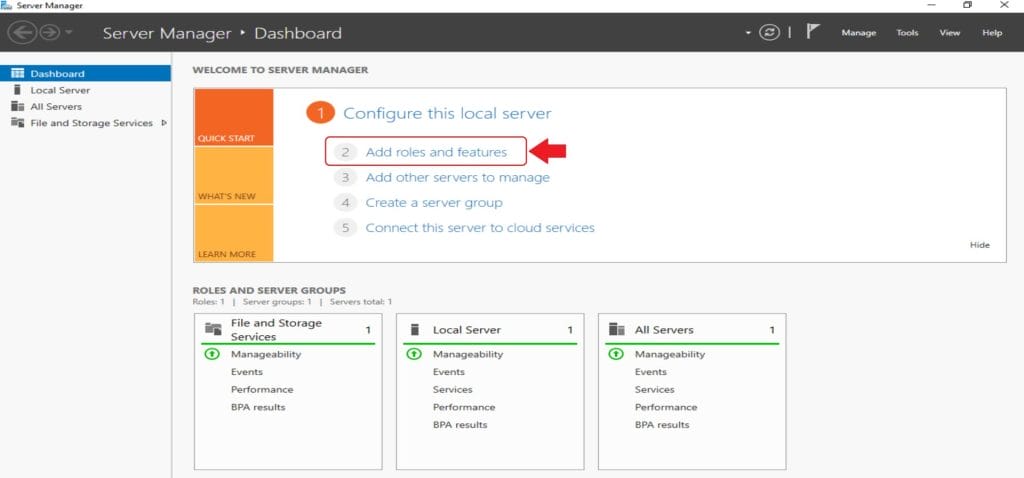
- Once Server Manager is open, Click Add Roles and Features. This action initiates the Add Roles and Features wizard.

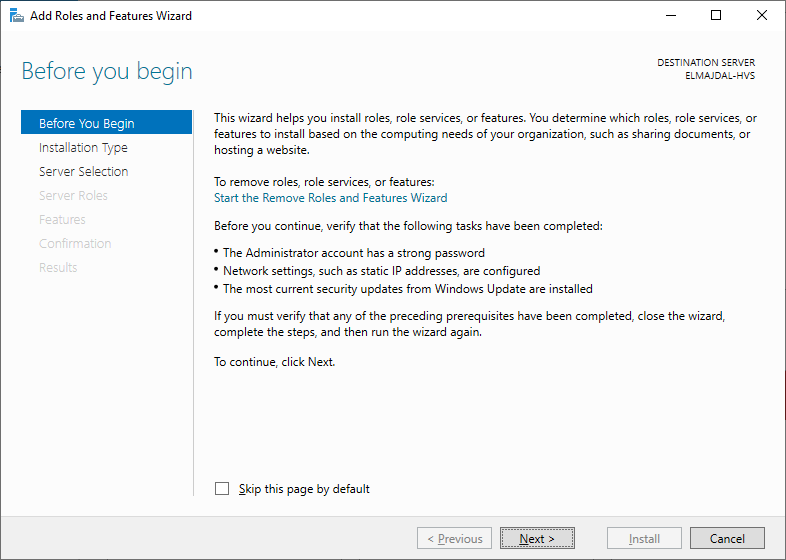
- In the Before you begin page, click Next

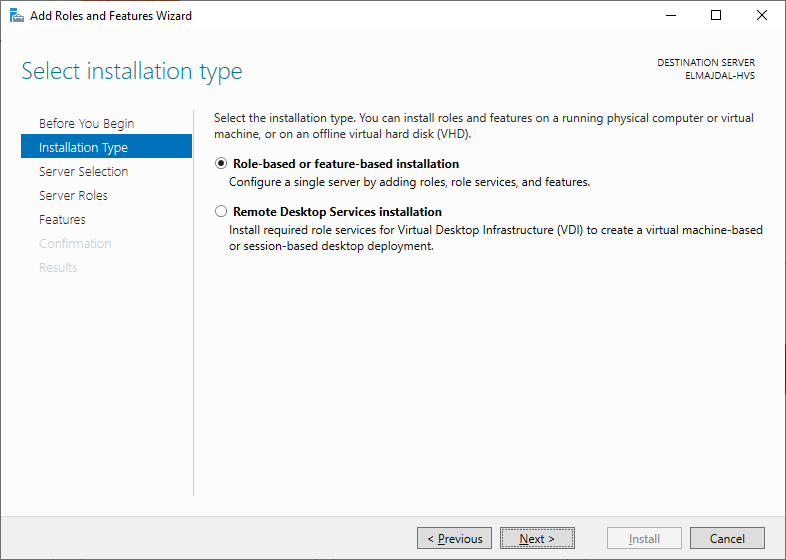
- In the Installation Type page, choose Role-based or feature-based installation and proceed by clicking Next.
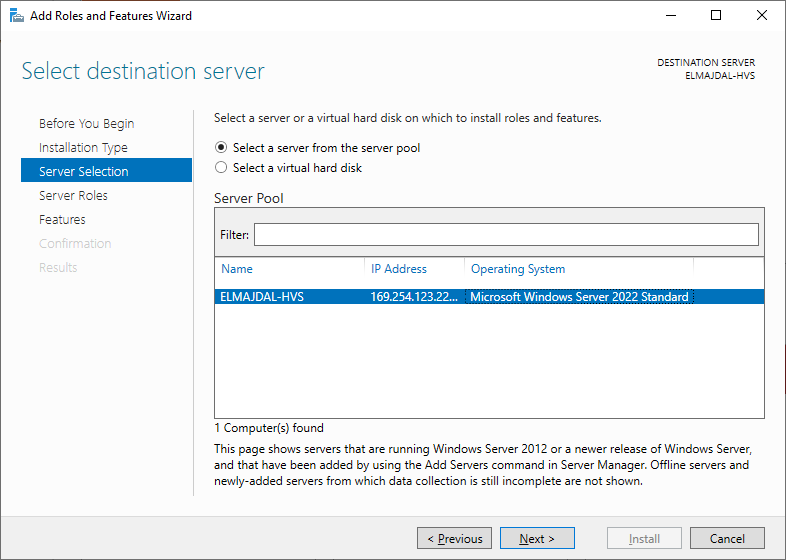
- In the Server Selection page, ensure Select a server from the server pool is selected, then choose your server from the list. Click Next to continue.
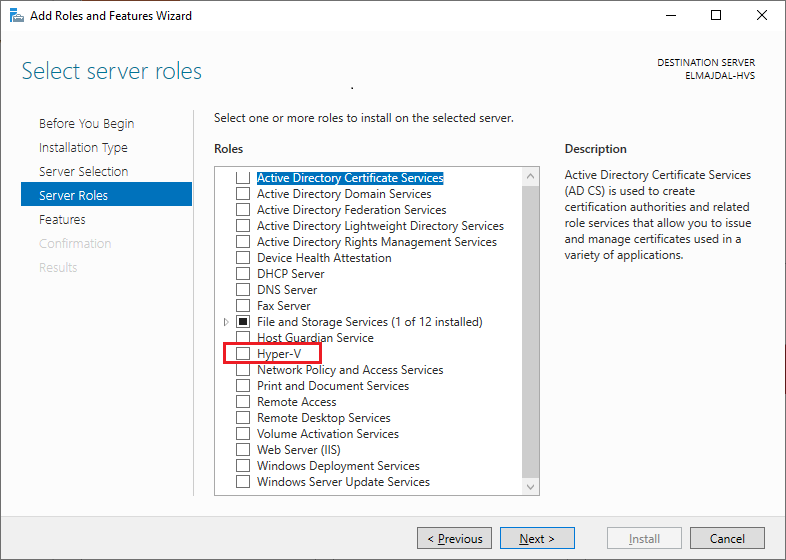
- On the Server Roles page, opt for Hyper-V from the array of features displayed.
Subsequently, a pop-up window will appear, prompting confirmation for the installation of the selected features. Click on the Add Features button.
 This action will return you to the Server Roles page. Proceed by clicking Next
![]()
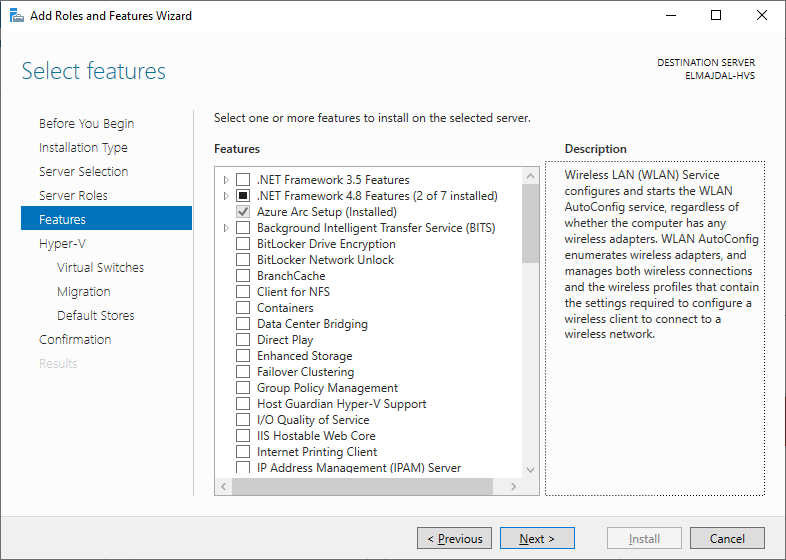
- Proceed to the next step by clicking Next on the Select Features page. ( Nothing extra will be selected in this page )
![]()
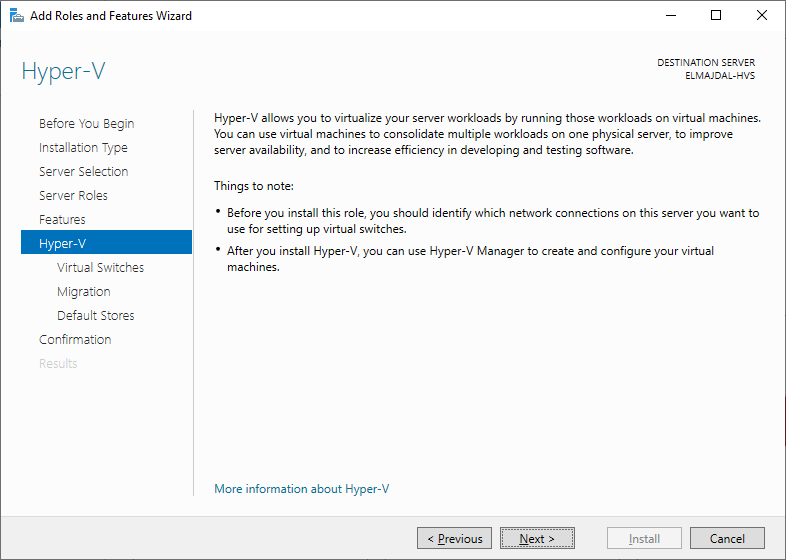
- Review essential details regarding the Hyper-V server you are in the process of creating. Proceed by clicking on the Next button.
![]()
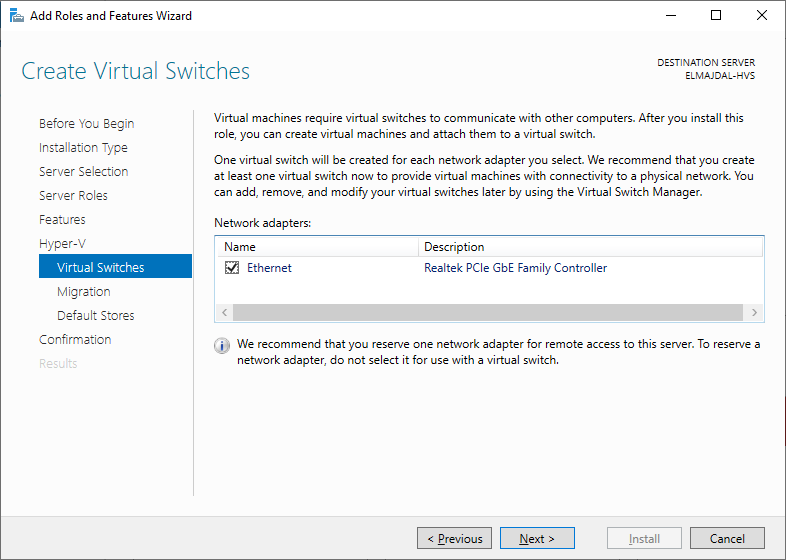
- On the Create Virtual Switches page, choose to establish a virtual switch. Pick Ethernet and proceed by clicking Next.
![]()
- Proceeding to the subsequent page, which pertains to Virtual Machine Migration, you will have the opportunity to customize the configurations associated with virtual machine migration. At this point, opt for the default settings and proceed by clicking on the Next button.
![]()
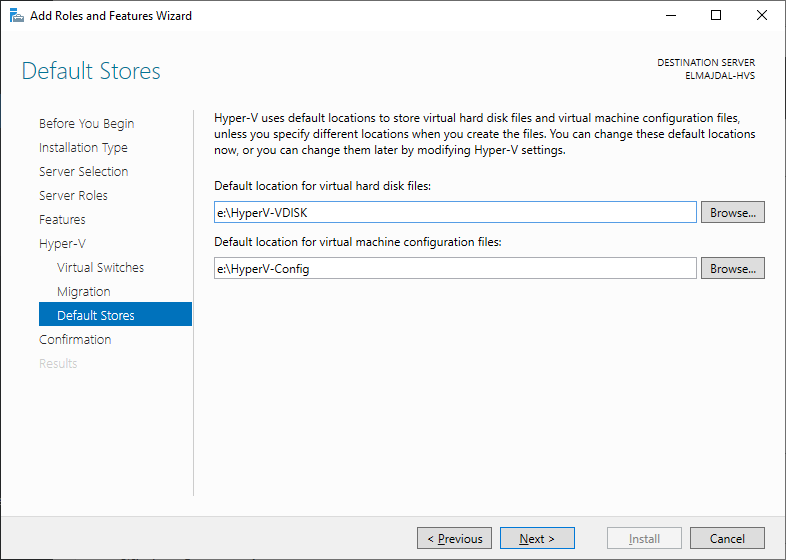
- Within the Default stores section, opt for the location to store virtual hard disk files and VM configuration files. You have the option to retain the default selections. If you want to change the default locations, click the Browse button and choose your new locations. Proceed by clicking Next.
![]()
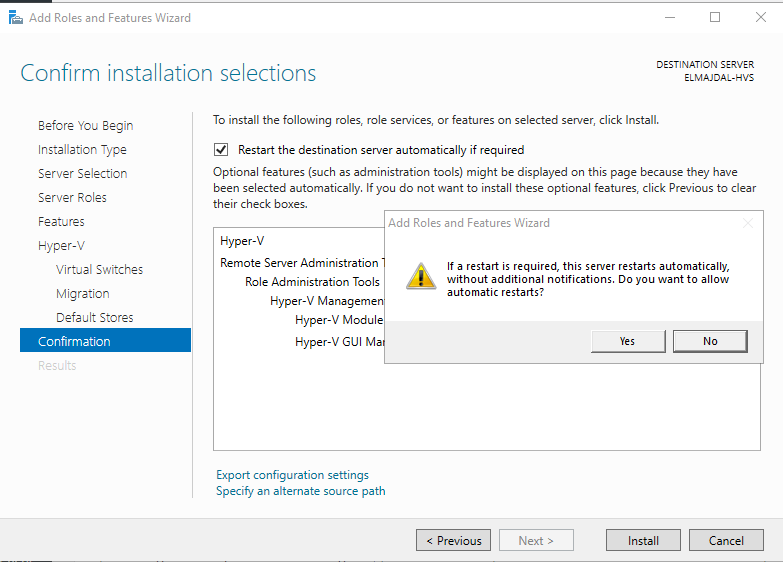
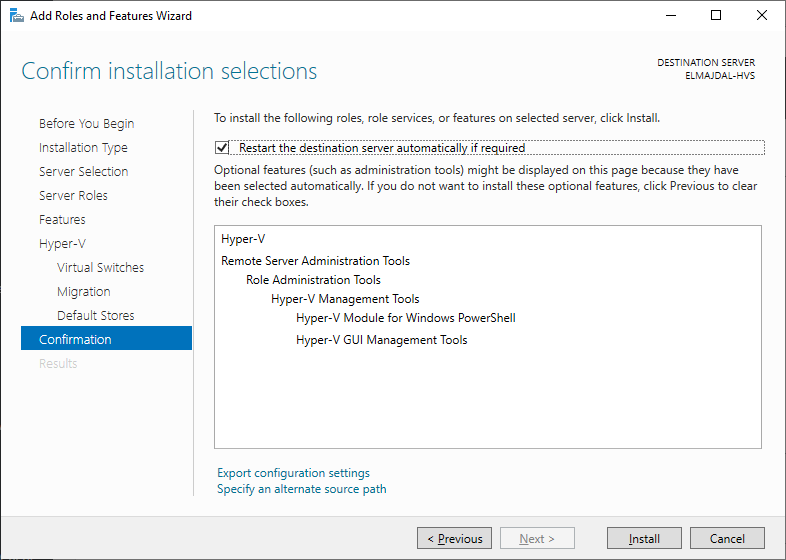
- During the Confirm Installation Selections step, ensure that all the necessary roles, services, and features are installed. Once you have verified this, choose the option Restart the destination server automatically if required. Respond affirmatively by selecting Yes in the prompted menu.
![]()
- Ultimately, select the Install option. Keep an eye on the installation progress displayed on the Progress page. After the installation concludes, click on Close.
![]() Installation will start and server will restart automatically
Installation will start and server will restart automatically
![]() Once you login back to your server after it boot up, the wizard will continue, and once it is completed, it will inform you that the installation succeeded on your server.
Once you login back to your server after it boot up, the wizard will continue, and once it is completed, it will inform you that the installation succeeded on your server.
![]()
 Subsequently, a pop-up window will appear, prompting confirmation for the installation of the selected features. Click on the Add Features button.
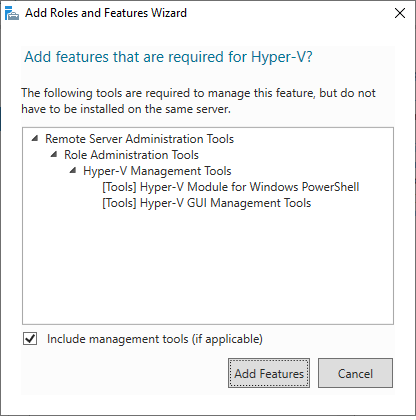 This action will return you to the Server Roles page. Proceed by clicking Next
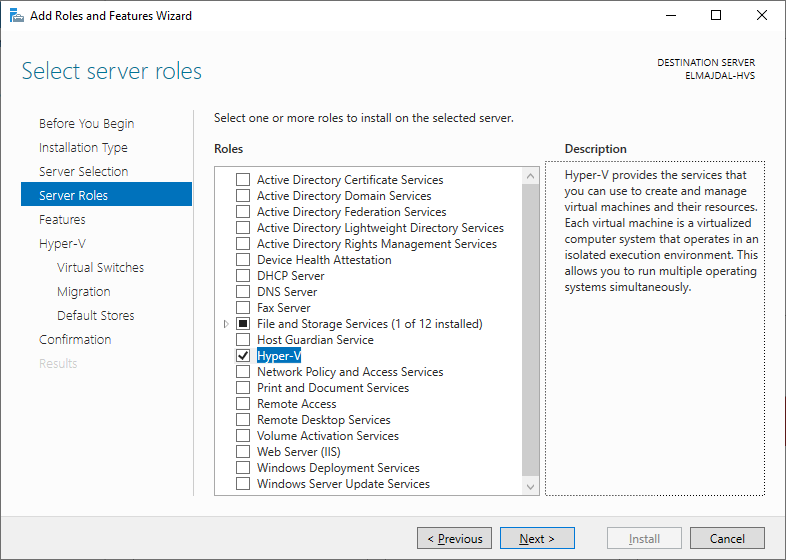

 Installation will start and server will restart automatically
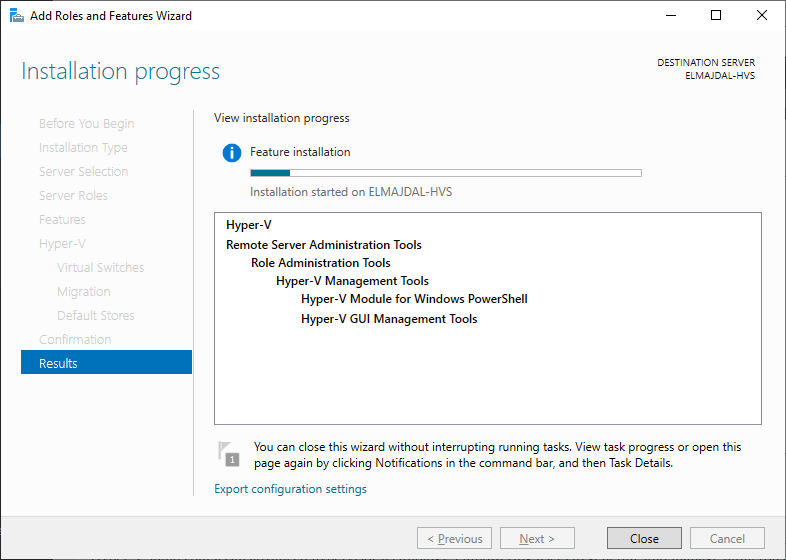 Once you login back to your server after it boot up, the wizard will continue, and once it is completed, it will inform you that the installation succeeded on your server.
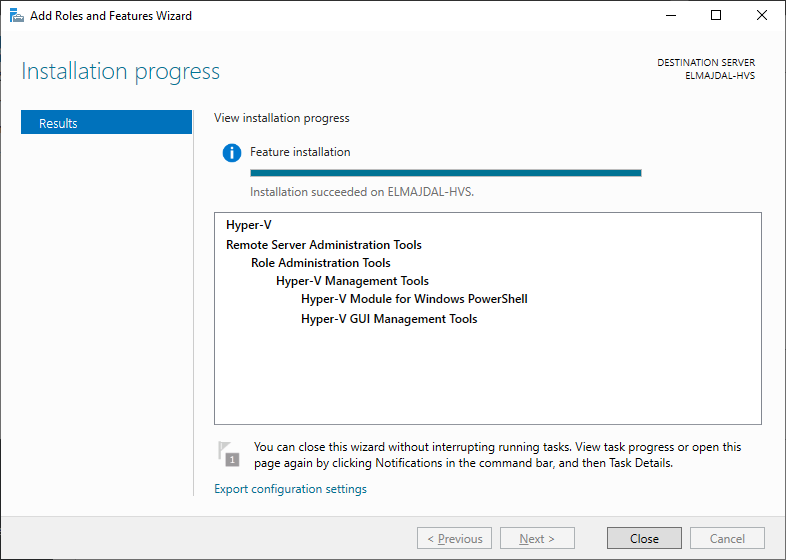
With the steps outlined above successfully accomplished, you are now prepared to begin utilizing Hyper-V on your Windows Server 2016, 2019 or 2022.
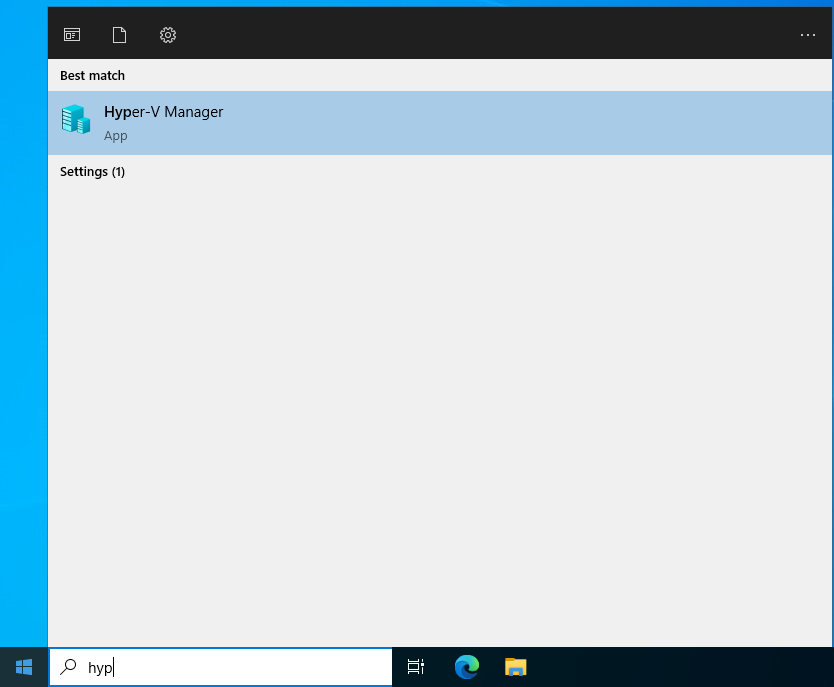
You can open Hyper-V by clicking on Start then typing hyper-v
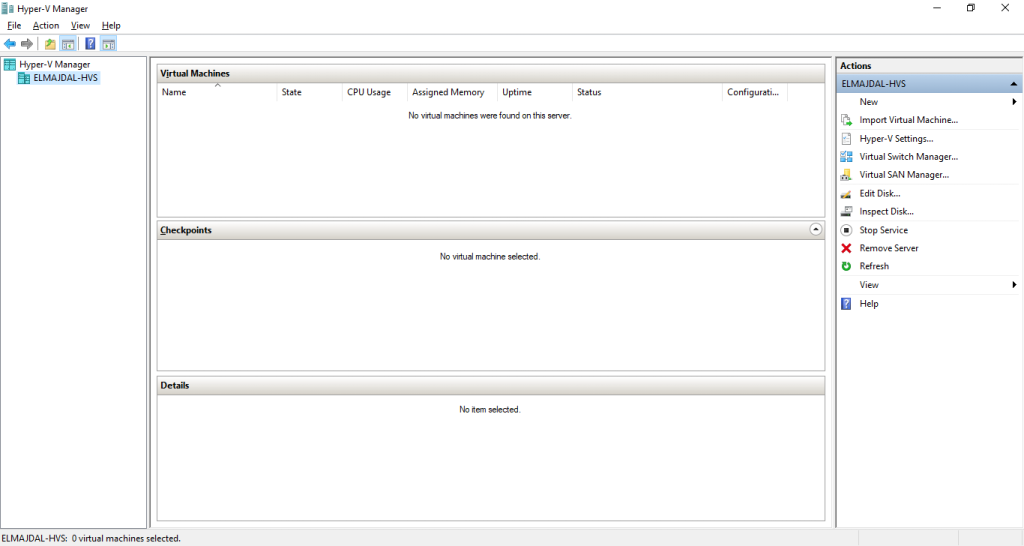
The Hyper-V management console will open .
In conclusion, Hyper-V stands as an integrated virtualization technology within Windows Server 2016/2019/2022, facilitating the creation and management of virtual machines (VMs). The ability to generate multiple VMs on a single physical server not only conserves space and power but also enhances overall resource utilization. Moreover, Hyper-V offers a remarkable level of flexibility, allowing you to tailor the configuration of your virtual machines to adapt to evolving business requirements.
Related Articles
What Is the Difference Between Hyper-V Generation 1 And Generation 2 Virtual Machines