


Introduction
1Everyone of us uses Windows Live Messenger to get connected and communicate with others. With Windows 7, Windows Live Messenger icon is placed on the Task Bar, even when it is minimized. In this article, I will be showing you how to set Windows Live Messenger icon, to get back to the notification area, when the program is running or even when it is minimized, just the way it was with previous versions of Windows
By default, this is how Windows Live Messenger looks when it is running or minimized in Windows 7 :

and this is where it will be placed after we finish this article :
![]()
So lets Start :
-
- First we need to completely close and exit Windows Live Messenger, this is done by right clicking on the Windows Live Messenger icon from the task bar (if its already running, else skip this step and go to step # 2) and clicking on Close window

- Click on Start then click on All Programs > then click on the Windows Live folder

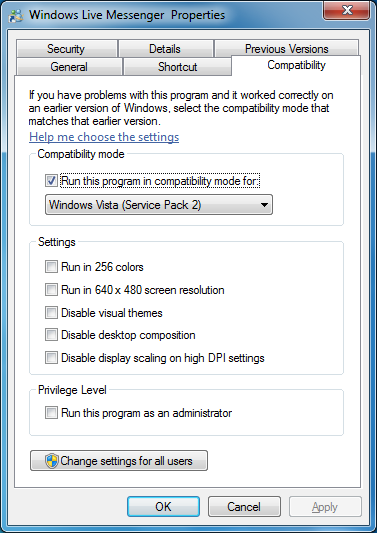
- Right Click on Windows Live Messenger and then click on Properties

- From the Compatibility tab, enable the checkbox beside Run this program in compatibility mode for: and choose for example Windows Vista (Service Pack2), then click on OK

- Now launch Windows Live Messenger, by clicking on Start > All Program > Windows Live , and then click on Windows Live Messenger
- You will notice that Windows Live Messenger icon is not placed on the task bar, but back to the notification area.

- If you still don’t see it there, just click on the Arrow in the notification area, and you will see it there.

- First we need to completely close and exit Windows Live Messenger, this is done by right clicking on the Windows Live Messenger icon from the task bar (if its already running, else skip this step and go to step # 2) and clicking on Close window


Note : If at any time later you wish to return back the Windows Live Messenger icon to the task then, then close Windows Live Messenger, go to the application properties, and then from the compatibility tab remove the checkbox from beside Run this program in compatibility mode for: and then click on OK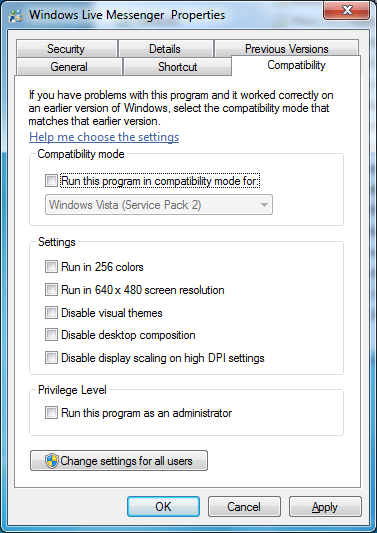
Summary
By default, Windows Live Messenger icon is placed on the task bar in Windows 7, however, this can be changed back if you desired and place the icon in the notification area just the way it was with previous versions of Windows, like Windows XP/Vista.