Close Menu
ElMajdal.netElMajdal.net
    Facebook X (Twitter) Instagram YouTube
    Facebook X (Twitter) Instagram YouTube
    ElMajdal.netElMajdal.net
    Contact Us
    • Home
    • Windows
      • Windows 11
      • Windows 10
      • Windows 8
      • Windows 7
    • Servers
      • Windows Server
      • Windows Server 2008
      • Exchange Server
    • MAC OS
    • ISA/TMG
    • About Tarek
    ElMajdal.netElMajdal.net
    Home » Enabling Telnet Client in Windows 7
    Windows 7

    Enabling Telnet Client in Windows 7

    TarekBy Tarek2 Mins Read
    WhatsApp Facebook Twitter Telegram Reddit Email
    blank
    Share
    WhatsApp Facebook Twitter Telegram Reddit Email

    Introduction

    Telnet Client is used to connect to remote machine by using the Telnet protocol. For example, I’m an old fashion IT guy, and I still like to configure Cisco Switches/Routers using telnet. If you started to use Windows 7, you will notice that telnet is not enabled by default !! Don’t panic, it is just a matter of few clicks and telnet will be enabled again.

    Telnet Client allows a computer to connect to a remote Telnet server and run applications on that server. Once logged on, a user is given a command prompt that can be used as if it had been opened locally on the Telnet server’s console. Commands that you type at the Telnet client command prompt are sent to the Telnet Server and executed there, as though you were locally logged on to a command prompt session at the server. Output from the commands that you run are sent back to the Telnet client where they are displayed for you to view.

    When you first try to run a telnet command, Windows will informs you that telnet is not recognized as a command

    To enable Telnet Client on Windows 7, follow these steps :

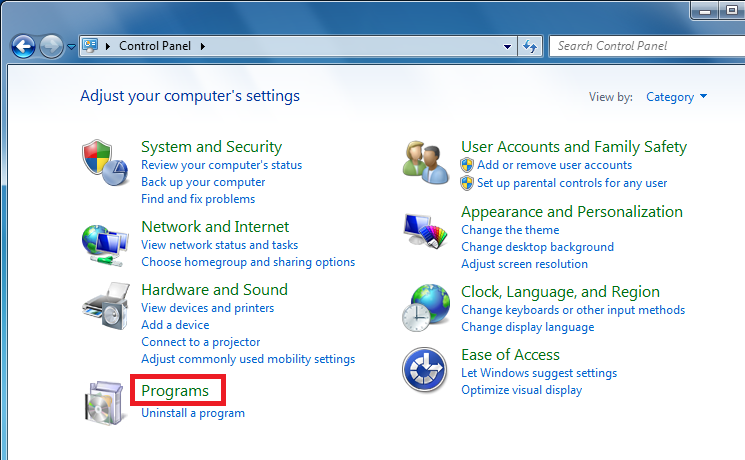
    1. Click on Start then right click on Control Panel
    2. From Control Panel, click on Programs
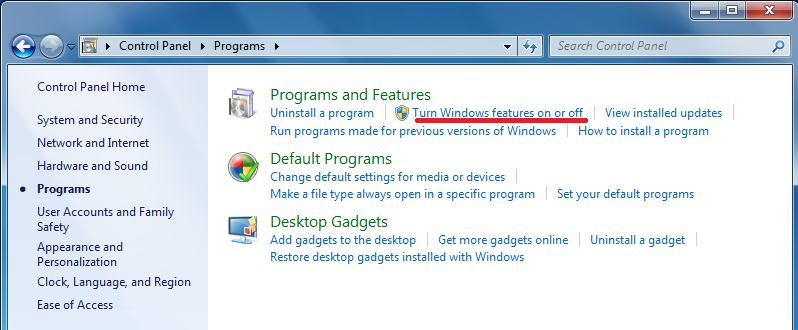
    3. Under Programs and Features, click on Turn Windows Features on or off

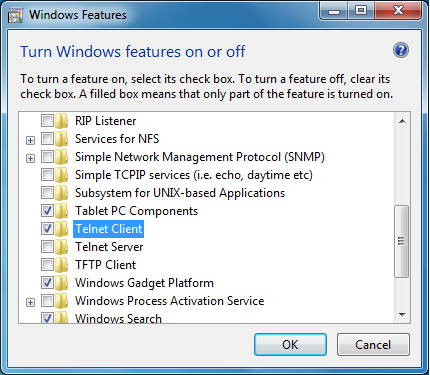
    4. From the Windows Features window, using the slider, scroll down till you reach Telnet Client, select

      the checkbox beside it, then click on OK
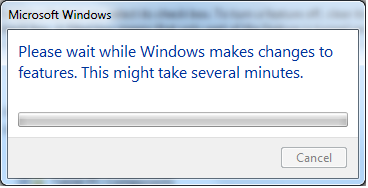
    5. The selected feature will be installed. Once it is installed, the Windows Features windows will be closed.
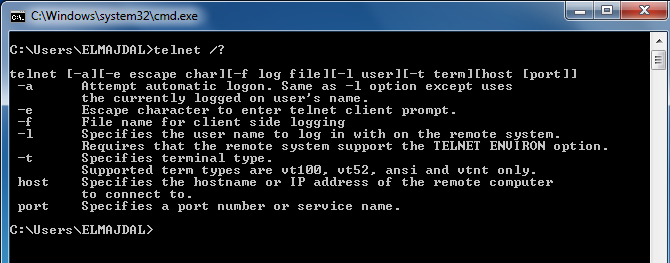
    6. To confirm that Telnet is installed, open command prompt and type telnet /?


    Summary

    By default, Telnet Client is not enabled in Windows 7. To enable it, you have to add the Telnet Client Windows Feature.

    Share. WhatsApp Facebook Twitter Telegram Reddit Email
    Previous ArticlePlacing Back Windows Live Messenger Icon To The Notification Area In Windows 7
    Next Article Enabling Remote Desktop Connection in Windows 7
    Tarek
    • Website
    • Facebook
    • X (Twitter)
    • Instagram

    Tarek Majdalani is an accomplished Windows Expert-IT Pro MVP, honored by Microsoft for eight consecutive years from 2007-2015. Holding a B.E. in Computer Engineering from the Lebanese American University, he pursued further education while working, earning various certificates showcased in his MVP profile. Tarek is currently serving as the Director of Engineering & Technology at Alrai Media Group in Kuwait. Since 2006, he has been actively contributing to the community by writing tutorials featuring tips and tricks, amassing over 300 tutorials on diverse systems.

    Related Article

    Downloading And Installing Microsoft Edge on Windows 7

    View A List Of All Shared Folders On Windows

    Upgrading Windows 7 To Windows 8 Consumer Preview Build

    Leave A Reply Cancel Reply

    Latest Posts

    How To Enable Active Directory Recycle Bin On Windows Server

    How To Check The Health Of Your Laptop’s Battery In Windows

    How To Transfer FSMO Roles In Active Directory Using PowerShell

    How To Check Active Directory Forest And Domain Functional Level In Windows Server

    Advertisement

    For any Feedback, click on the Contact Us link

    Facebook X (Twitter) Instagram YouTube
    Quick Links
    • Contact Us
    • About Tarek
    • Windows 11
    • Windows 8
    • Windows 10
    • Windows 7
    • Windows Server
    • Windows Server 2008
    • Exchange Server
    • macOS
    • ISA Server
    • Privacy Policy
    Visitors
    • Contact Us
    • About Tarek
    • Windows 11
    • Windows 8
    • Windows 10
    • Windows 7
    • Windows Server
    • Windows Server 2008
    • Exchange Server
    • macOS
    • ISA Server
    • Privacy Policy
    © ElMajdal 2007-2025

    Type above and press Enter to search. Press Esc to cancel.

    ×