Close Menu
ElMajdal.netElMajdal.net
    Facebook X (Twitter) Instagram YouTube
    Facebook X (Twitter) Instagram YouTube
    ElMajdal.netElMajdal.net
    Contact Us
    • Home
    • Windows
      • Windows 11
      • Windows 10
      • Windows 8
      • Windows 7
    • Servers
      • Windows Server
      • Windows Server 2008
      • Exchange Server
    • MAC OS
    • ISA/TMG
    • About Tarek
    ElMajdal.netElMajdal.net
    Home » Enabling Automatic Logon in Windows 7
    Windows 7

    Enabling Automatic Logon in Windows 7

    TarekBy Tarek3 Mins Read
    WhatsApp Facebook Twitter Telegram Reddit Email
    blank
    Share
    WhatsApp Facebook Twitter Telegram Reddit Email

    Introduction

    Enabling automatic logon means booting up your PC and logging to a user account profile without the need to type a password. I usually set this option on machines where I have startup applications that are needed to run after the computer boots up.

    With automatic logon enabled, you will no longer see the logon screen after you boot your Windows 7 machine.

    To enable automatic logon, follow the below steps :

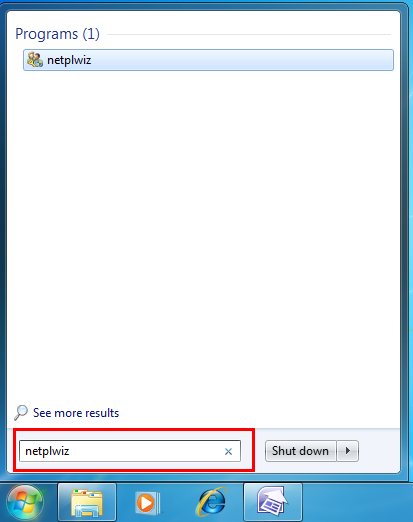
    1. Open the User Accounts page, this is done by clicking on Start then inside the search programs and files textbox, type netplwiz then click Enter.
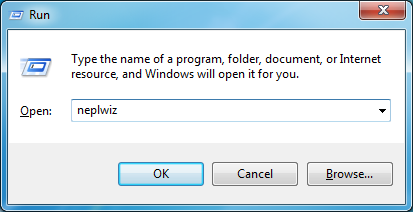
    2. It can also be opened by using the Run window, which is opened by clicking on the Windows Key + R buttons, then type either netplwiz or control userpasswords2 and then click OK

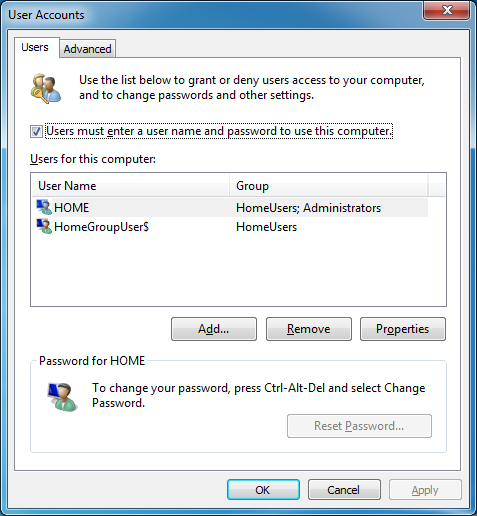
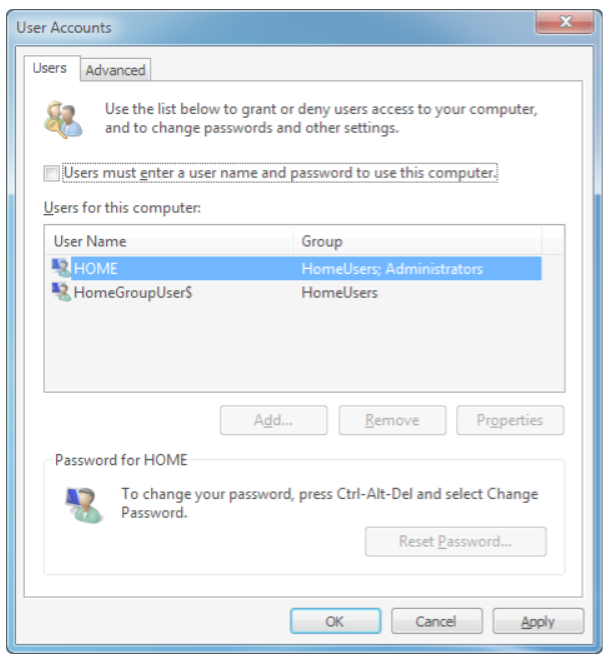
    3. The User Accounts page will open. It contains the list of user account created on this computer. Select the user for which you want to enable automatic logon for it, this is done by clicking a single click on the username. The selected username will be highlighted.
    4. Uncheck the selection beside the users must enter a user name and password to use this computer , then click OK
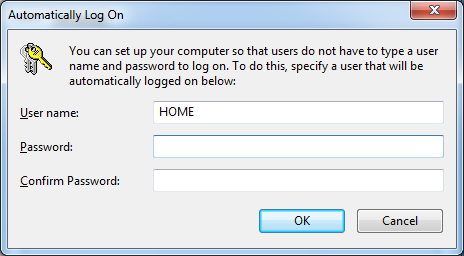
    5. A popup box will open, where you will have to enter the password for the user which you want to enable automatic logon for it. Type the password and confirm it and then click on OK
    6. If you have multiple user accounts on the computer you want to enable automatic logon and that user account does not have a password, then on step # 4, just click OK , leaving the password and confirm password textboxes empty.
    7. Reboot your machine, and you will see that this time you will not asked to enter a password to logon. The user which you have selected to enable automatic logon, has automatically logon to its user account profile.

    But how about if you later decided to enable automatic logon for another user account, or even you decided to turn off automatic logon.

    Change Automatic Logon for another User Account

    If you already set automatic logon for a user and then later on you decided to enable the automatic logon for another user, then follow these steps :

    1. Open the User Accounts page
    2. Check the option Users must enter a user name and password to use this computer

    3. Click Apply

    4. Select a different user account, the username will be highlighted

    5. Uncheck the option beside Users must enter a user name and password to use this computer

    6. Click OK

    Turn Off Automatic Logon

    • Check the option beside Users must enter a user name and password to use this computer

    • Click OK

    Share. WhatsApp Facebook Twitter Telegram Reddit Email
    Previous ArticleEnhanced User Account Control (UAC) in Windows 7
    Next Article Using The Windows 7 USB/DVD Download Tool
    Tarek
    • Website
    • Facebook
    • X (Twitter)
    • Instagram

    Tarek Majdalani is an accomplished Windows Expert-IT Pro MVP, honored by Microsoft for eight consecutive years from 2007-2015. Holding a B.E. in Computer Engineering from the Lebanese American University, he pursued further education while working, earning various certificates showcased in his MVP profile. Tarek is currently serving as the Director of Engineering & Technology at Alrai Media Group in Kuwait. Since 2006, he has been actively contributing to the community by writing tutorials featuring tips and tricks, amassing over 300 tutorials on diverse systems.

    Related Article

    Downloading And Installing Microsoft Edge on Windows 7

    View A List Of All Shared Folders On Windows

    Upgrading Windows 7 To Windows 8 Consumer Preview Build

    Leave A Reply Cancel Reply

    Latest Posts

    How To Enable Active Directory Recycle Bin On Windows Server

    How To Check The Health Of Your Laptop’s Battery In Windows

    How To Transfer FSMO Roles In Active Directory Using PowerShell

    How To Check Active Directory Forest And Domain Functional Level In Windows Server

    Advertisement

    For any Feedback, click on the Contact Us link

    Facebook X (Twitter) Instagram YouTube
    Quick Links
    • Contact Us
    • About Tarek
    • Windows 11
    • Windows 8
    • Windows 10
    • Windows 7
    • Windows Server
    • Windows Server 2008
    • Exchange Server
    • macOS
    • ISA Server
    • Privacy Policy
    Visitors
    • Contact Us
    • About Tarek
    • Windows 11
    • Windows 8
    • Windows 10
    • Windows 7
    • Windows Server
    • Windows Server 2008
    • Exchange Server
    • macOS
    • ISA Server
    • Privacy Policy
    © ElMajdal 2007-2025

    Type above and press Enter to search. Press Esc to cancel.

    ×