


Introduction
The stand-alone version of Hyper-V is now available and is called Microsoft Hyper-V Server 2008. So now if you want to work with Hyper-V and does not have a copy of Windows Server 2008, then download Microsoft Hyper-V Server 2008, which is absolutely free, easy to install and easy to configure.
Since day one of introducing Hyper-V with Windows Server 2008, people on the TechNet forums were wondering if a stand alone Hyper-V server would ever be released and how much would it cost. People were very excited for Hyper-V, but not all of them had a hand on experience on Windows Server 2008 With Hyper-V ! For those people who have been waiting, the day had came and Microsoft released Hyper-V Server 2008, which in absolutely free !
Microsoft Hyper-V Server 2008 requires specific hardware ( they are the same as Hyper-V that is available with Windows Server 2008).
You will need the following:
- An x64-based processor
- Hardware-assisted virtualization. This is available in processors that include a virtualization option; specifically, Intel VT or AMD Virtualization
- Hardware Data Execution Protection (DEP) must be available and be enabled. Specifically, you must enable Intel XD bit (execute disable bit) or AMD NX bit (no execute bit).
Before installing Hyper-V Server 2008 , let me show you a table that will summaries the differences between Hyper-V Server 2008 and Hyper-V role that is available in the different versions of Windows Server 2008.
|
Virtualization Needs |
Microsoft Hyper-V Server 2008 |
Windows Server 2008 Standard |
Windows Server 2008 Enterprise |
Windows Server 2008 Datacenter |
|---|---|---|---|---|
|
Server Consolidation |
||||
|
Test and Development |
||||
|
Mixed OS Virtualization (Linux and Windows) |
||||
|
Local Graphical User Interface |
||||
|
High Availability—Clustering |
||||
|
Quick Migration |
||||
|
Large Memory Support (Host OS) > 32 GB RAM |
||||
|
Support for > 4 Processors (Host OS) |
||||
|
Ability to Add Additional Server Roles |
||||
|
Virtualization Rights per Server License |
Each VM Guest requires a server license |
1 Physical + 1 VM |
1 Physical + 4 VMs |
1 Physical + Unlimited VMs |
Download Hyper-V Server 2008 from this link : http://www.microsoft.com/servers/hyper-v-server/how-to-get.mspx
Once you download the ISO image file, burn it to a DVD disk.
Ready to install Hyper-V Server ? Then boot your machine with the DVD disk inserted into the DVD-Rom, make sure that the DVD-Rom is higher than the Hard disk in the boot sequence of the BIOS.
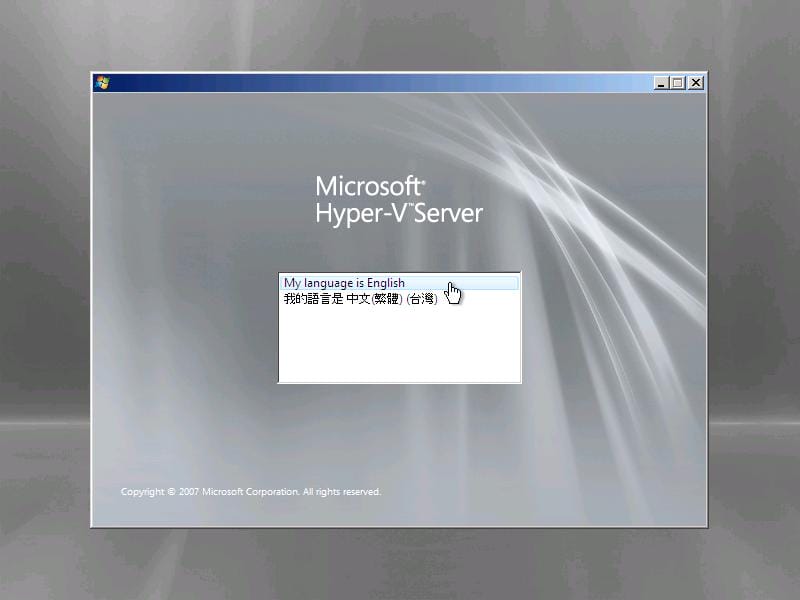
- You will be asked to choose the language of the Wizard, then will select the language that will be installed for your Hyper-V server 2008, the time and currency format and the keyboard language. Once you have made your selections, click on Next

- Click on Install now
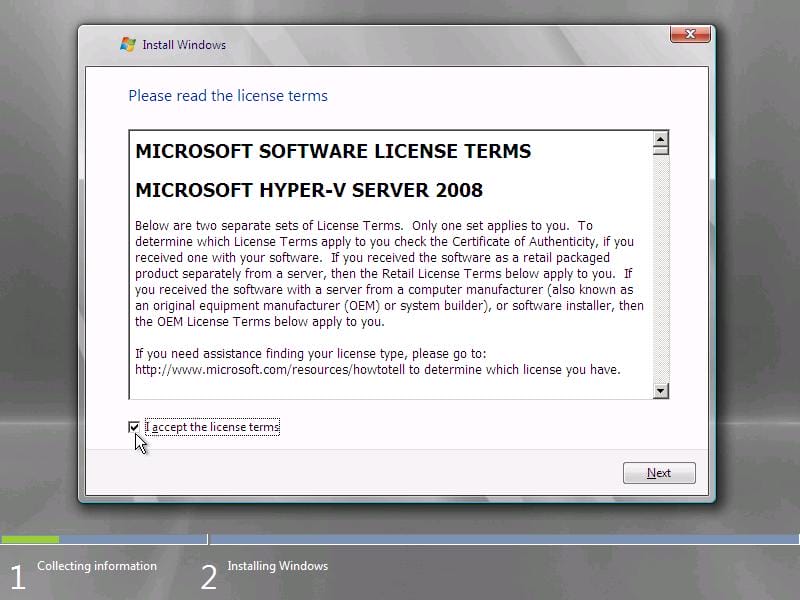
- Accept the license terms, by selecting the checkbox beside I accept the license terms, then click on Next
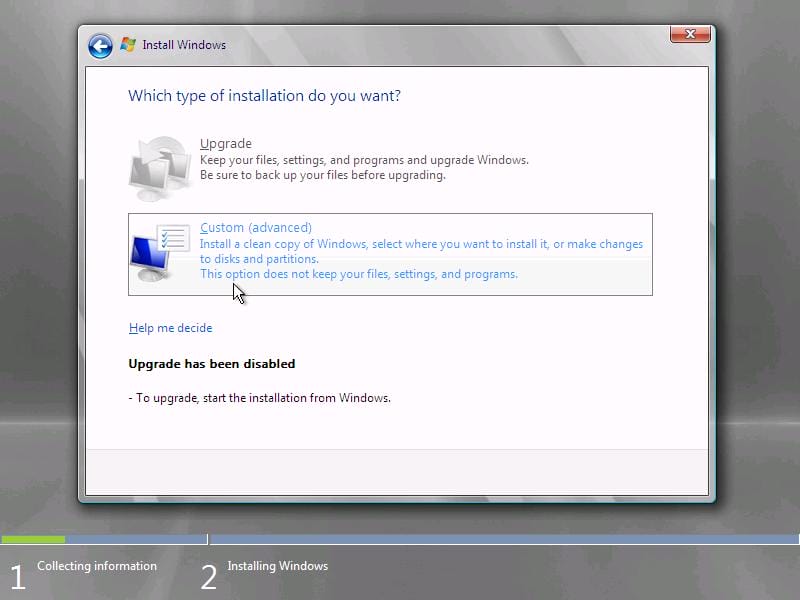
- On the Installation type page, click on Custom (advanced). You will notice that the Upgrade option is grayed out, as Hyper-V Server 2008 can not be upgraded from any previous Windows Operating Systems.
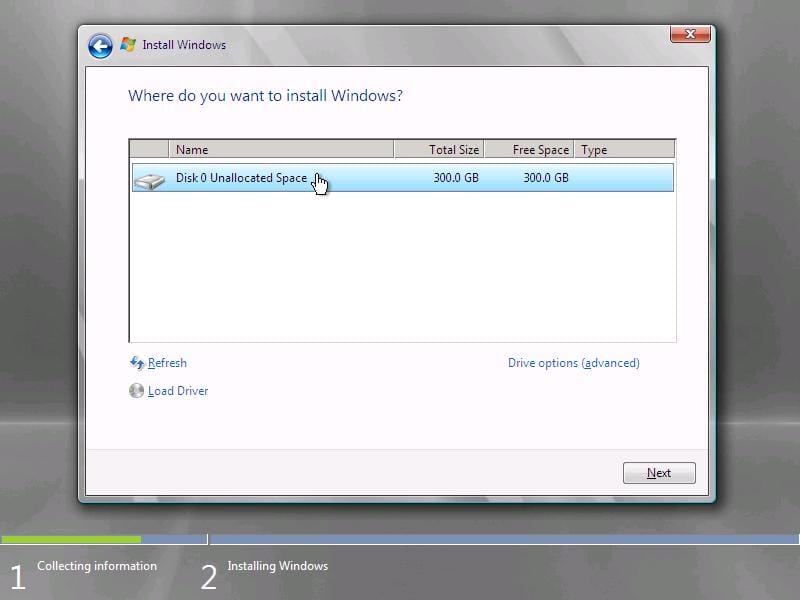
- Choose the drive/partition that you wish to install Hyper-V Server on, and then click Next
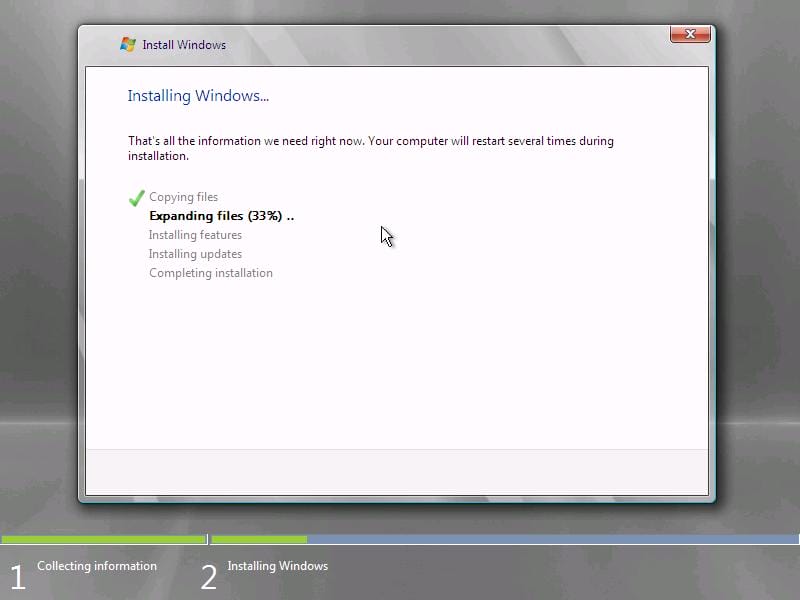
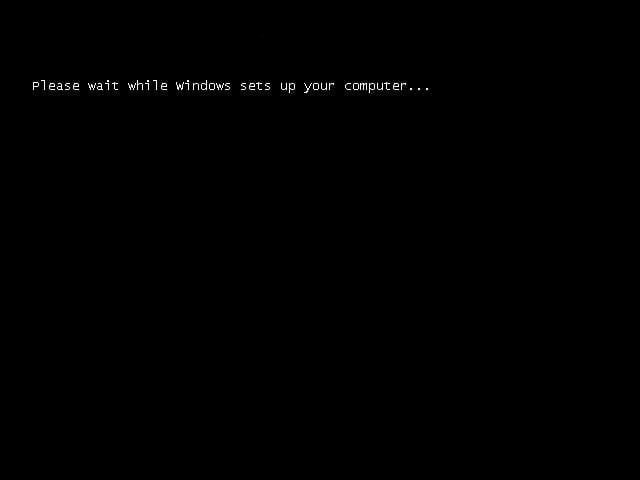
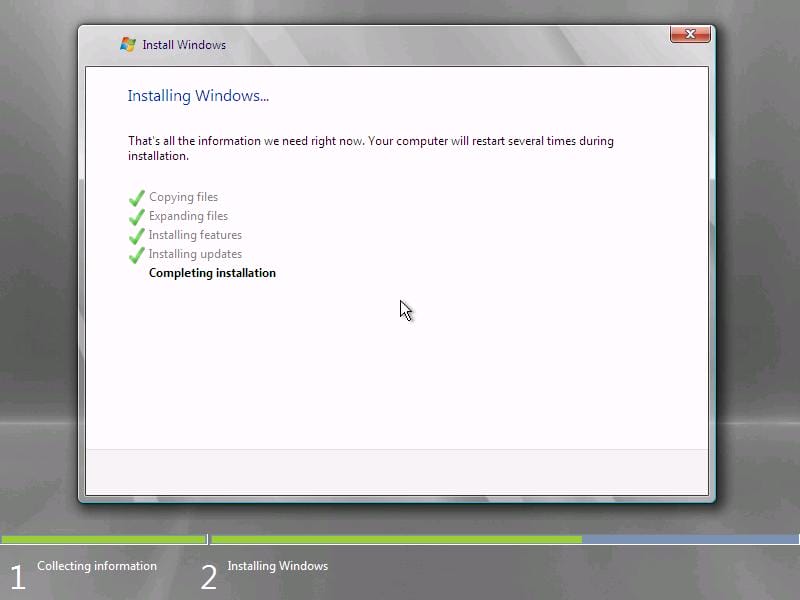
- Installing Microsoft Hyper-V Server 2008 will start, which will include several restarts during installation

- Once installation is completed, press CTRL+ALT+DEL to log on.Click on Other UserType administrator as a username and keep the password textbox empty, then hit the Enter key or click on the arrow button
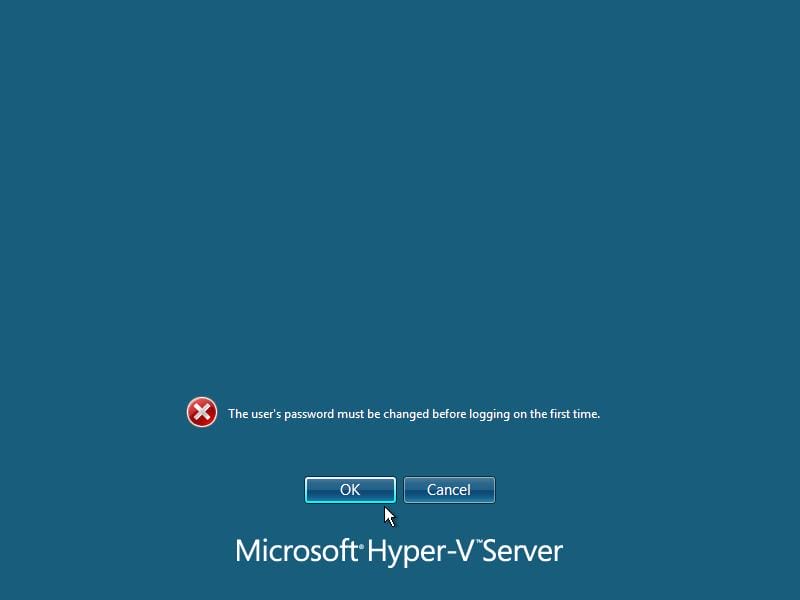
- You will be asked to change the administrator password, click OK
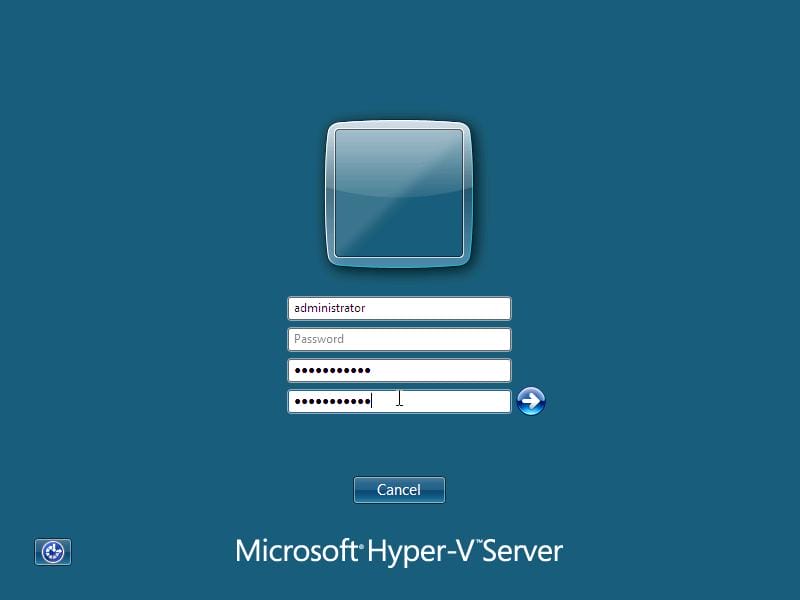
The new password must meet the following minimum requirements:
The password is at least six characters long.
The password contains characters from three of the following four categories:- English uppercase characters (from A through Z)
- English lowercase characters (from a through z)
- Base 10 digits (from 0 through 9)
- Non-alphanumeric characters (for example: !, $, #, or %)
- Type the new password and confirm it, then click EnterYou will get a confirmation message that your password has been changed, click OK
- The administrator account desktop will be prepared and in few seconds you will be logged in.
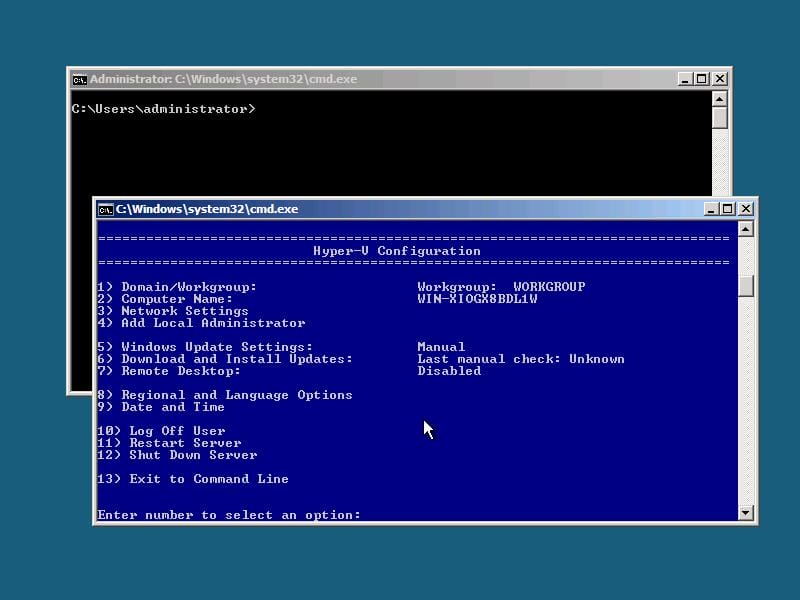
- You will noticed that the desktop of Hyper-V Server 2008 looks as Windows Server 2008 Server Core but with a new windows called Hyper-V Configuration. Now you can use the blue background screen ( Hyper-V Configuration ), where you can easily configure your basic server settings, instead of memorizing different commands as we did with Windows Server 2008 Server Core.


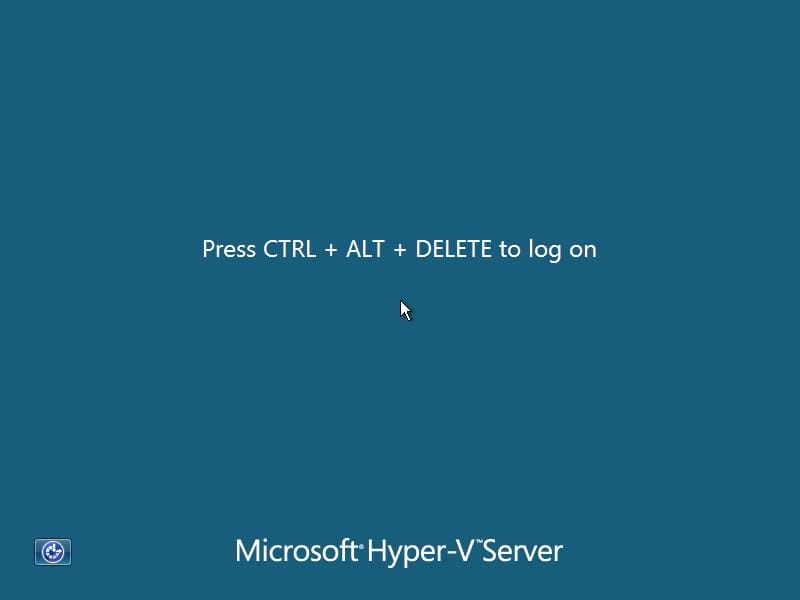 Click on Other User
 Type administrator as a username and keep the password textbox empty, then hit the Enter key or click on the arrow button
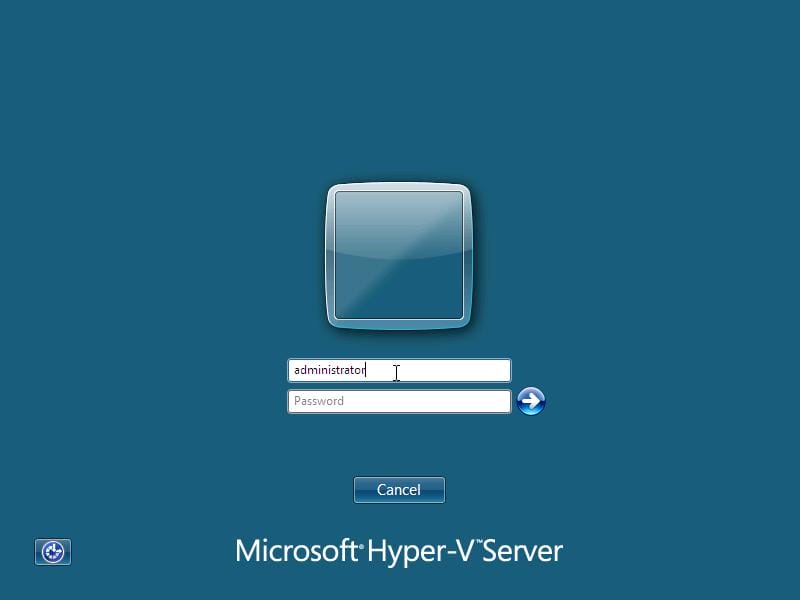
 You will get a confirmation message that your password has been changed, click OK
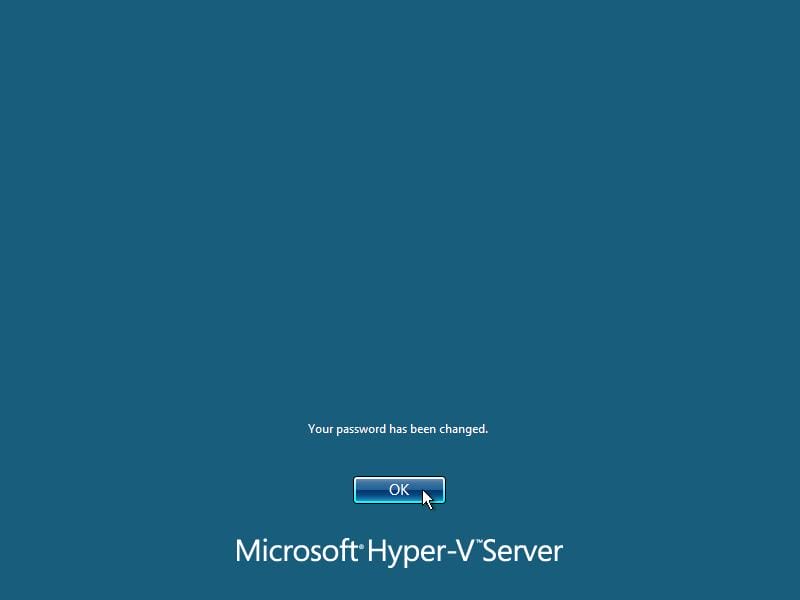

In the second part of this article, I will configure Hyper-V Server 2008 ( computer name, domain membership , etc .. ) and then in the last and third part of this article, I will show how to connect to it using the Hyper-V management console using a remote computer.
Summary
A stand alone Hyper-V Server is now available and it is free. You install it on a physical machine and configure it using the Hyper-V Configuration window, then after that, everything that you need to do with the Hyper-V server such as creating new virtual machines, is done using the Hyper-V management console using a remote machine.
Related Articles
Introducing Microsoft Hyper-V Server 2008 – Part 2 : Configuration