Close Menu
ElMajdal.netElMajdal.net
    Facebook X (Twitter) Instagram YouTube
    Facebook X (Twitter) Instagram YouTube
    ElMajdal.netElMajdal.net
    Contact Us
    • Home
    • Windows
      • Windows 11
      • Windows 10
      • Windows 8
      • Windows 7
    • Servers
      • Windows Server
      • Windows Server 2008
      • Exchange Server
    • MAC OS
    • ISA/TMG
    • About Tarek
    ElMajdal.netElMajdal.net
    Home » Slip Streaming ISA Server 2006 with Service Pack 1
    ISA Server

    Slip Streaming ISA Server 2006 with Service Pack 1

    TarekBy Tarek2 Mins Read
    WhatsApp Facebook Twitter Telegram Reddit Email
    blank
    Share
    WhatsApp Facebook Twitter Telegram Reddit Email

    Introduction

    If you plan to install ISA Server 2006, you know that once the installation is completed, you will have to install Service Pack1 to benefit from the new features available with SP1. How about if you can get SP1 to be integrated into ISA Server 2006 installation files ? so that you can directly install ISA server 2006 + SP1. In this article, I will be showing you how to slip stream ISA Server 2006 with Service Pack 1.

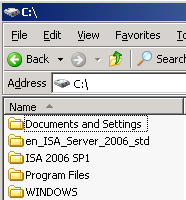
    I have copied the content of my ISA Server 2006 Standard Edition to the root drive (c:\), inside a folder called en_ISA_Server_2006_std. Also I have downloaded ISA Server 2006 SP1 ( ISA2006-KB943462-X86-ENU.msp ) and saved it inside a folder, on the root drive, called : ISA Server 2006 SP1 as shown in the below image.

    Follow the below steps to slip stream ISA Server 2006 with SP1

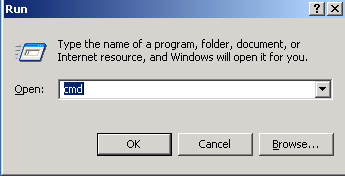
    1. Open a Command Prompt Windows by clicking Start > Run , type cmd and click on OK

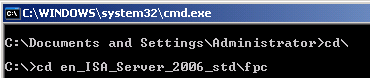
    2. Using Command Prompt, browse to the folder FPC  which is inside the folder that has the content of the ISA Server 2006 CD, by typing :
      cd <isa-folder-name\fpc> , where isa-folder-name is in my case : en_ISA_Server_2006_std

    3. Now its time to apply (integrate) SP1 from its folder inside C:\ISA Server 2006 SP1 to the ISA Server 2006 installation file by running the following command :

      c:\<isa-folder-name\fpc>Msiexec /a MS_FPC_Server.msi /p <isa-sp1-file-path>

      where c:\<isa-folder-name\fpc>  is equal to  : C:\en_ISA_Server_2006_std\fpc

      and <isa-sp1-file-path> is equal to :   C:\ISA Server 2006 SP1\ISA2006-KB943462-X86-ENU.msp

      and click on enter to execute the command line

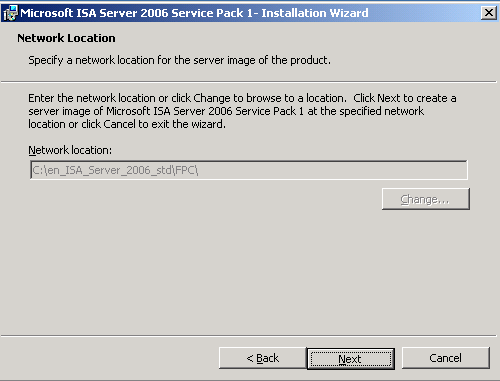
    4. Service Pack 1 installation wizard will launch, you can notice that the wizard states that it will create a server image of Microsoft ISA Server 2006 Service Pack 1 at a specified network location. Click Next

    5. The Network location will be the <isa-folder-name\fpc> folder. Which we specified previously to be : C:\en_ISA_Server_2006_std\fpc  , click Next

      This will merge SP1 with ISA Server 2006

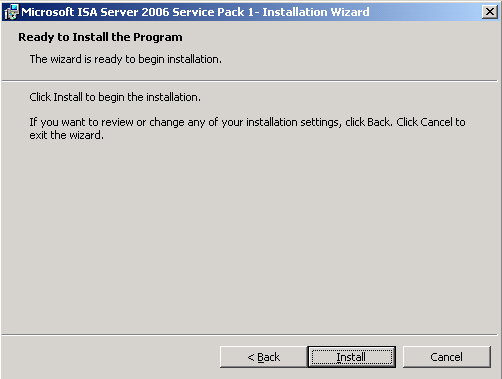
    6. On the Ready to Install the Program page, click Install

    7. Merging between SP1 & ISA Server 2006 files will start

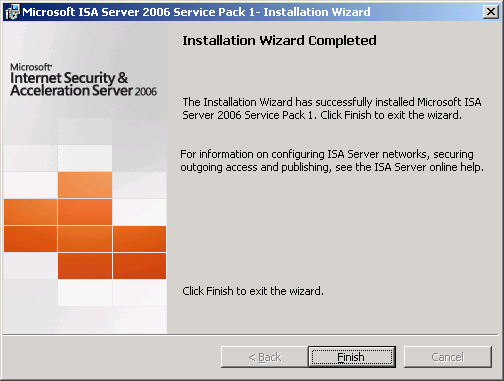
      When installation is completed, click on Finish

    Congratulation…You now have ISA Server 2006 + SP1 installation files. As you can see, slip streaming ISA Server 2006 with Service Pack 1 is an easy process and straight forward.

    Now you can simply rename the folder en_ISA_Server_2006_std to be en_ISA_Server_2006_SP1_std  🙂

    Related Articles

    How To Determine Which ISA Server 2006 Version You Have

    Share. WhatsApp Facebook Twitter Telegram Reddit Email
    Previous ArticleIntroducing Microsoft Hyper-V Server 2008 – Part 1 : Installation
    Next Article Extending Windows 7 Activation Period from 30 to 120 Days
    Tarek
    • Website
    • Facebook
    • X (Twitter)
    • Instagram

    Tarek Majdalani is an accomplished Windows Expert-IT Pro MVP, honored by Microsoft for eight consecutive years from 2007-2015. Holding a B.E. in Computer Engineering from the Lebanese American University, he pursued further education while working, earning various certificates showcased in his MVP profile. Tarek is currently serving as the Director of Engineering & Technology at Alrai Media Group in Kuwait. Since 2006, he has been actively contributing to the community by writing tutorials featuring tips and tricks, amassing over 300 tutorials on diverse systems.

    Related Article

    ISA 2004, ISA 2006 and TMG Server 2010 Version Numbers

    Enabling HTTPS Inspection With Forefront TMG Server 2010

    Search Feature For TMG 2010 Firewall Policies

    Leave A Reply Cancel Reply

    Latest Posts

    How To Enable Active Directory Recycle Bin On Windows Server

    How To Check The Health Of Your Laptop’s Battery In Windows

    How To Transfer FSMO Roles In Active Directory Using PowerShell

    How To Check Active Directory Forest And Domain Functional Level In Windows Server

    Advertisement

    For any Feedback, click on the Contact Us link

    Facebook X (Twitter) Instagram YouTube
    Quick Links
    • Contact Us
    • About Tarek
    • Windows 11
    • Windows 8
    • Windows 10
    • Windows 7
    • Windows Server
    • Windows Server 2008
    • Exchange Server
    • macOS
    • ISA Server
    • Privacy Policy
    Visitors
    • Contact Us
    • About Tarek
    • Windows 11
    • Windows 8
    • Windows 10
    • Windows 7
    • Windows Server
    • Windows Server 2008
    • Exchange Server
    • macOS
    • ISA Server
    • Privacy Policy
    © ElMajdal 2007-2025

    Type above and press Enter to search. Press Esc to cancel.

    ×