

Introduction
In part I of this article, I pointed to you the prerequisites to install Hyper-V, the differences between Hyper-V and Virtual Server 2005 R2, and then installed Hyper-V on Windows Server 2008. In this part of the article, I will use Hyper-V Manager to create my first Virtual machine and then install on it Windows Server 2008 as a guest operating system.
Once you install the Hyper-V role on Windows Server 2008, a new console will be installed on your machine, and it is called the Hyper-V Manager. Everything related to Hyper-V is done using this MMC console.
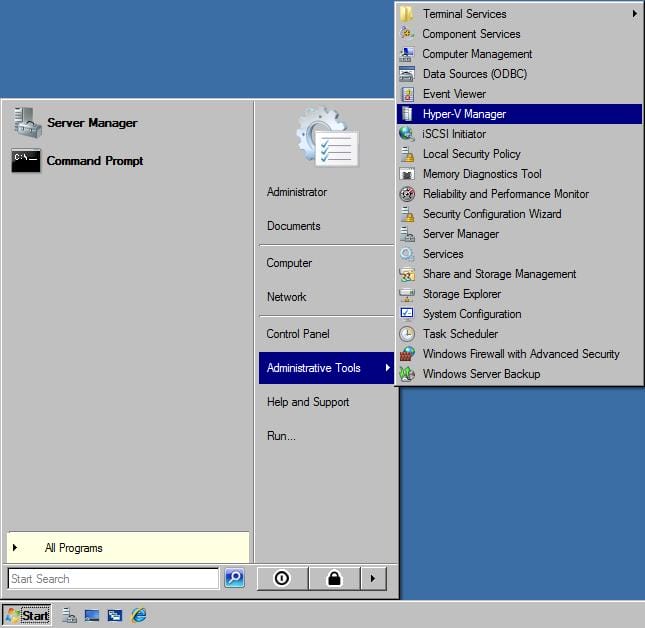
- To open Hyper-V, click on Start > Administrative Tools > Hyper-V Manager

- The first time you open Hyper-V, an End User license Agreement (EULA) page will open, take a moment to read it and then enable the checkbox beside I have read and agree to the terms of this EULA, then click on the Accept button. If you clicked on the Cancel button, then you will not be able to connect to any server running Hyper-V until you accept the EULA, which will keep popping up whenever you open Hyper-V or even try to connect to a server that has the Hyper-V role installed on.
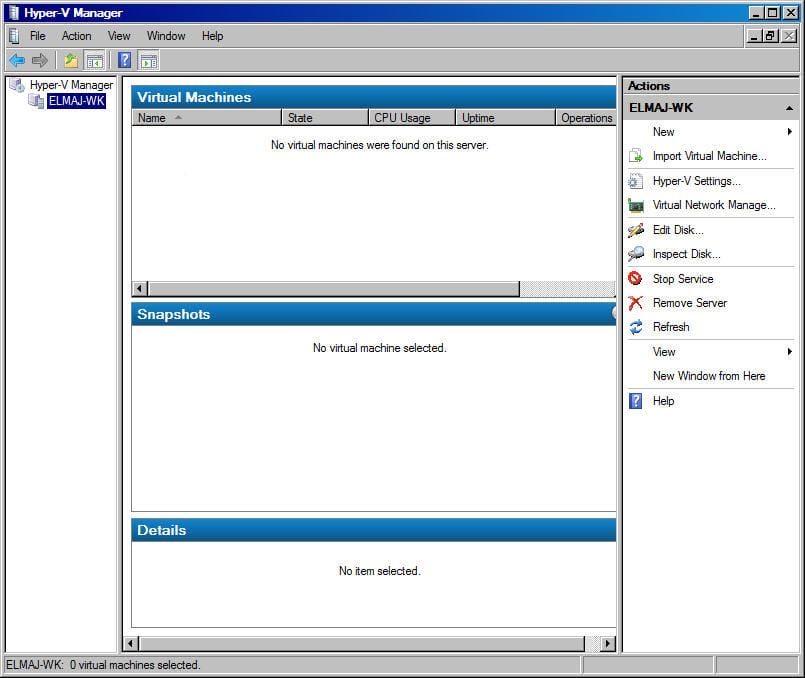
 The Hyper-V Manager console will open
 From the right side pane, under Actions, click on Connect to Server . Hyper-V is installed locally on the machine you are working with, so keep the default selection on Local Computer (the computer this console is running on) and then click on OK
The server name will be displayed in the left side pane, and now we have more Actions to select from the right side pane

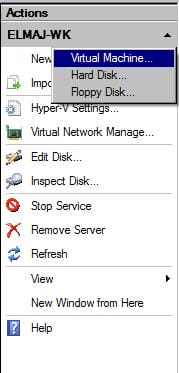
- To Create a new virtual machine, From the right side pane, click on New > Virtual Machine

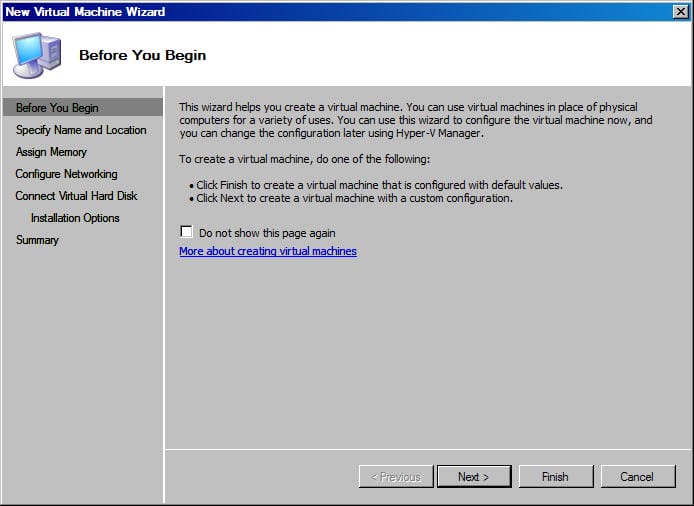
- On the Before You Begin page, click Next

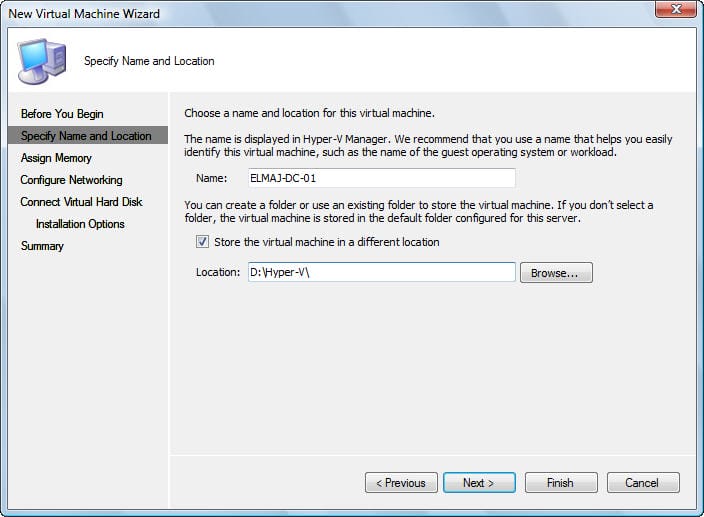
- On the Specify Name and Location page, type a meaningful name for your Virtual Machine, as for the location where the virtual machine will be stored, either keep the default location as shown, or change it to another path and then Click Next. I will name the virtual machines as
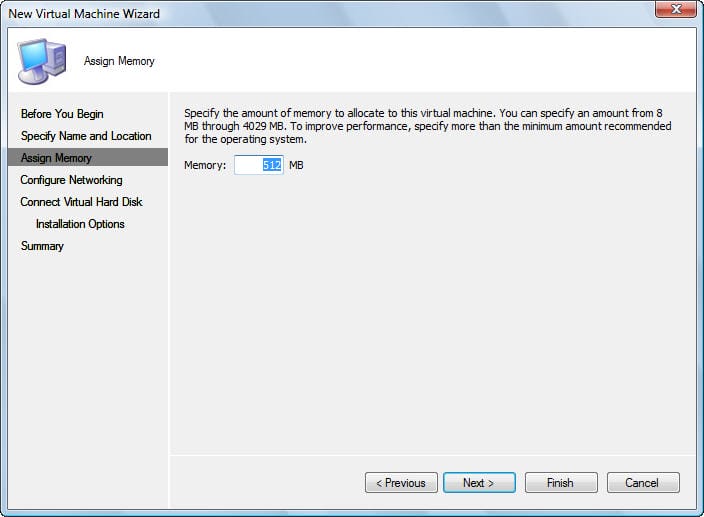
ELMAJ-DC-01 and will store it in the D drive inside the Hyper-V folder. - On the Assign Memory page, specify the amount of memory to allocate to this virtual machine. This depends on how much memory is installed on your system. Either keep the default displayed memory, or increase it. As I’m going to install Windows Server 2008, I am going to set the memory to be 2 GB. Click Next

- Select a Virtual Network from the drop down list on the Configure Networking page. You can keep the virtual machine disconnected by not selecting any Virtual Network, Click Next
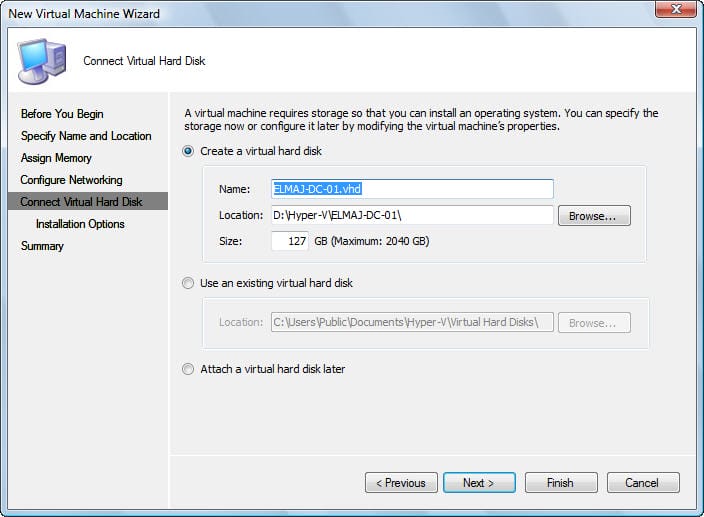
- For Every Virtual Machine, you will need to connect it to a Virtual Hard Disk, on the Connect Virtual Hard Disk page, we will need to create a new virtual hard disk, as we do not have any existing virtual hard disk ( you can use existing virtual hard disk if you already have created virtual hard disk before , or if you have downloaded a virtual hard disk from Microsoft site )I will keep the default settings ( name, location, size ) and click Next
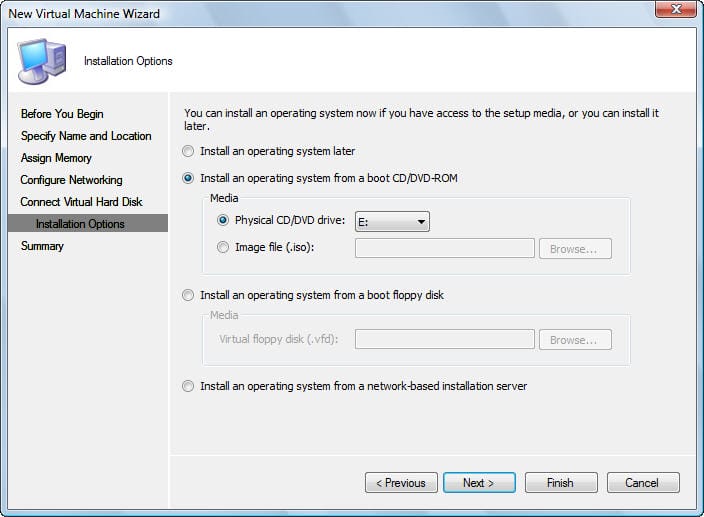
- On the Installation Options page, you have multiple options to choose from where you are going to install the operating system, or you can even postpone this operation by choosing Install an operating system later. Insert the Windows Server 2008 DVD inside the DVD Drive, and select to install an operating system from a boot CD/DVD-ROM, if you have multiple DVD Drives, make sure to select the one which has the Windows Server 2008 DVD into it. Click Next
- On the Completing the New Virtual Machine Wizard, take a moment to review your selections and then click Finish. If you need the virtual machine to be automatically started after it is created, then select the checkbox Start the Virtual Machine after it is created
- Windows Server 2008 files will start to load


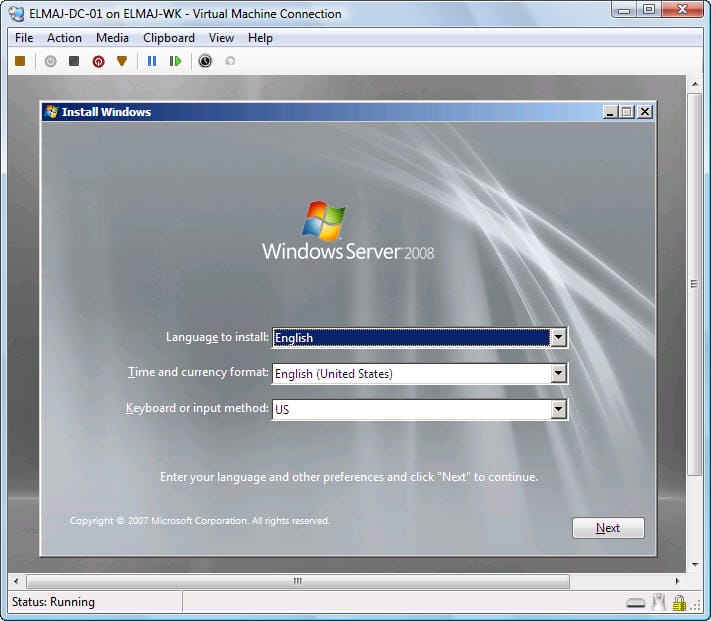
- Select the language to install, Time and currency format and the keyboard language, and then click Next

- Click on Install Now
- Enter the product key, and keep the checkbox Automatically activate Windows when I’m online to activate your Windows copy when you are online, if you wish not to activate it, as this might be a test lab on your Hyper-V, then deselect this option and then click Next

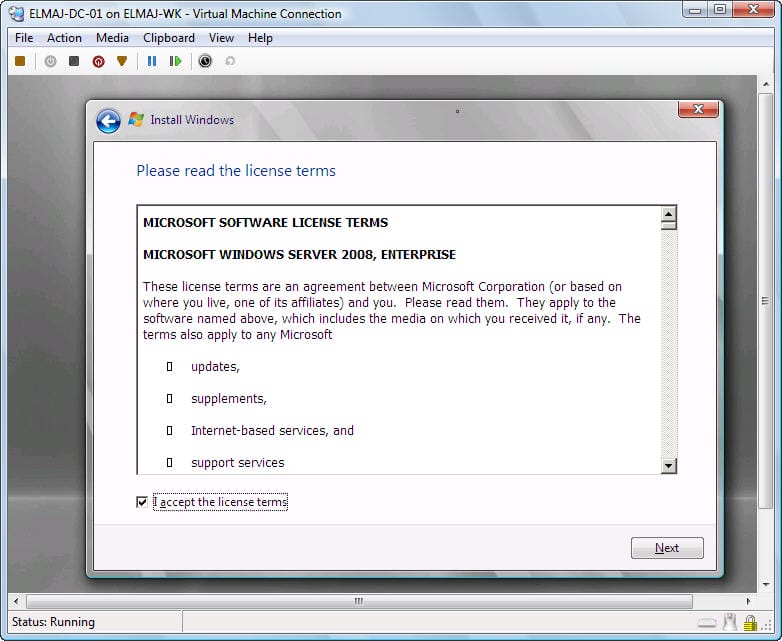
- Accept the license terms and click Next

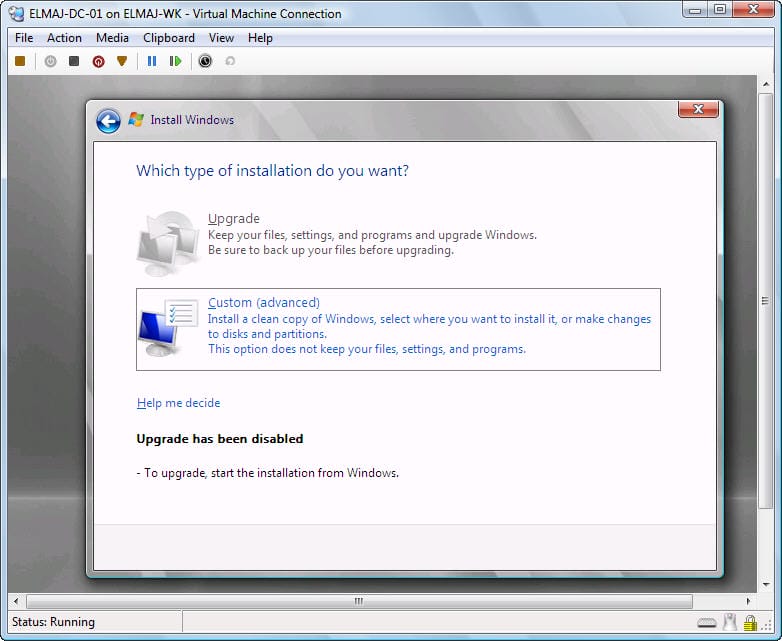
- Click Custom (advanced), on the Type of installation page
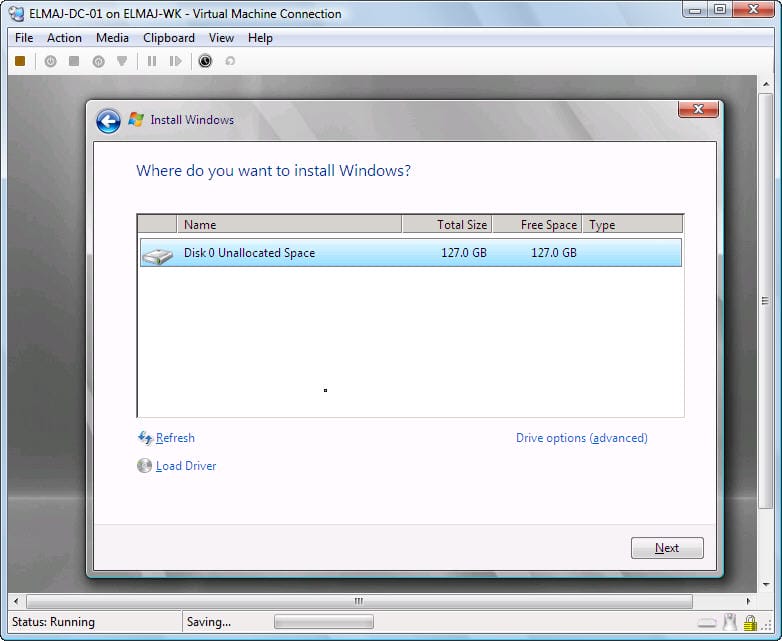
- Select the drive / partition you want to install Windows Server 2008 on it and then click Next.
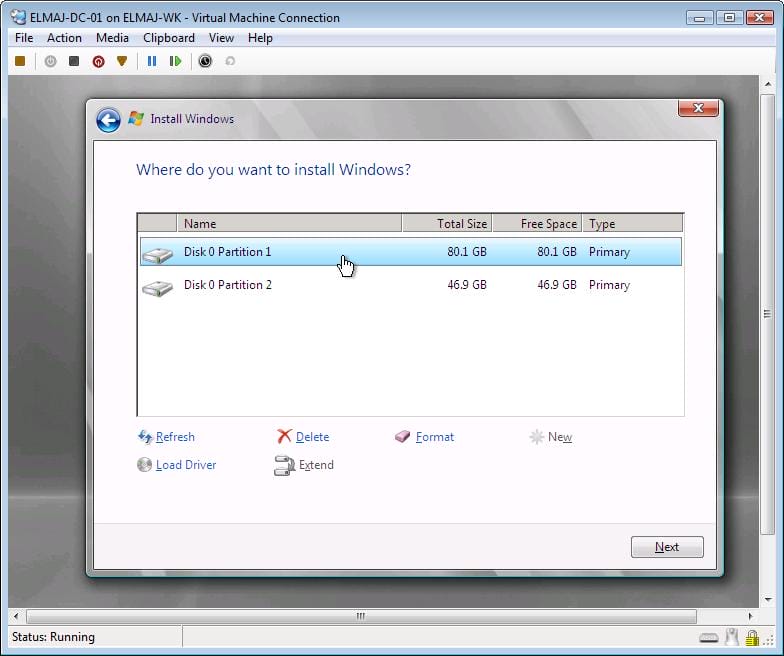
If you want to divide the virtual hard disk into two partitions, you can do this by selecting the drive , and then clicking on the Drive options (advanced) optionTo divide the drive into different partitions, click on the New option, enter the new partition size, then click on the Apply button
Once you are done with creating the partitions, select the one that you want to install Windows Server 2008 on it, and then click on Next
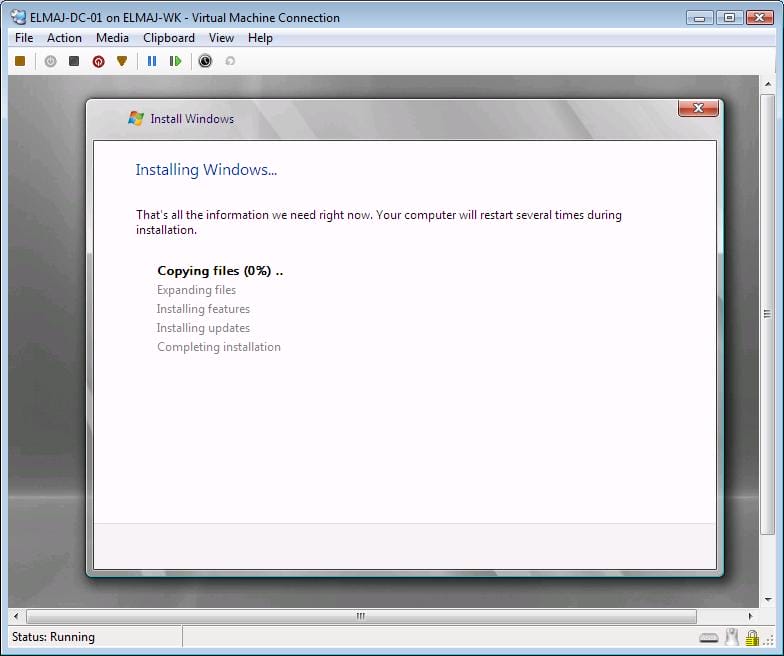
- Installation will start
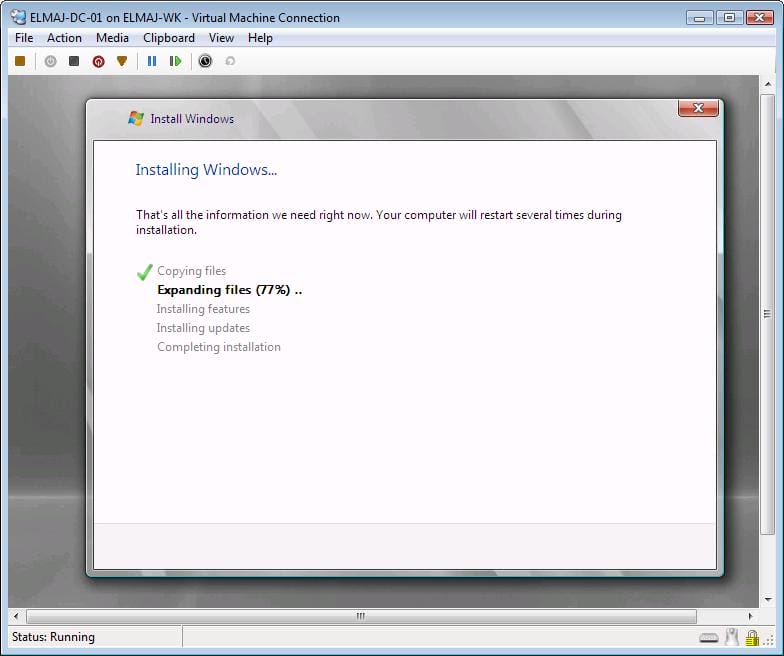
- The machine will reboot several times until the installation is completed.
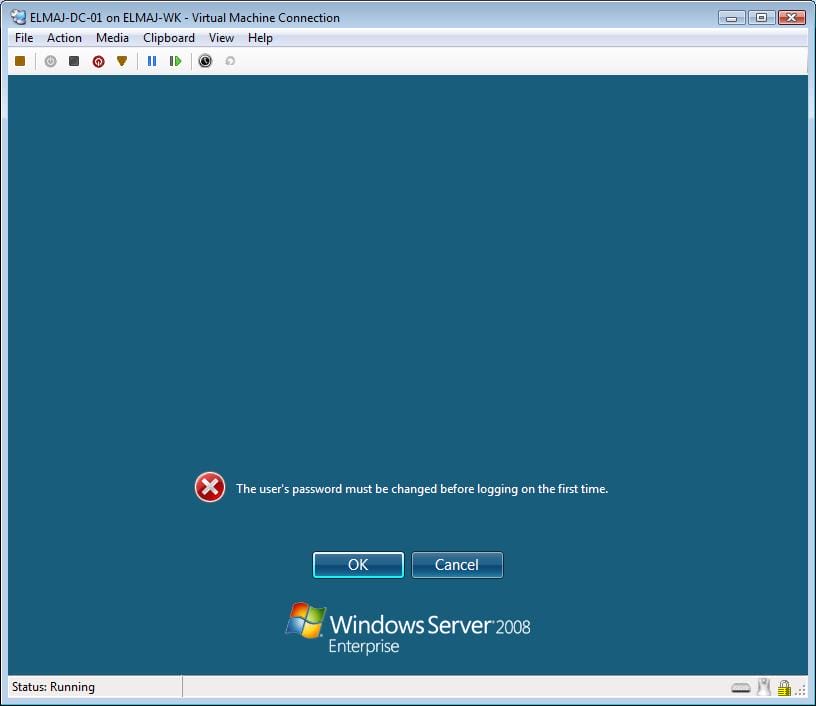
 To create a password and logon to Windows Server 2008, read my article : How To Log On To Windows Server 2008
 - One last note, in step # 10 , if you did not select to start the virtual machine after it is created, then to start and connect to the virtual machine, right click on the Virtual machine name inside Hyper-V Manager and click on Start, this will turn on the Virtual machine
 Then right click on the Virtual machine name and click Connect, this will open the Virtual machine window.

 The Hyper-V Manager console will open
 From the right side pane, under Actions, click on Connect to Server . Hyper-V is installed locally on the machine you are working with, so keep the default selection on Local Computer (the computer this console is running on) and then click on OK


 To divide the drive into different partitions, click on the New option, enter the new partition size, then click on the Apply button
 To create a password and logon to Windows Server 2008, read my article :
 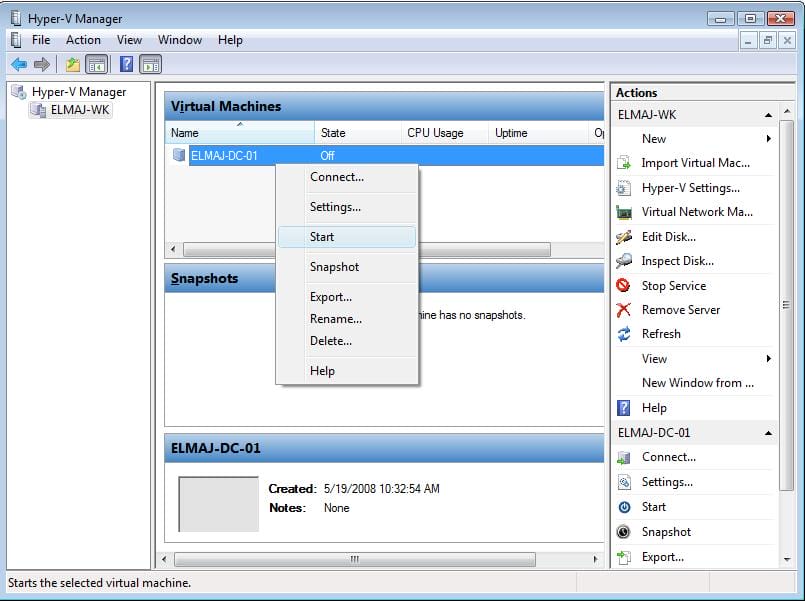 Then right click on the Virtual machine name and click Connect, this will open the Virtual machine window.
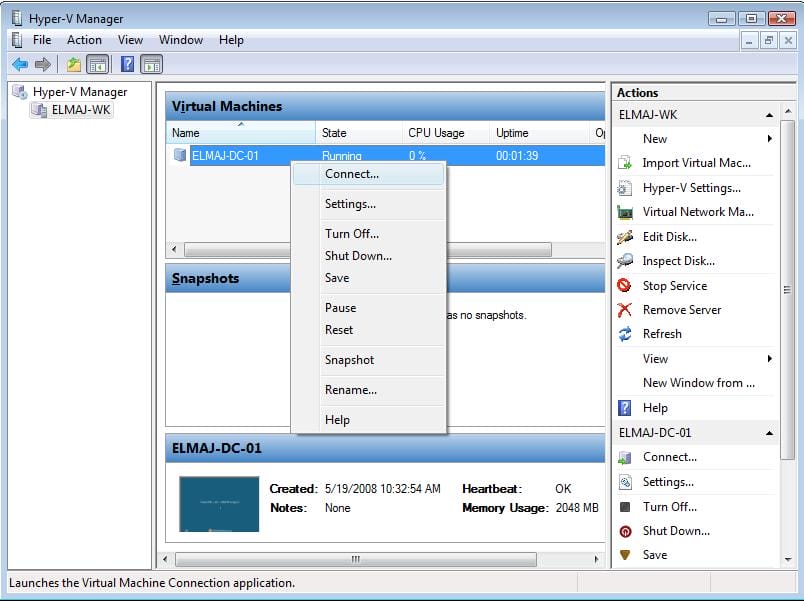
Summary
In part 2 of this two parts article, I showed you how to use Hyper-V Manager to create your first Virtual Machine, and then installed Windows Server 2008 as a guest operating system. Now that you know how to install and use Hyper-V, start building your own test labs and experience the next level of virtualization. Start using a virtualized computing environment to improve the efficiency of your computing resources by utilizing more of your hardware resources. Enjoy Hyper-V !
Related Articles
Installing Hyper-V and Deploying Windows Server 2008 as Your First Virtual Machine – Part I
How To Log On To Windows Server 2008