


Ransomware, a persistent threat causing file access restrictions until a ransom is paid, has been a longstanding issue for computer users and businesses. To address this concern, Microsoft has integrated ransomware protection features into its built-in Windows Security software since Windows 10.
Windows Security provides a two-tiered approach to ransomware protection. The initial level involves default malware scans, while the second level requires manual activation of Windows’ ransomware protection. Although not enabled by default due to potential compatibility issues with certain apps, this feature permits only approved applications to modify your files, preventing ransomware from encrypting and locking them. Users may encounter occasional troubleshooting when using this protection feature.
Controlled folder access monitors file changes made by applications and notifies you of any suspicious activity when an app attempts to modify files within a protected folder. This guide aims to assist you in enabling and configuring Controlled folder access using Microsoft Defender Antivirus to enhance the security of your Windows 10 device and data against ransomware.
Microsoft Defender Antivirus, the default anti-malware solution on Windows 10, safeguards your computer from various threats such as viruses, spyware, rootkits, and ransomware out-of-the-box. In addition to its primary antivirus functions, Microsoft Defender Antivirus includes the “Controlled folder access” feature, enhancing protection for your files against ransomware.
Additionally, Windows Security offers Ransomware Data Recovery, automatically syncing common data folders with Microsoft OneDrive for file backup. Victims of ransomware, with this feature enabled, can utilize OneDrive for file recovery in the event of encryption.
In Windows 10 version 1903, Windows Defender’s Ransomware Protection is disabled by default. This guide provides instructions on enabling it to fortify your computer against ransomware attacks. However, it’s important to note that if you have third-party antivirus software installed and Windows Defender’s real-time protection is disabled, access to the Ransomware Protection features screen and the Controlled Folder Access feature will be unavailable.
Following these steps will activate Windows’ built-in ransomware protection, enhancing the security of your important files and folders.
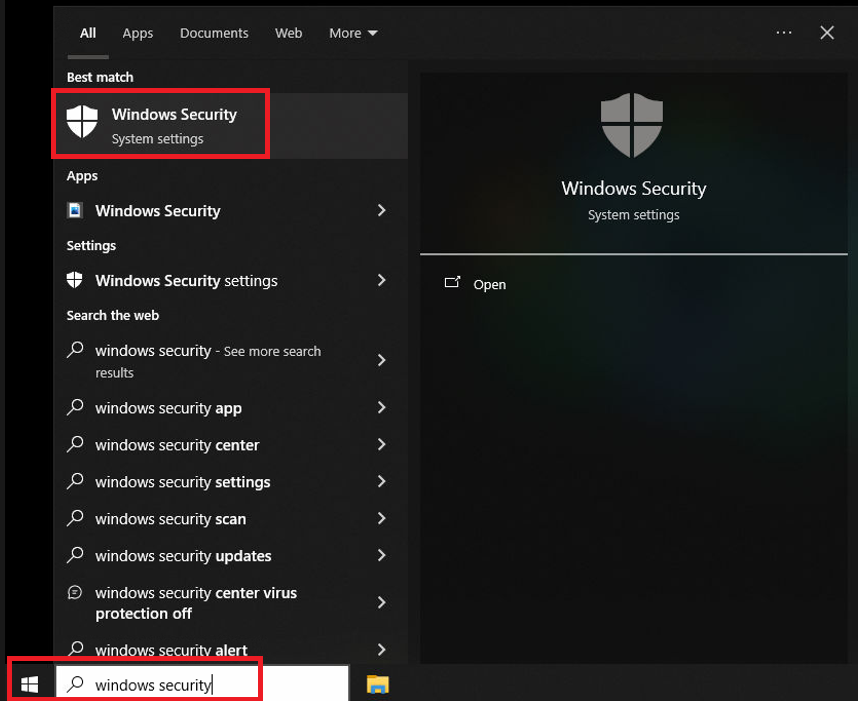
- Navigate to the Windows Security app by either searching for Windows Security in the start menu or accessing it through Settings > Privacy & Security > Windows Security.

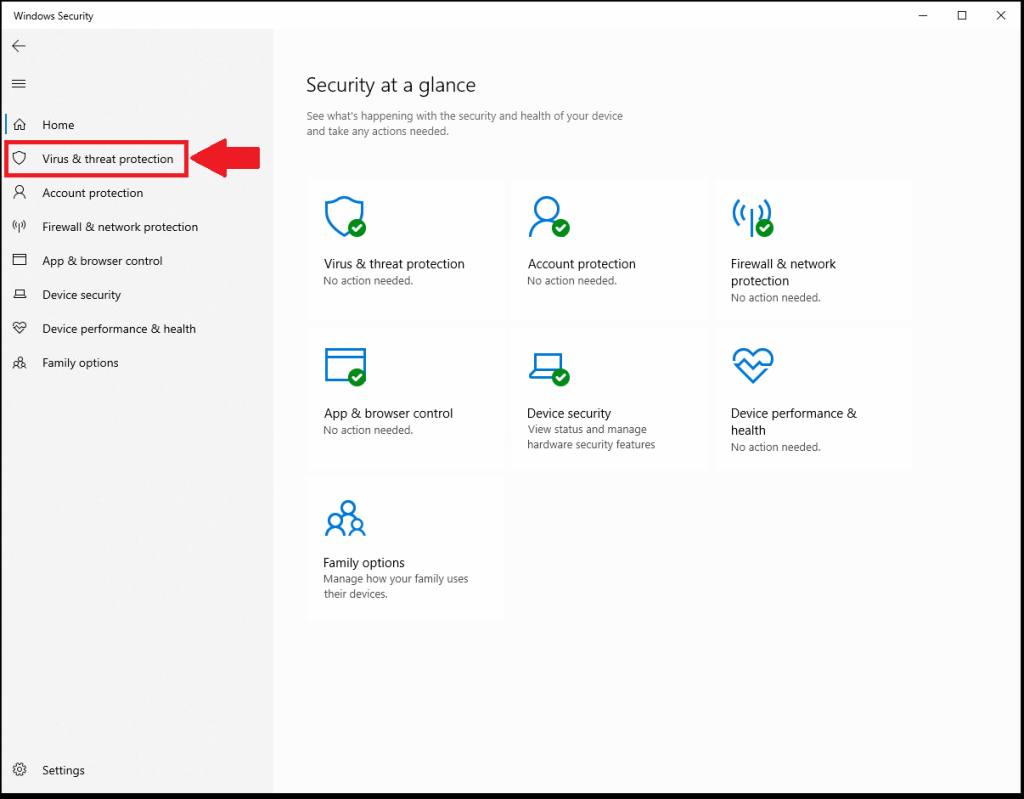
- In the Windows Security app, select Virus and threat protection.

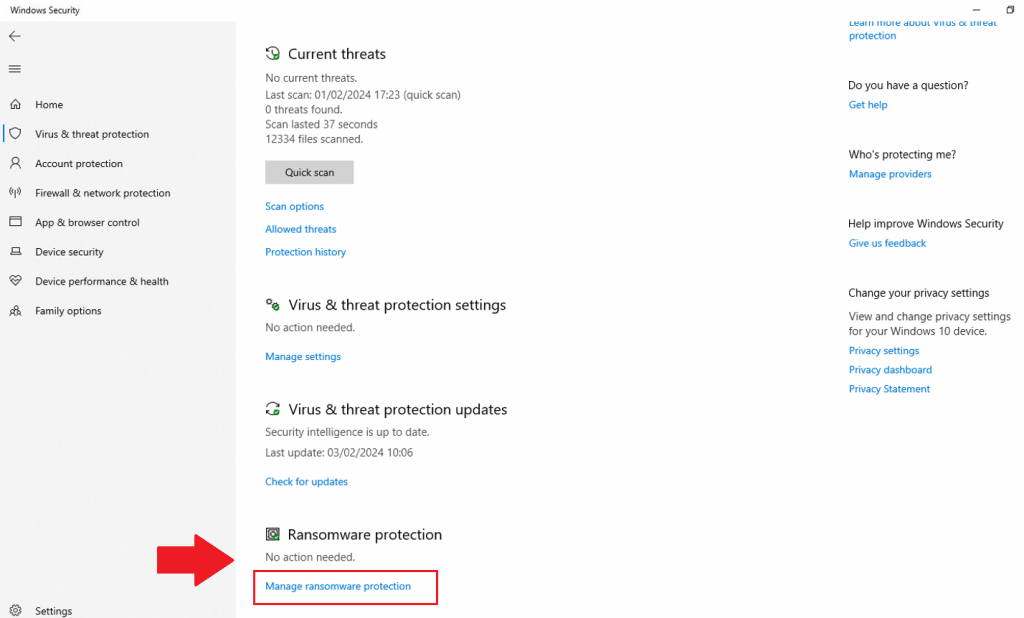
- From the middle pane, scroll down and click on Manage ransomware protection to access the ransomware protection settings.

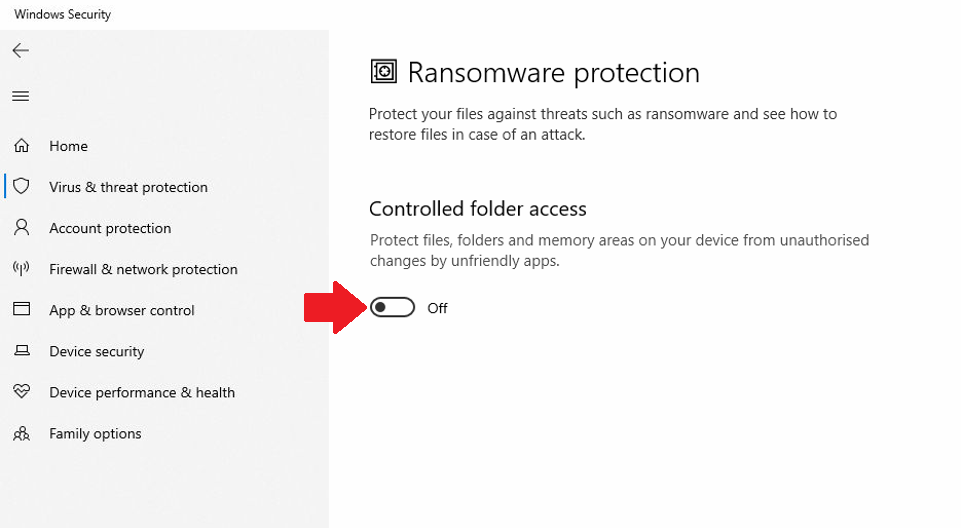
- Within the ransomware protection settings, locate and enable the Controlled folder access feature.

- By turning on Controlled folder access, you ensure that unauthorized applications cannot make changes to your documents, pictures, videos, music and favorites folders.
How to modify the settings of Controlled Folder Access
After activating Controlled Folder Access, three additional control panes become visible:
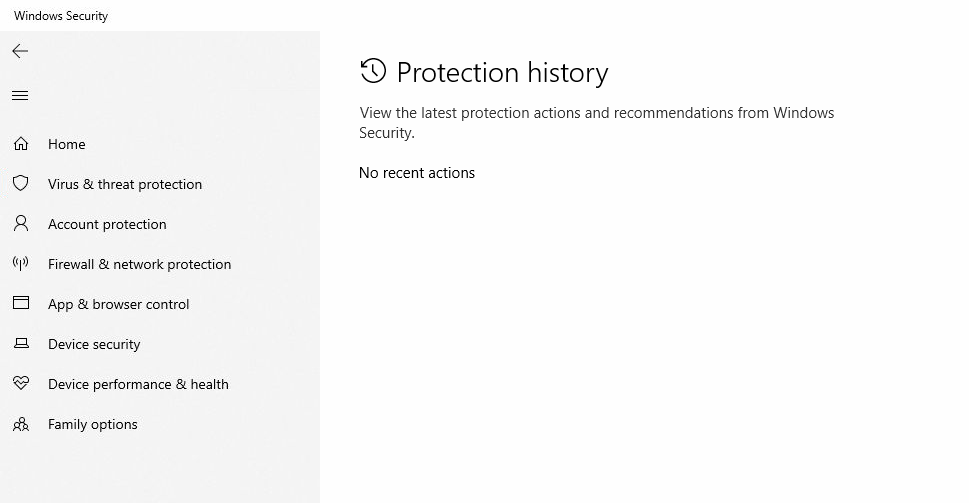
- Block history
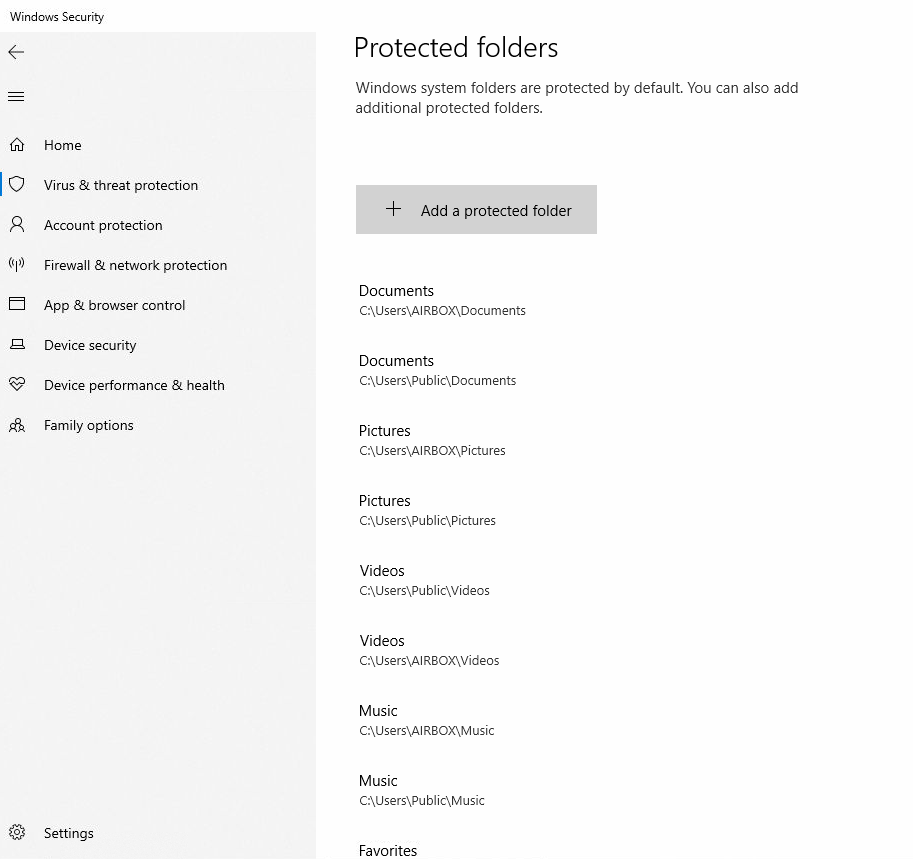
- Protected folders
- Allow an app through Controlled folder access.
 By default, Controlled Folder Access permits only a predetermined list of approved applications to modify files within the Documents, Pictures, Videos, and Music folders on your computer. These approved apps provide flexibility in customizing the system’s functionality.
For instance, you have the option to enhance protection by adding additional folders through the Protected folders screen. You can also manage which applications are authorized to make changes to these protected folders using the Allow an app through Controlled folder access screen.
The following outlines the actions you can take.
- Block History:
As per information on a Windows security page, applications deemed “friendly” by Microsoft are consistently permitted to make changes to your protected folders. However, this does not guarantee that every desired app will automatically gain approval. If you encounter an unusual error, such as a This file cannot be found message when attempting to save a file after enabling Controlled Folder Access, it’s advisable to check the Block history section. Here, you can review which app was blocked and the targeted folder for writing. If the problematic app is identified, you can add it to the list of permitted programs, a process we’ll discuss shortly.

- Protected Folders:
To safeguard additional folders from ransomware, such as the Desktop folder, which is not protected by default, navigate to Protected folders and select the Add a protected folder option.
 Subsequently, locate and select the folder you wish to protect, then click the Select Folder button.
 If needed, you can remove protection from custom-added folders (excluding default ones) by returning to the Protected folders screen, selecting the added folder, and clicking the Remove button.

- Allow an App Through Controlled Folder Access:
If you encounter difficulties with an app and wish to include it in the list of permitted applications, return to the Ransomware protection page and choose Allow an app through Controlled folder access. After clicking Add an allowed app
 you can access Recently blocked apps to view a list of apps attempting to write to your protected folders. To unblock a specific app, click the plus button next to its name.
 While this setup should typically be a one-time process for each app, it may be frustrating. Although you have the option to disable Ransomware Protection at any time, exercise caution, especially if you perceive a high risk of infection and lack proper backups.
 Subsequently, locate and select the folder you wish to protect, then click the Select Folder button.
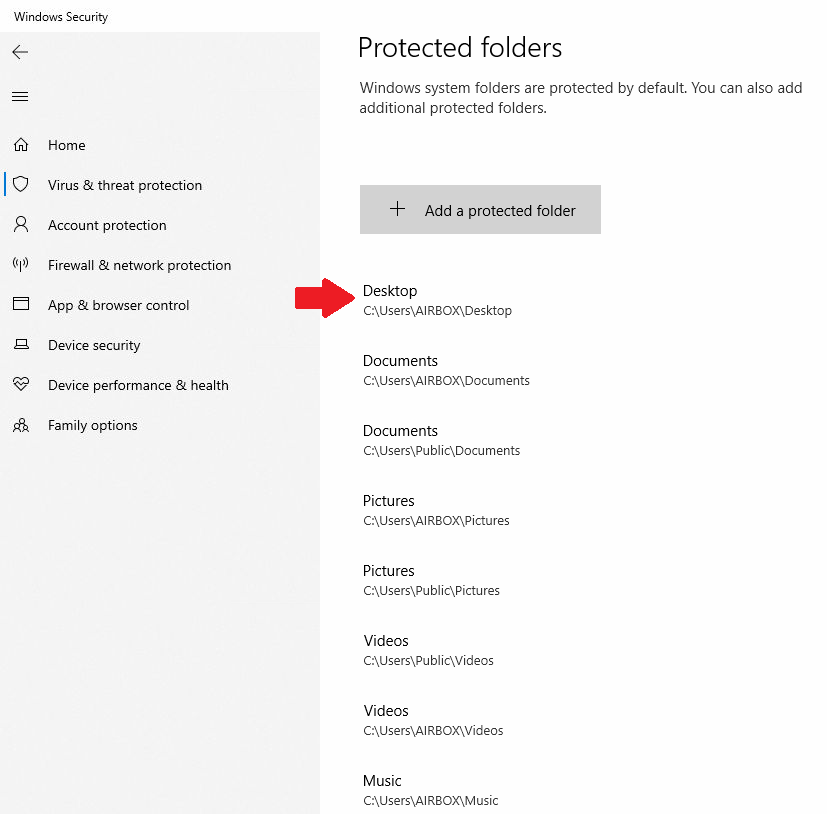 If needed, you can remove protection from custom-added folders (excluding default ones) by returning to the Protected folders screen, selecting the added folder, and clicking the Remove button.
 you can access Recently blocked apps to view a list of apps attempting to write to your protected folders. To unblock a specific app, click the plus button next to its name.
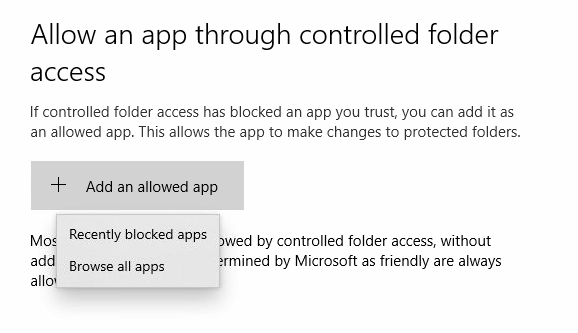 While this setup should typically be a one-time process for each app, it may be frustrating. Although you have the option to disable Ransomware Protection at any time, exercise caution, especially if you perceive a high risk of infection and lack proper backups.
What to undertake if your computer falls victim to ransomware:
In the event that all your protective measures prove ineffective and you ascertain that your computer has been infected with ransomware, it is imperative to follow three crucial steps:
- Disconnect your computer from Wi-Fi or Ethernet – some ransomware has the potential to spread to other network-connected computers, necessitating the immediate limitation of damage.
- Refrain from paying the ransom – engaging in such an action could be deemed illegal, contingent on the hackers’ location attempting to extort you. Moreover, paying does not assure the restoration of access to your files.
- Avoid connecting your backups, if available – ransomware is highly likely to target and attempt to destroy these files as well.
Microsoft advises conducting a comprehensive scan of your computer using Windows Security. Another viable option is Malwarebytes, renowned for its effectiveness in eliminating malware from a computer, and it is available for personal use free of charge. If these solutions prove ineffective, a full PC reset may be necessary.
If you lack confidence in your ability to remove the ransomware independently, consider seeking professional assistance. Ensuring that your computer is thoroughly cleaned before attempting to recover your backups is the best course of action.