Close Menu
ElMajdal.netElMajdal.net
    Facebook X (Twitter) Instagram YouTube
    Facebook X (Twitter) Instagram YouTube
    ElMajdal.netElMajdal.net
    Contact Us
    • Home
    • Windows
      • Windows 11
      • Windows 10
      • Windows 8
      • Windows 7
    • Servers
      • Windows Server
      • Windows Server 2008
      • Exchange Server
    • MAC OS
    • ISA/TMG
    • About Tarek
    ElMajdal.netElMajdal.net
    Home » How To Setup MAC OSX To Log Out Automatically After a Period of Inactivity
    macOS

    How To Setup MAC OSX To Log Out Automatically After a Period of Inactivity

    TarekBy Tarek2 Mins Read
    WhatsApp Facebook Twitter Telegram Reddit Email
    blank
    Share
    WhatsApp Facebook Twitter Telegram Reddit Email

    Introduction

    With MAC OSX, you can set your computer to log out after a period of inactivity. This means all currently running apps close out as well as all documents which save in their current state through the Versions & Resume features. This is very useful when you don’t want just anyone to walk up to your Mac and have full access to your data.

    Automatic logout helps ensure that your information is secure when your computer is unattended. It is also great for use in school computer labs and in situations where computers are shared. By automatically logging out an inactive user, the Mac becomes available for the next person to use.

    To setup automatic logout, follow the below steps :

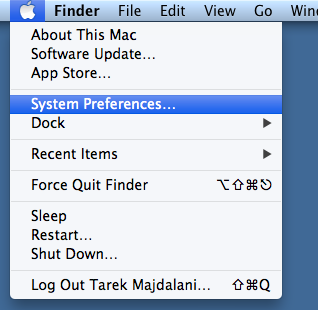
    1. Open System Preferences. Do this by clicking on the Apple  logo  in the top left side of the screen and then click on System Preferences…

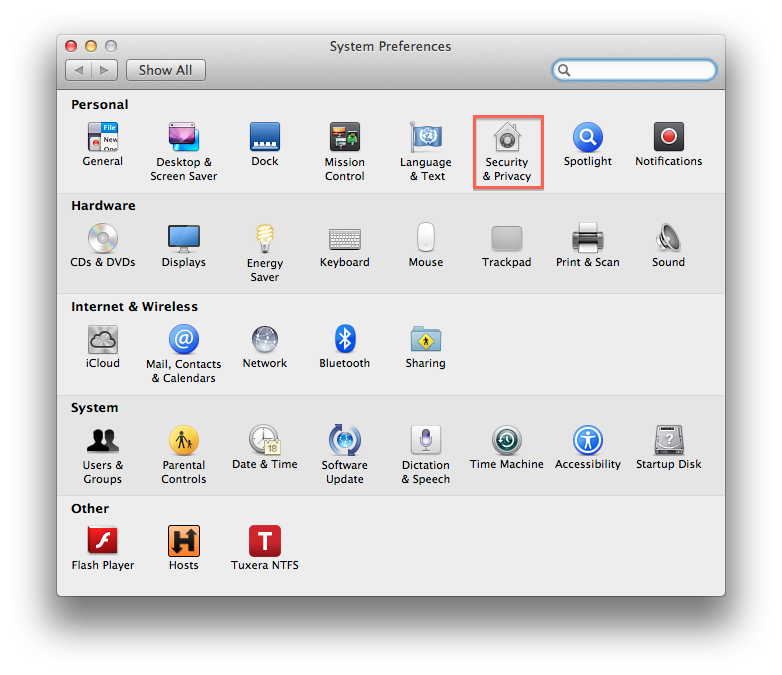
    2. Click on Security & Privacy

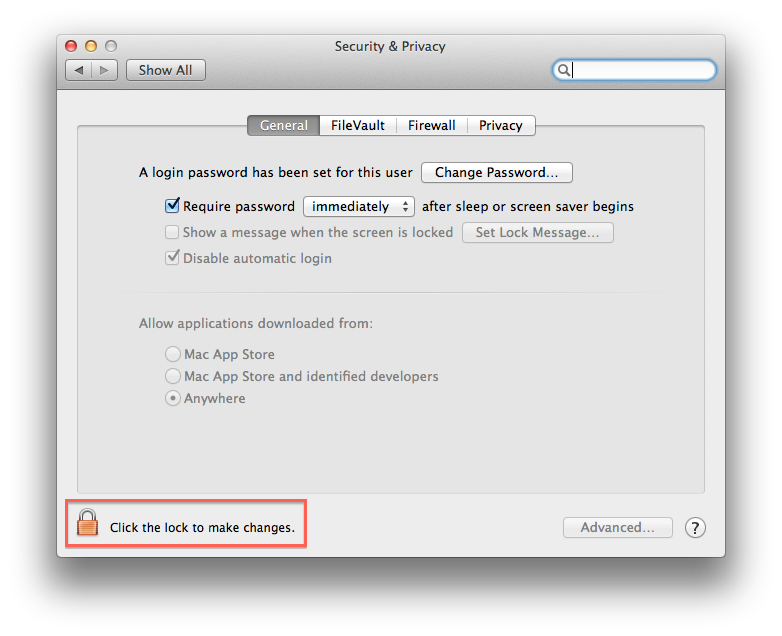
    3. Under the  General, click the Lock button so that you be able to make changes.

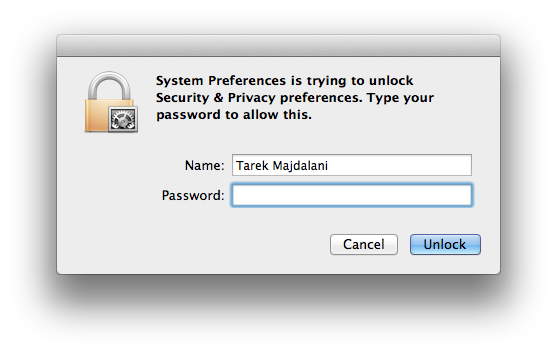
    an authentication dialog box will open, where you will need to type an administrator username and password, then click Unlock

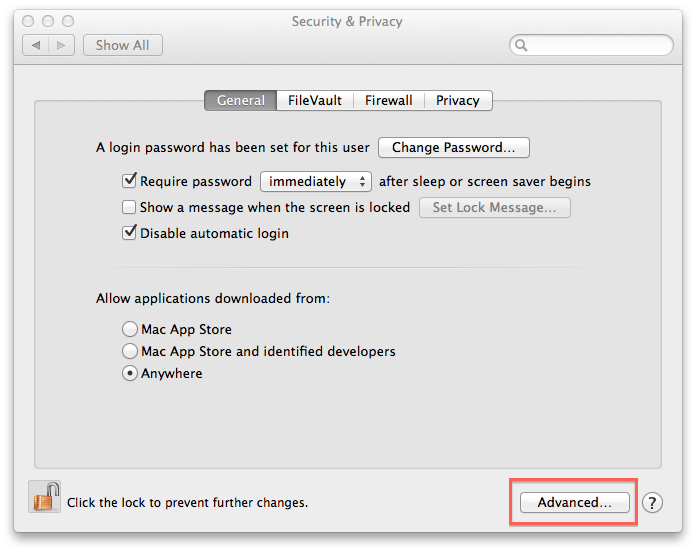
    Once you authenticate, the Advanced… button will be enabled, click on Advanced…

    4. Check the box next to Log out after  [   ] minutes of inactivity and set your time limit. The default setting is 60 minutes

    Set the required amount of minutes and then click OK

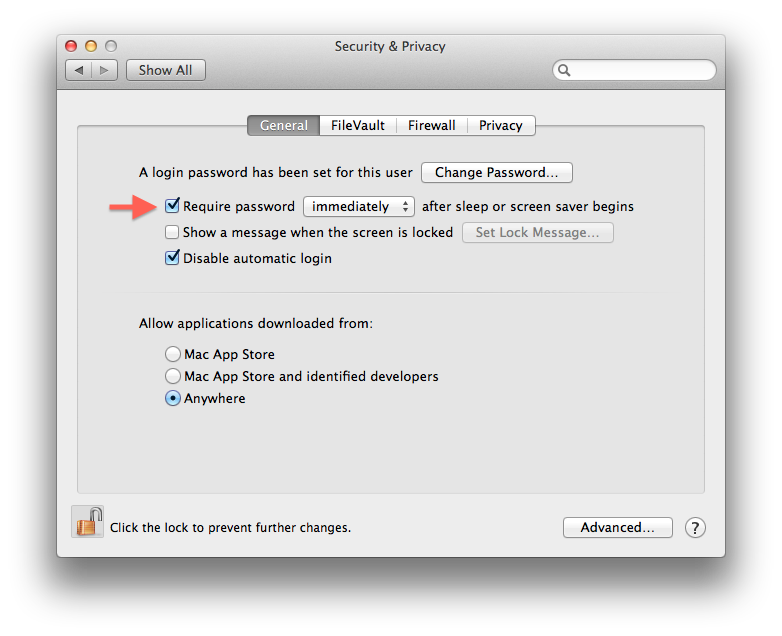
    5. For added security, select Require password [  ] after sleep or screen saver begins and choose the amount of time before a password is required.

    Watch the video below to see a demonstration of what we have done above :

    Share. WhatsApp Facebook Twitter Telegram Reddit Email
    Previous ArticleInstalling Microsoft Exchange Server 2013 Prerequisites On Windows Server 2012
    Next Article Installing Microsoft Exchange Server 2013 On Windows Server 2012
    Tarek
    • Website
    • Facebook
    • X (Twitter)
    • Instagram

    Tarek Majdalani is an accomplished Windows Expert-IT Pro MVP, honored by Microsoft for eight consecutive years from 2007-2015. Holding a B.E. in Computer Engineering from the Lebanese American University, he pursued further education while working, earning various certificates showcased in his MVP profile. Tarek is currently serving as the Director of Engineering & Technology at Alrai Media Group in Kuwait. Since 2006, he has been actively contributing to the community by writing tutorials featuring tips and tricks, amassing over 300 tutorials on diverse systems.

    Related Article

    How To Download And Install macOS Sonoma

    How to Find the Serial Number of Your Apple Computer

    How To Set Your Own Images as a Folder Icon in Mac OSX

    Leave A Reply Cancel Reply

    Latest Posts

    How To Enable Active Directory Recycle Bin On Windows Server

    How To Check The Health Of Your Laptop’s Battery In Windows

    How To Transfer FSMO Roles In Active Directory Using PowerShell

    How To Check Active Directory Forest And Domain Functional Level In Windows Server

    Advertisement

    For any Feedback, click on the Contact Us link

    Facebook X (Twitter) Instagram YouTube
    Quick Links
    • Contact Us
    • About Tarek
    • Windows 11
    • Windows 8
    • Windows 10
    • Windows 7
    • Windows Server
    • Windows Server 2008
    • Exchange Server
    • macOS
    • ISA Server
    • Privacy Policy
    Visitors
    • Contact Us
    • About Tarek
    • Windows 11
    • Windows 8
    • Windows 10
    • Windows 7
    • Windows Server
    • Windows Server 2008
    • Exchange Server
    • macOS
    • ISA Server
    • Privacy Policy
    © ElMajdal 2007-2025

    Type above and press Enter to search. Press Esc to cancel.

    ×