

Introduction
So you just finished installing Exchange Server 2013 and tried to send your first email to an external email domain, such as Google/Hotmail/Yahoo, but you found out that the email was never received. Exchange Server 2013 is similar to 2010, where it is installed by default without a Send Connector. In order to be able to send emails to other domains, you will need to setup one.
In Microsoft Exchange Server 2013, a Send connector controls the flow of outbound messages to the receiving server. They are configured on Mailbox servers running the Transport service. Most commonly, you configure a Send connector to send outbound email messages to a smart host or directly to their recipient, using DNS.
Login into Exchange Admin Center , and from the left side pane, click on Mail Flow and then click on send connectors

2. Under send connectors, click the Add button ![]() to create a new send connector
to create a new send connector

3. The new send connector wizard will open, where you have to give it a name and choose a Type appropriate to your connection scenario. The type determines the default permission sets that are assigned on the connector and grants those permissions to trusted security principals. Security principals include users, computers, and security groups.
For the Name, give it a name as its type, I will type Internet for the Name. And for the Type, select Internet . Then click next

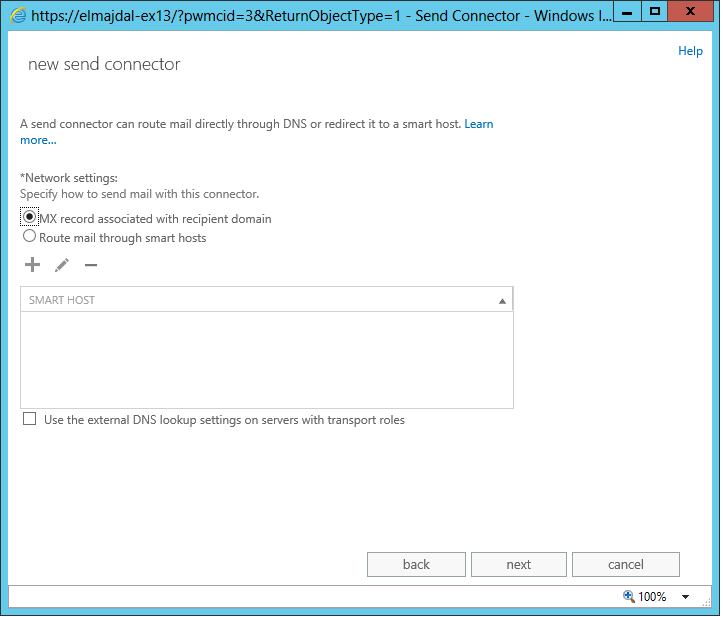
4. In the Send Connector Network setting page, you have two options for routing emails. Either directly through DNS or it will be redirected to a Smart Host such as Barracuda Spam and Virus Firewall.

If you don’t have a smart host, then select MX record associate with recipient domain and then click next ( Jump to Point # 6, else if you have a smart host, then continue reading Point # 5)
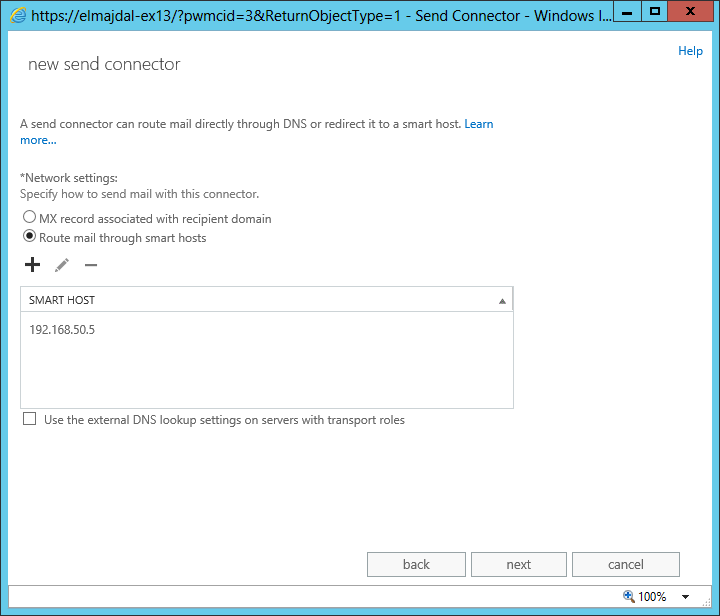
5. In some situations you may want to route email through a third-party smart host, such as in an instance where you have a network appliance that you want to perform policy checks on outbound messages. If you do have a smart host, then :
Select Route mail through smart hosts, and then click ![]() button. In the Add smart host window, specify the IP address , or the fully qualified domain name (FQDN) for your Smart Host. Then click save.
button. In the Add smart host window, specify the IP address , or the fully qualified domain name (FQDN) for your Smart Host. Then click save.

Click next to continue
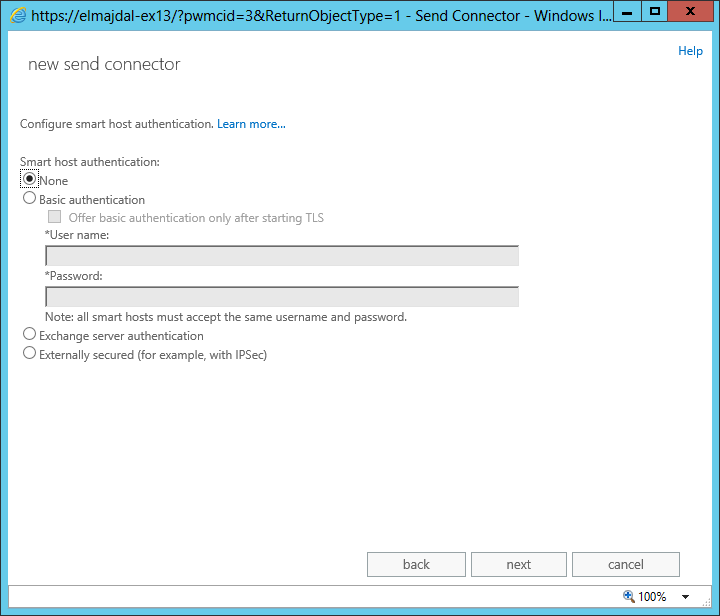
For Smart host authentication, choose the type of authentication required by the smart host. If you choose Basic authentication, you must provide a user name and password. Then click next
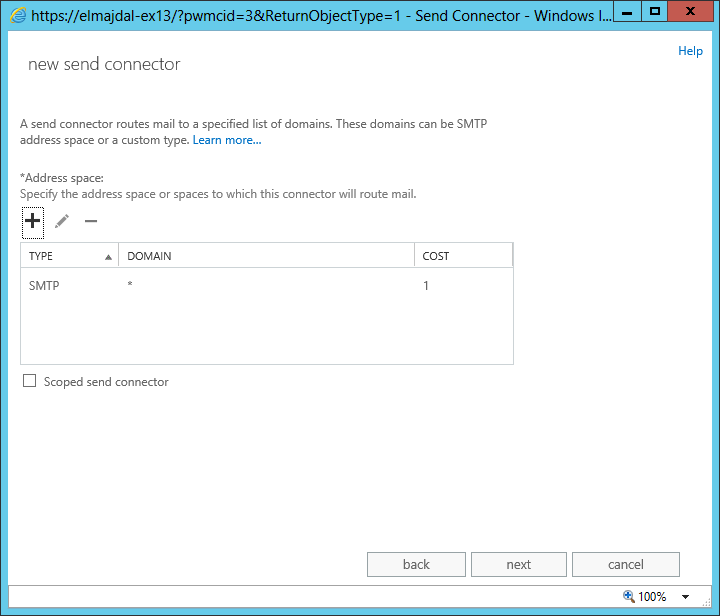
6. Under Address space, click ![]() . In the Add domain window, make sure SMTP is listed as the Type. For Fully Qualified Domain Name (FQDN), type * to specify that this send connector applies to messages sent to any domain. Click save
. In the Add domain window, make sure SMTP is listed as the Type. For Fully Qualified Domain Name (FQDN), type * to specify that this send connector applies to messages sent to any domain. Click save

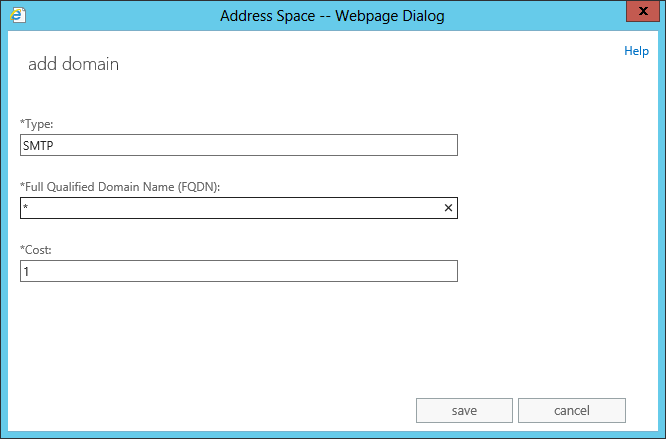
Click next to continue
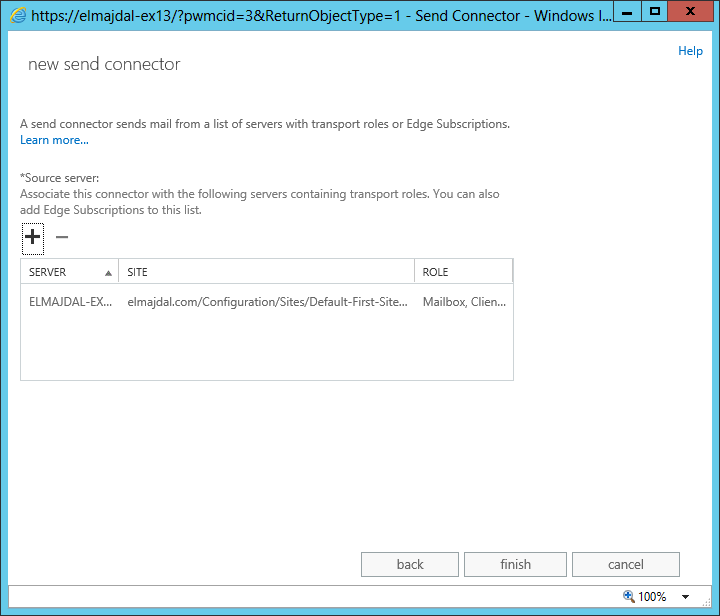
7. For Source server, click ![]() . In the Select a server window, choose a server by highlighting it and clicking add, then click OK
. In the Select a server window, choose a server by highlighting it and clicking add, then click OK

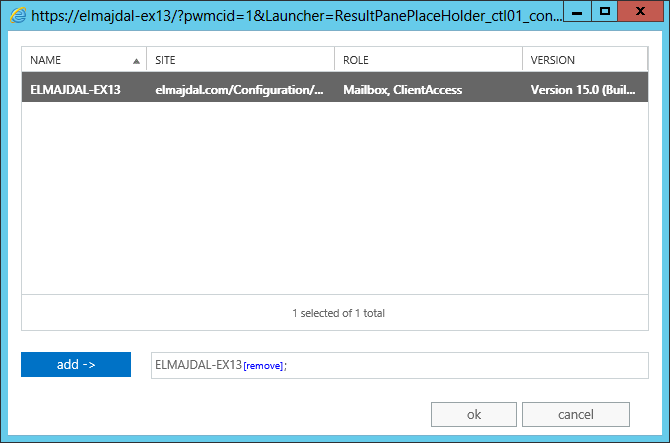
The selected server(s) will be displayed, click finish
The created outbound send connector will be listed. Now trying sending an email to an external domain ( for example Google/Hotmail/Yahoo ) and this time your emails will be delivered to the recipient. 
Summary
Exchange 2013 Mailbox servers running the Transport service require Send connectors to deliver messages to the next hop on the way to their destination. Send connectors that are created on Mailbox servers are stored in Active Directory and are available to all Mailbox servers running the Transport service in the organization