Introduction
With the availability of Windows Server 2012, IT Administrators will start introducing Windows Server 2012 into their Network. If you want to know how to setup a domain controller using Windows Server 2012, or want to have your first domain controller setup on Windows Server 2012, then this is the right article for you.
Dcpromo can’t be used anymore with Windows Server 2012. dcpromo has been deprecated. We have been always using Dcpromo to setup a domain controller. However, with Windows Server 2012, you can only use it for an unattended installation. So what is the alternative ? well, you have to use Server Manager
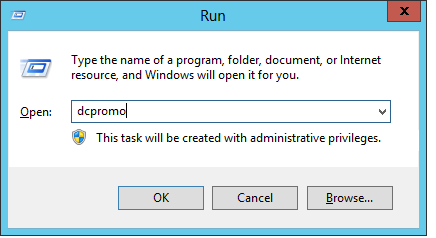
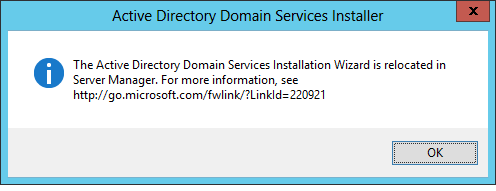
In order to make the windows server 2012 domain controller we will install ADDS (Active Directory Domain Services) Role from the server manager on Windows Server 2012 and then promote the server to a domain controller. So we have this articles into two sections:
-
Install Active Directory Domain Services using Server Manager
-
Promote the server to a Domain Controller using Server Manager
so lets start.
-
Install Active Directory Domain Services using Server Manager
-
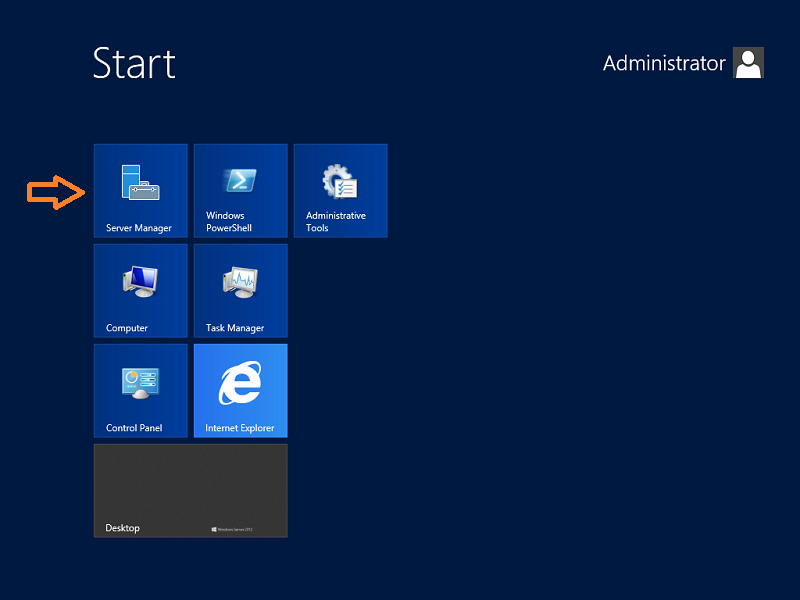
Log on as the local Administrator, and from the Start Screen, click on Server Manager
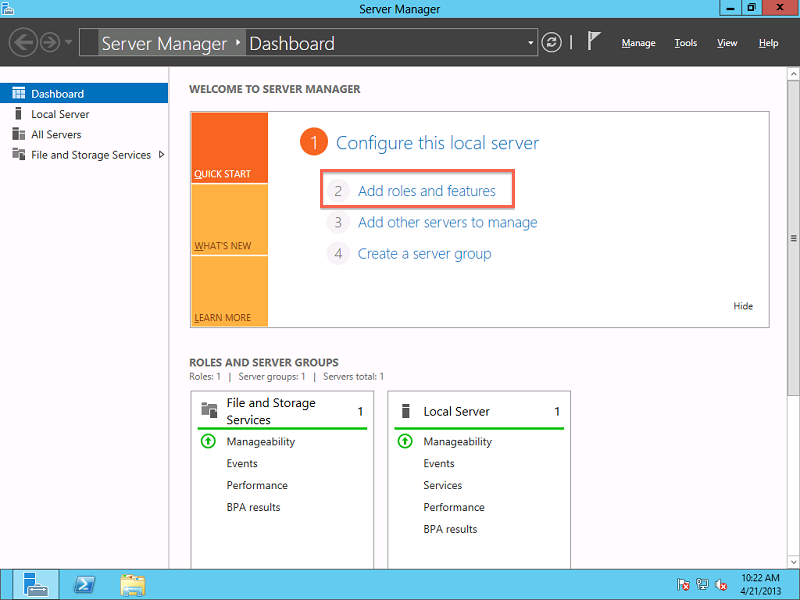
2. From the Server Manager Dashboard page, Click on Add roles and features
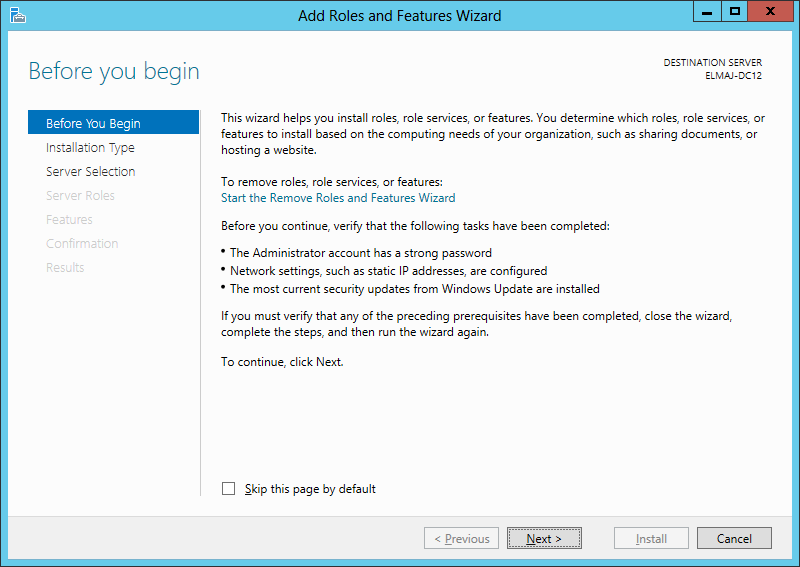
3. The Add roles and features wizard will open, click Next to begin
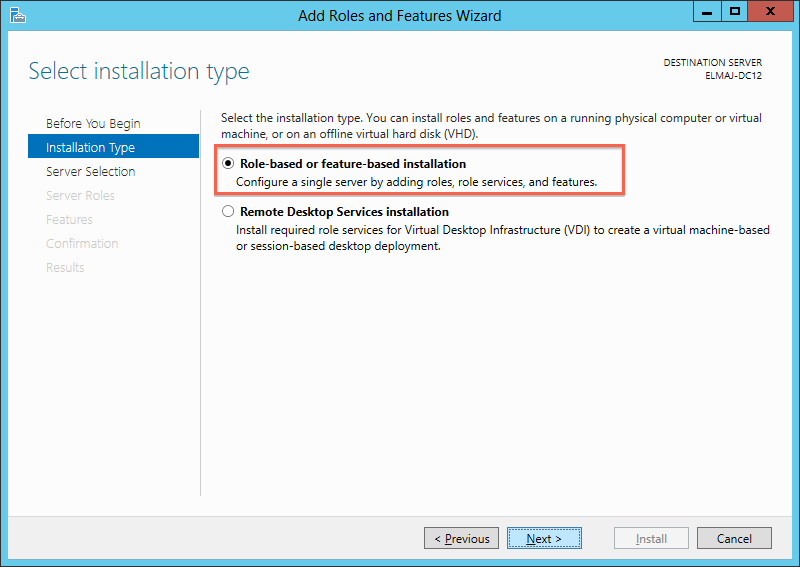
4. On the installation type page, select Role-based or feature-based installation and click Next
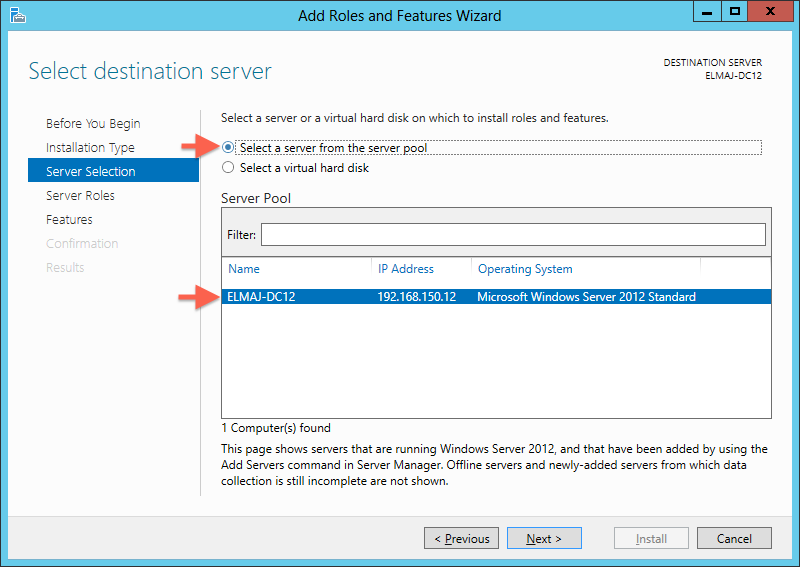
5. On the destination server, select a server from the server pool and make sure that the server you want to install Active Directory services on is currently highlighted ( You can manager a server pool if you had any but this is out of the scope of this article )
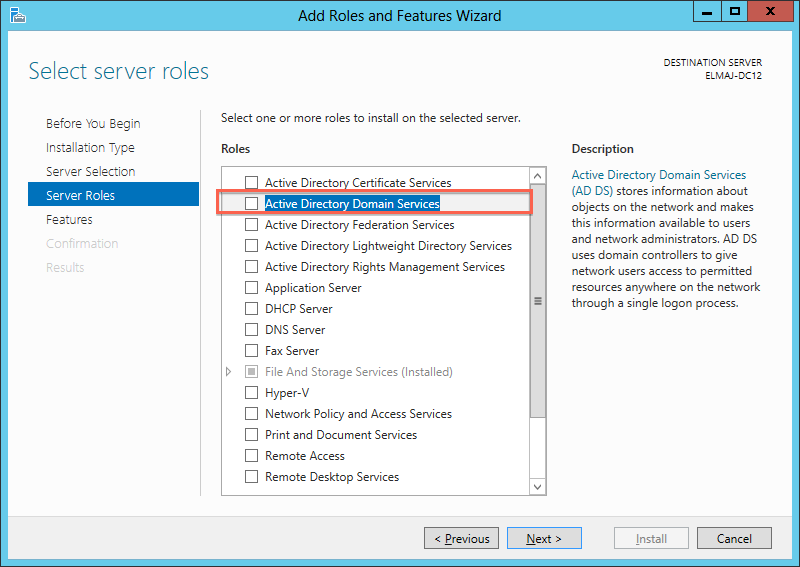
6. From the list of available roles, select Active Directory Domain Services
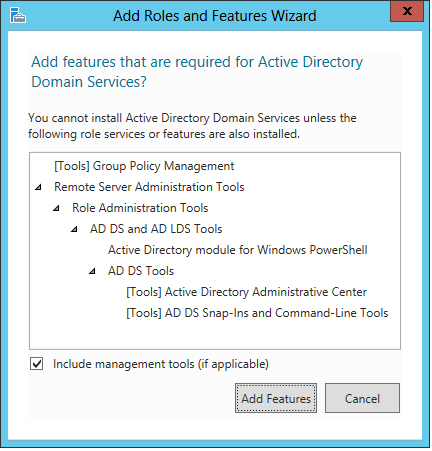
7. A list of features that will automatically be installed along with Active Directory Domain Services role will be displayed. Click Add Features.
The features that will be installed along with ADDS are Group Policy Management and Remote Server Administrator Tools
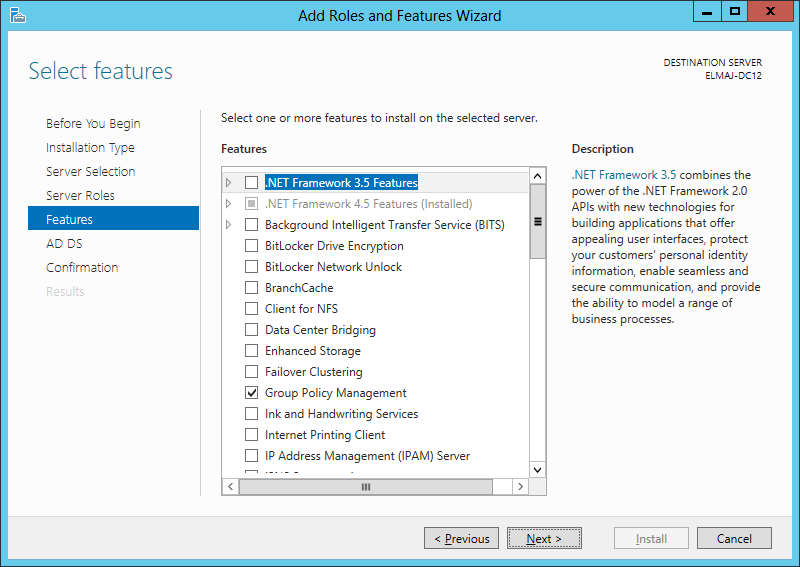
8. Next are the Features to select/deselect. As you can see, Group Policy Management and Remote Server Administrator Tools are automatically selected. Click Next to continue
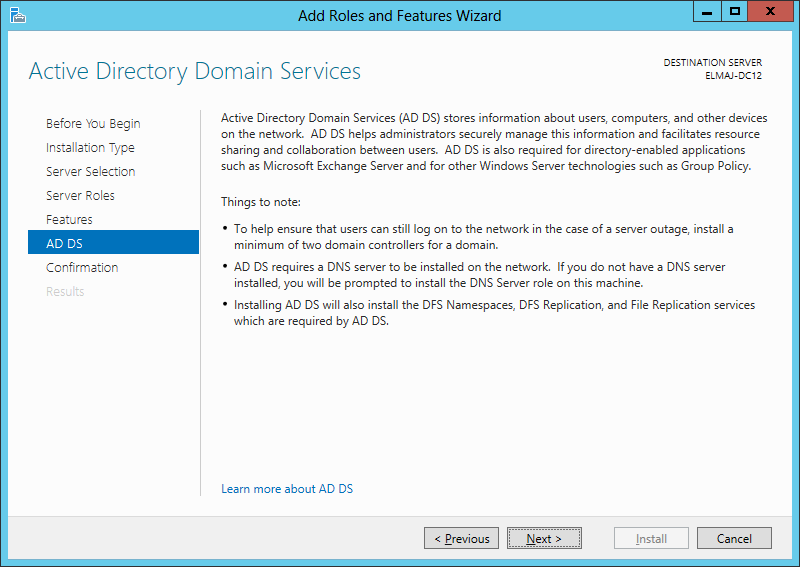
9. A Brief about the role you are installing and few notes will be displayed, click Next to continue
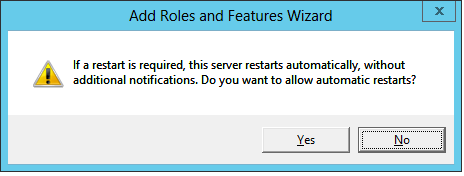
On the Confirmation page, If you need to reboot the machine automatically if required after installation is completed, then select the option Restart the destination server automatically if required. Click Install
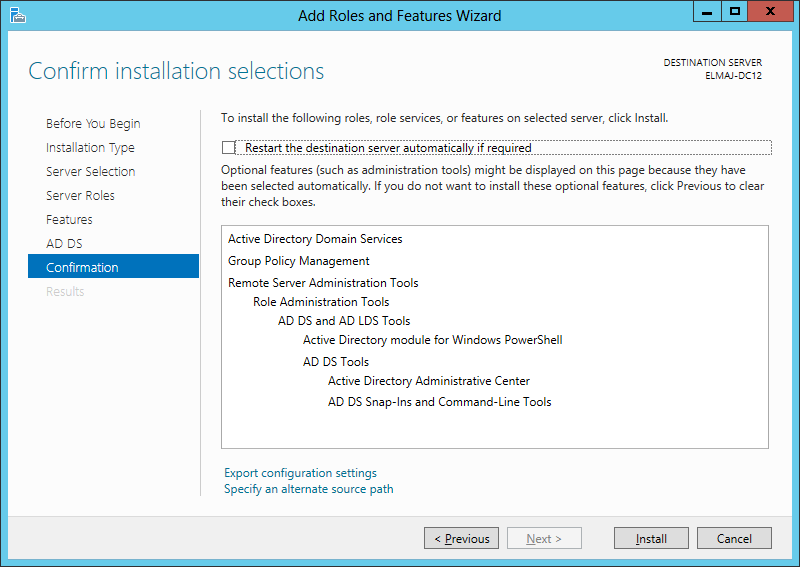
Confirm that you want to reboot the server if required after installation is completed
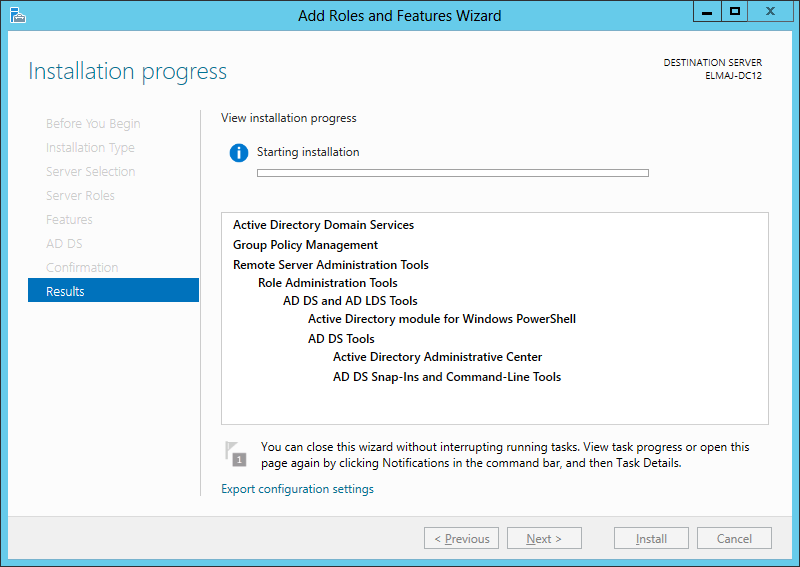
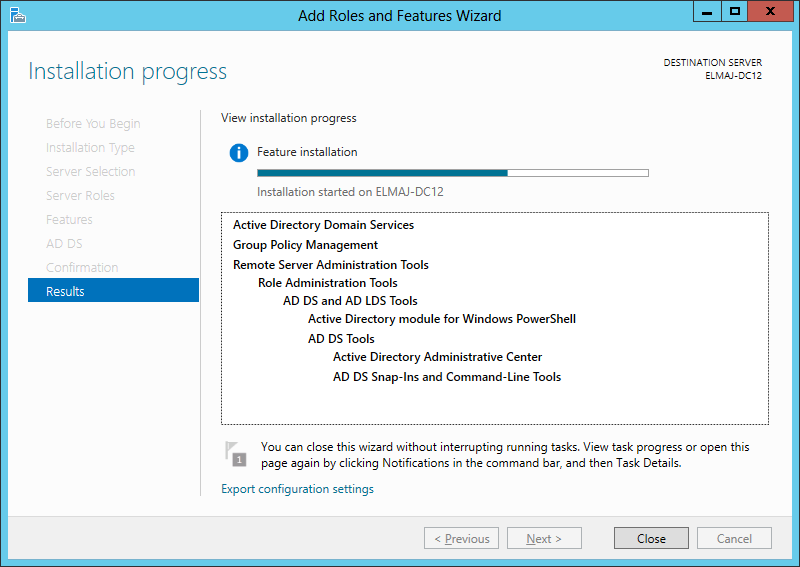
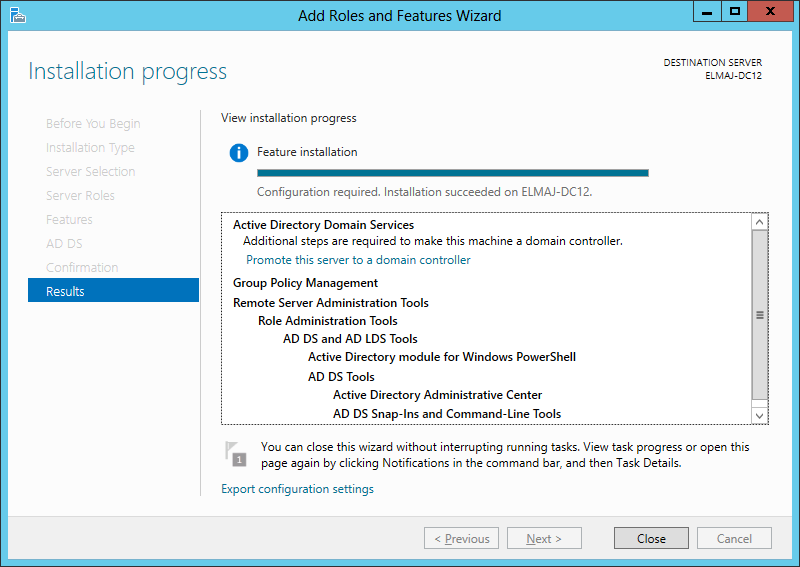
10. Installation will be completed successfully and no reboot is required. Click Close
- Promote the server to a Domain Controller using Server Manager
1. After Active Directory Domain Services role binaries have been installed. It is time to promote the server to a Domain Controller. From the Dashboard in Server Manager, click on Notifications ![]() and then click on Promote this server to a domain controller
and then click on Promote this server to a domain controller

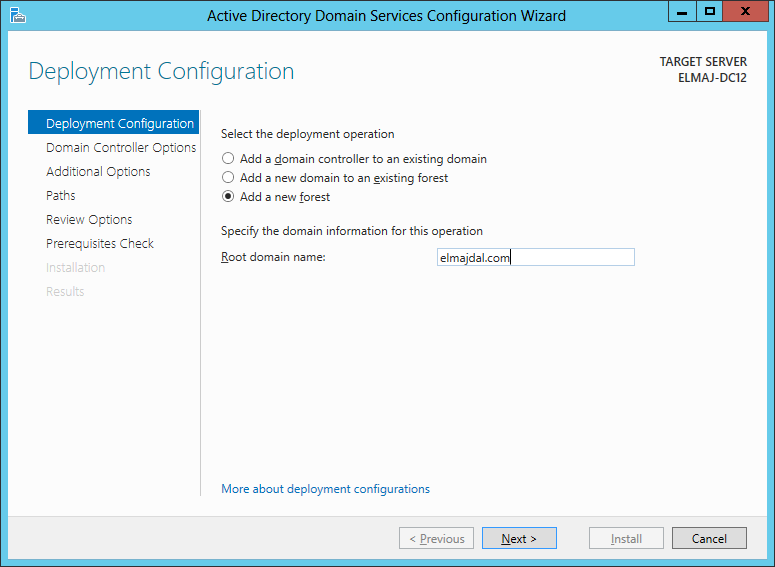
2. On the Deployment Configuration page, select Add a new forest, as this will be our first domain controller. Also type the root domain name, in my case, my domain name will be : elmajdal.com . Click Next to continue
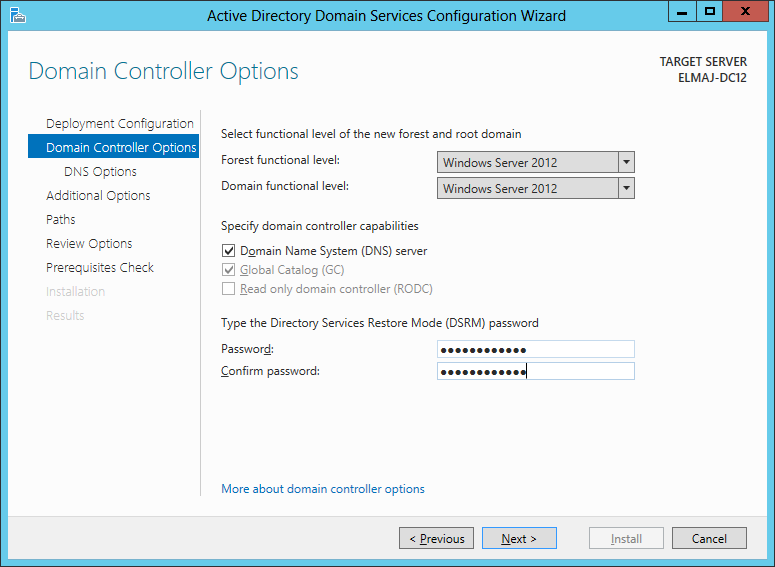
3. Select the functional level of the new forest and domain. As this is first Domain Controller in our Network, and we don’t have a DNS Server installed. We can select to have a DNS Server role installed as well. Type a password for the directory services restore mode. This password is needed when you want to restore your Active Directory . The Server is by default selected as a Global Catalog, this option can not be removed. This is because in Forest, there has to be at least on Global Catalog Domain Controller.
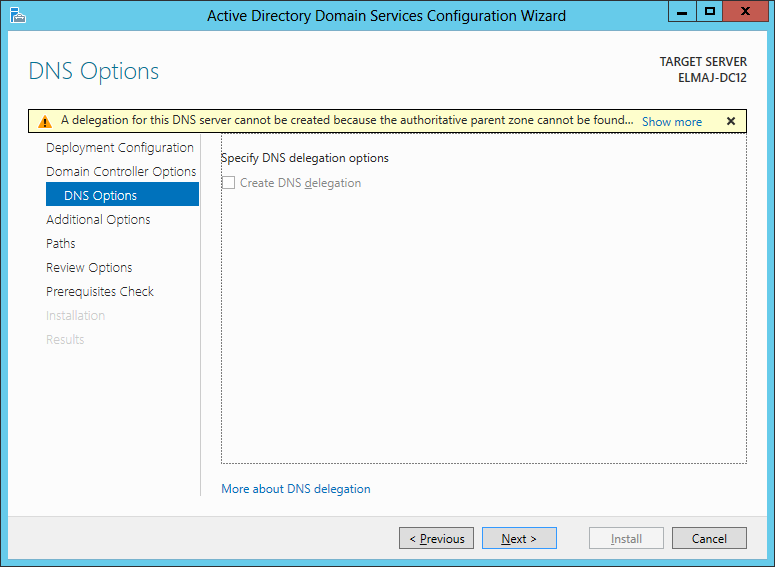
4. On the DNS Options page, you can safely ignore the warning message. Normally you could select in this Wizard a DNS delegation but currently we have no DNS Server in this domain, so we have no option to delegate. Click Next
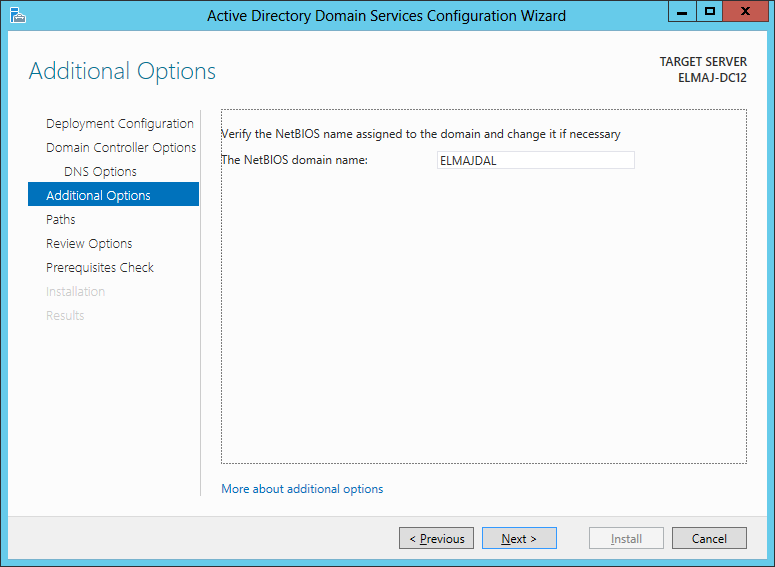
5. The NetBIOS name assigned to the domain will be verified, Click Next
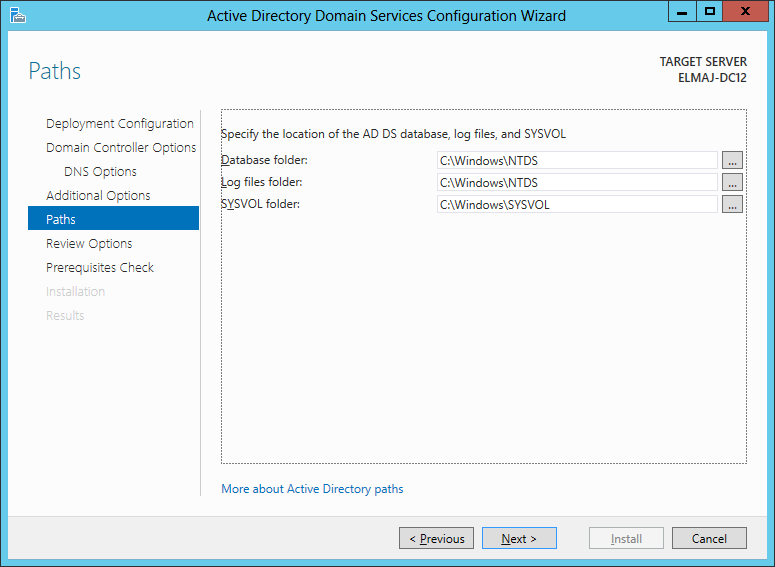
6. The Database, logs and SYSVOL folders paths will be displayed. You can change the default location . I will keep the default paths. Click Next
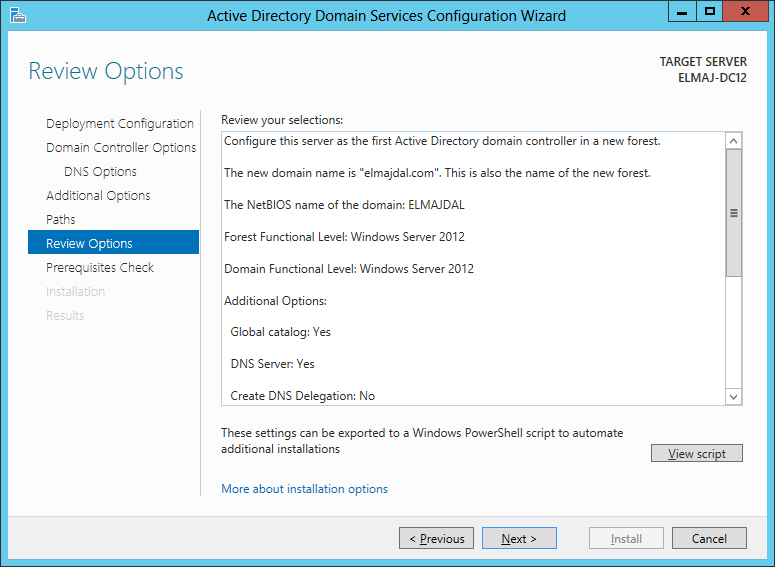
7. Review the installation summary and then click Next.
Here you are able to export the configuration selected into a dcpromo unattended file . This script can be used in PowerShell script to install domain controllers.
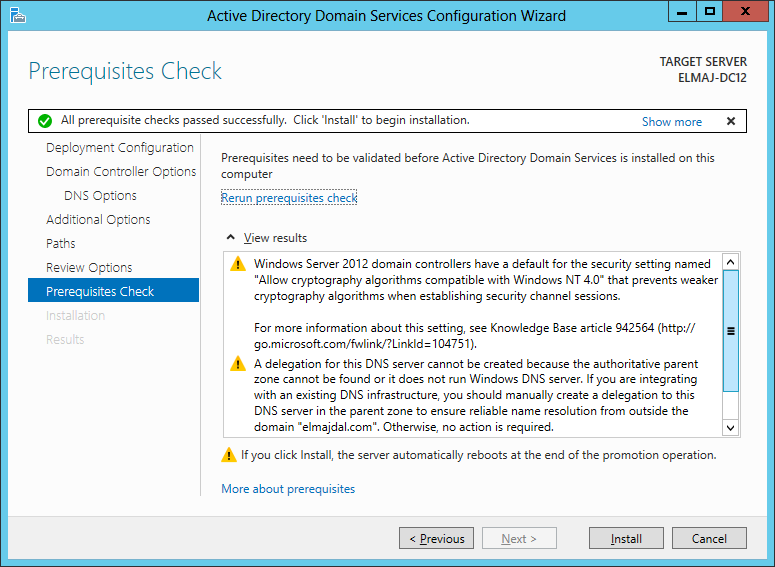
8. Prerequisites check will be performed. Click Install
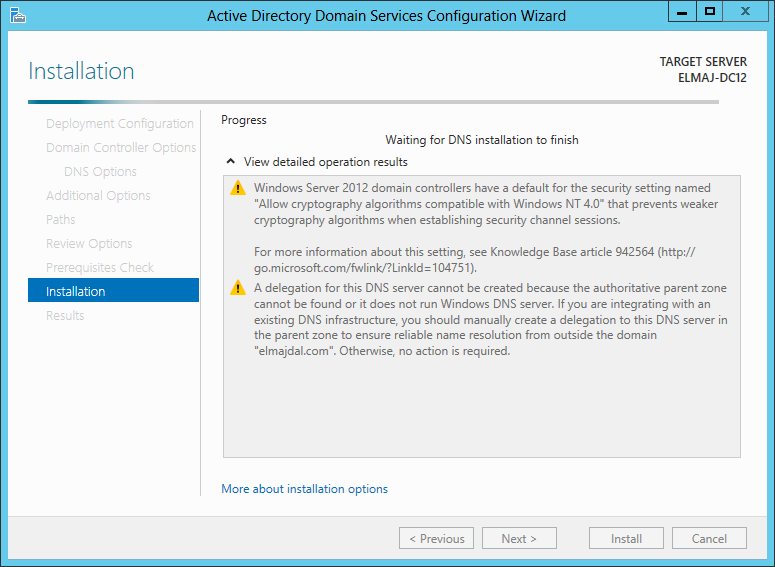
9. Promoting the Server to a Domain Controller will start . Computer Will automatically reboot.
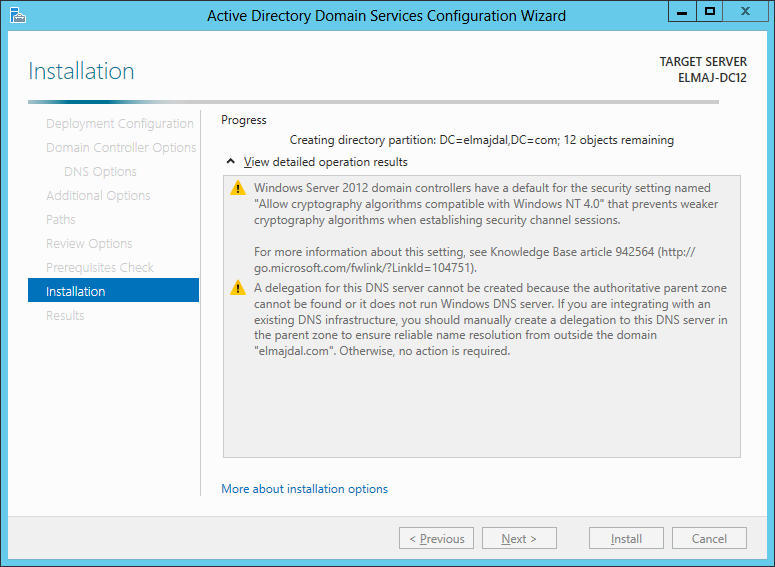
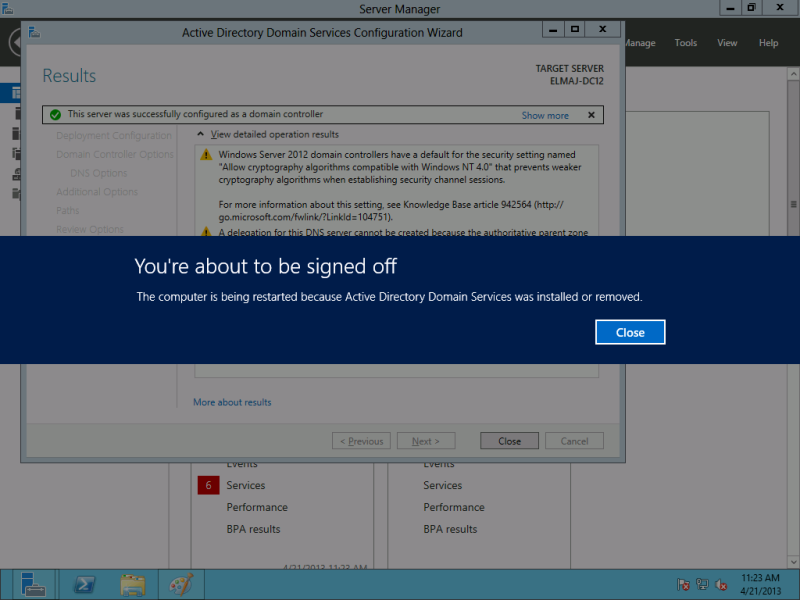

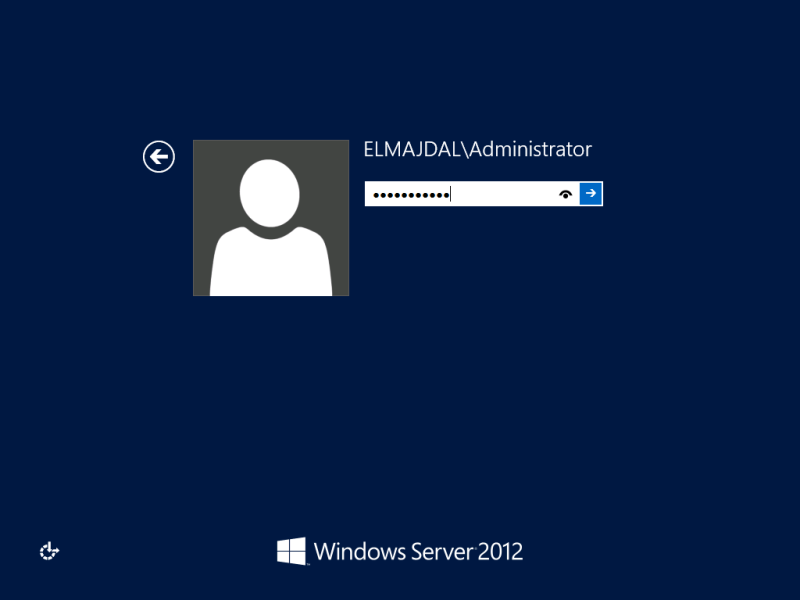
10. Login to domain controller using your administrator username and password.
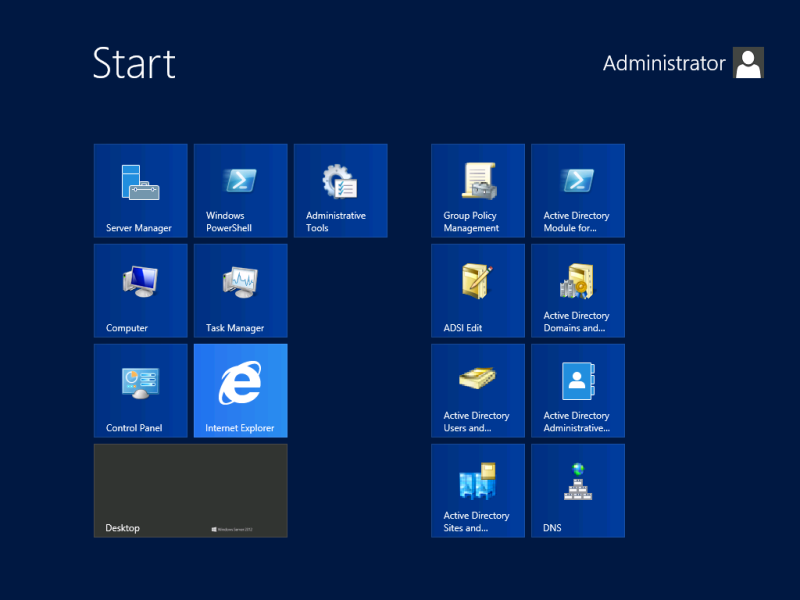
You will notice that the following are installed and added to the Start Screen:
Group Policy Management
Active Directory Module for Windows PowerShell
ADSI Edit
Active Directory Domains and Trusts
Active Directory Users and Computers
Active Directory Administrative Center
Active Directory Sites and Services
DNS
Summary
In this article, I have installed my first Domain Controller on Windows Server 2012. There was no domain controllers in my network. So I didn’t have to prepare my infrastructure for introducing a new Domain Controller. The setup did all the prerequisites checks and installation was straight forward. In future articles, I will be showing you how to setup an additional domain controller with Windows Server 2012

