


Introduction
Windows 7, allows you to create multiple user accounts, so that each user can have a separate user account with unique settings and preferences, such as a desktop background or screen saver. User accounts control which files and programs users can access and what types of changes users can make to the computer.
To create a new user account, follow the below steps :
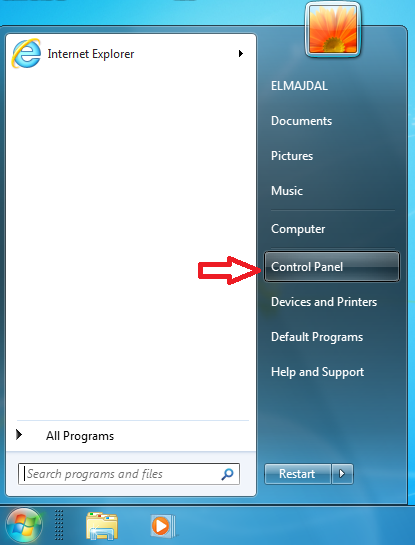
1. Click the Start button ![]() , then click Control Panel
, then click Control Panel
2. Under the User Accounts and Family Safety category, click on Add or remove user accounts

3. The Manage Accounts window will open, where all the created accounts are displayed, click on Create a new account

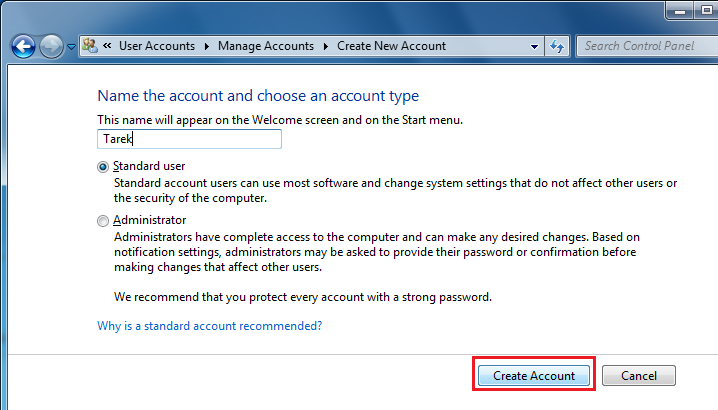
4. The Create New Account window will open, here you will need to type a name for the new user account and select a type for it, either standard or as an administrator.
There are three types of accounts. Each type gives users a different level of control over the computer:
-
Standard accounts are for everyday computing.
-
Administrator accounts provide the most control over a computer, and should only be used when necessary.
-
Guest accounts are intended primarily for people who need temporary use of a computer.
When you are logged on to Windows with a standard account, you can do almost anything that you can do with an administrator account, but if you want to do something that affects other users of the computer, such as installing software or changing security settings, Windows might ask you to provide a password for an administrator account. That’s why its recommended creating a standard account for each user. This will protect your computer by preventing users from making changes that affect everyone who uses the computer, such as deleting files that are required for the computer to work.
 After typing the new user account name and selecting his account type, click on the Create Account button
5. The Manage Accounts window will be opened again, and as you can see now the new user account is listed along with the other user accounts.

Now you can logoff from the current logged in user and log in using the new user account created.