


Introduction
In this article, I will be showing you how we used to change the screen resolution in Windows XP, Windows Vista and how it is easily done now in Windows 7.
Note : This article was written when Windows 7 was still in RC build, changes might occur later to the product once it is RTM.
When you start working with Windows 7, you will notice that it is created to make our life easier and to accomplish tasks much faster. How about if a simple operation, that previously was taking three steps from you, now takes only two steps ? it would be trivial for you, but think about it again, imagine how many clicks you can save, if lots of the new features are now faster with Windows 7 and can be accessed in fewer clicks, then imagine how many seconds/minutes you can save.
Let’s remember how we used to change screen resolution with Windows XP & Windows Vista.
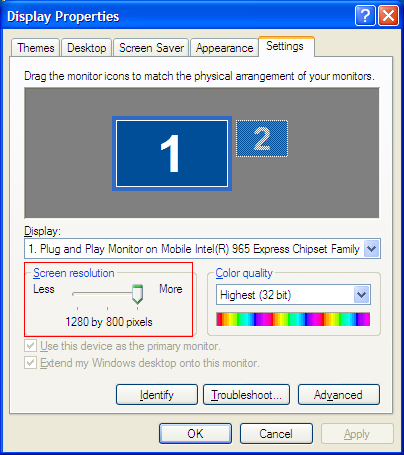
Windows XP
- Right click any empty spot on the desktop, and click on Properties

- The Display Properties page will open, click on the Settings tab.

- Using the slider, under Screen resolution, go left or right till you choose the desired screen resolution and then click on OK. You might be asked if you want to keep the new settings or not.


Now lets see how we used to change screen resolution with Windows Vista.
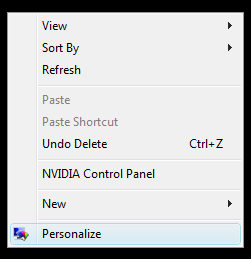
Windows Vista
With Windows Vista, the graphical user interface that we were working with for years has changed and new words came out, such as Properties was replaced with Personalize
- Right click on any empty spot on the desktop and click on Personalize

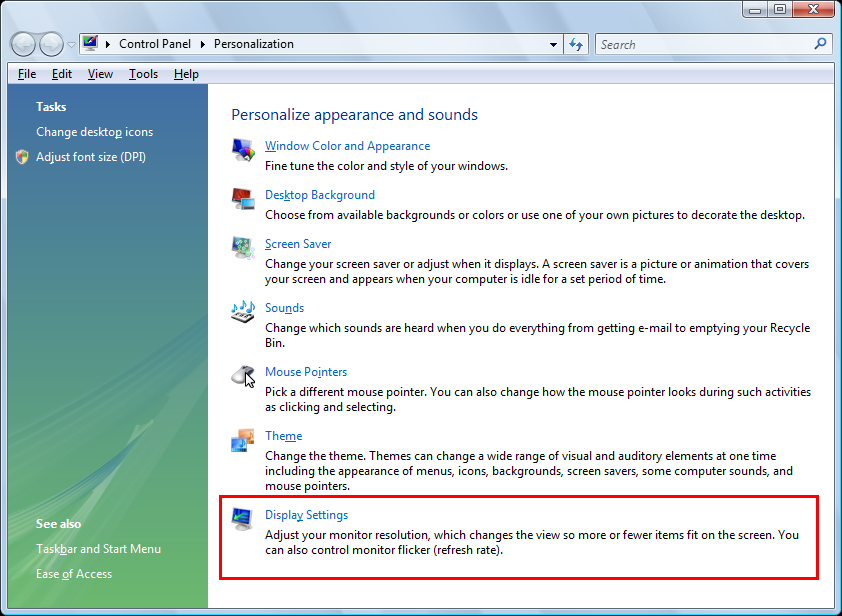
- The Display Properties page was replaced with the Personalization page, and as you can see, no more tabs are used. To adjust your monitor resolution, click on Display Settings

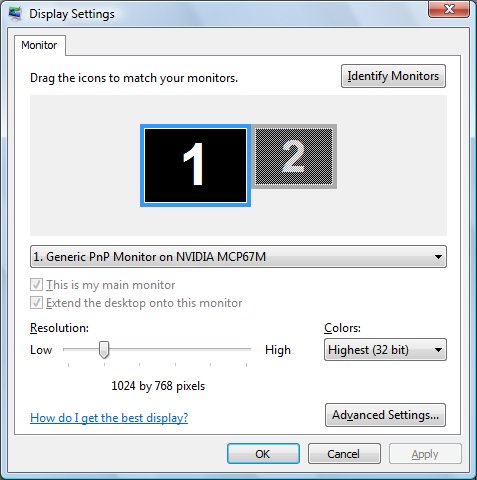
- Under Resolution, go with the slider left or right to adjust your monitor resolution, then click on OK

- You might be asked to keep the new changes or revert back.


Now lets see how this is done with Windows 7.
Windows 7
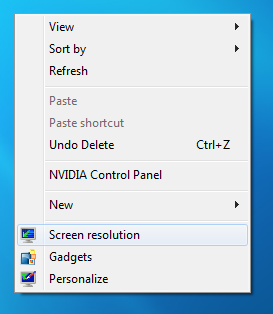
- Right click any empty area on your desktop, now instead of clicking on Personalize as we used to do with Windows Vista, simply click on Screen resolution

- This will directly open the Screen Resolution page, using the drop down list beside Resolution, slide the slider up or down and stop it to the desired resolution, then click outside the resolution drop down list box and click OK
 Accept the change by clicking on Keep changes or revert it back by either clicking on Revert, or doing nothing for 15 seconds, once the count down finishes, the changes will be ignored and will revert back to previous display settings.
 Note : You can change the screen resolution by opening Control Panel, and then click on Adjust Screen resolution under Appearance and Personalization
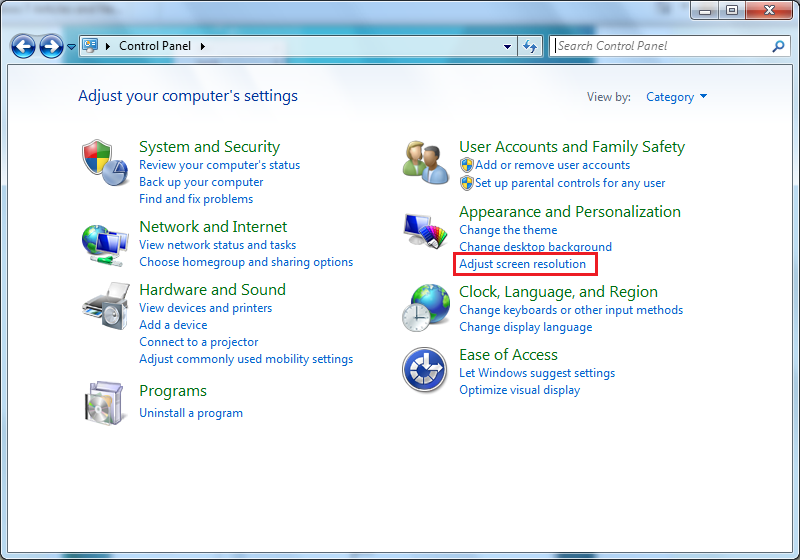
As you can see, Windows 7 introduces a new way to change screen resolution. Personally, I like it as it saves few steps and clicks.