


Introduction
In part 1 of this article, I installed Microsoft Hyper-V Server 2008. Today I’m going to configure Hyper-V Server 2008 by using the Hyper-V Configuration Window.
As shown in part 1 of this article, the desktop of the Hyper-V server contains only two windows; the Command Line window and the Hyper-V Configuration window. If by mistake you closed any of these windows, you can easily re-open anyone of these windows by following the below steps:
Opening the Command Line window
-
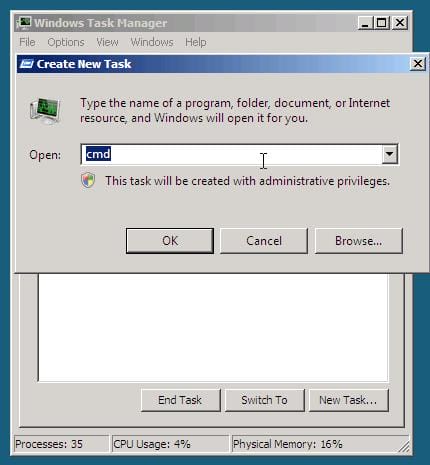
Click CTRL+ALT+DEL > click on Start Task Manager
-
Click on New Task…
-
Type cmd > click Enter or OK

Opening the Hyper-V configuration window
-
In the command line window, type hvconfig and then click Enter

Now lets start configuring our Hyper-V Server. The Hyper-V Configuration window has a list of configuration that you can go through any of them by typing the number of that item and clicking Enter, you are not obliged to go through them in sequence ( ex. from option 1 download to option 13) . But some options can not be completed, before configuring an option that it depends on. For example, you can not join a domain ( option 1 ) or download updates (option 6) if you have not configured your network settings first ( option 3 ). That’s why I will configure the options in the way I prefer.
The following configurations are available with the Hyper-V configuration window

Computer Name
-
Type 2 and click Enter to change the computer name.
-
Type the new computer name and click Enter

-
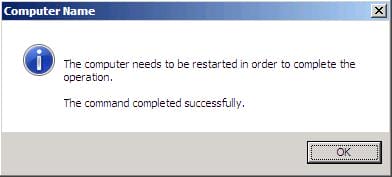
You will be prompted with The computer needs to be restarted in order to complete the operation. The command completed successfully. Click OK

-
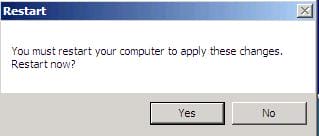
You will be prompted with You must restart your computer to apply these changes. Restart now? , click Yes

-
After the machine reboots and you logon, you will see the new computer name.

Network Settings
Hyper-V Server network settings can be assigned by a DHCP Server or an IP Address can be assigned manually.
- Type 3 and click Enter to configure the Hyper-V Server network settings.
- The Network cards that are attached to your machine will be listed

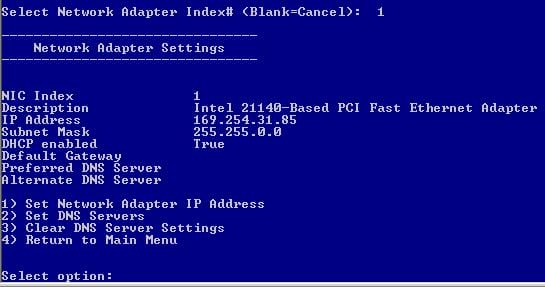
- Type the Index# of the adapter you want to configure and click Enter. I only have one network adapter in my server, so I will type 1
- You will be presented with the current configuration for the network adapter you selected.

- Type 1 and click Enter to configure the IP address for the selected network adapter

-
To set the network card to receive its IP address from a DHCP Server
- Type D and click Enter
-
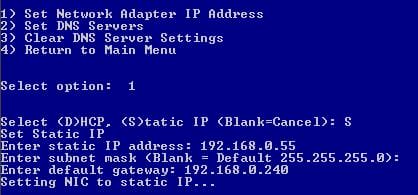
To set a static IP address
- Type S and click Enter
- Type the IP address then click Enter
- Type the subnet mask then click Enter, the default subnet mask is 255.255.255.0 , so you can leave this entry blank and just click Enter
- Type the default gateway then click Enter

-
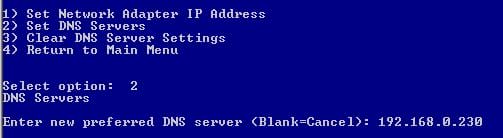
To configure DNS Server settings for the selected network adapter
- Type 2 then click Enter
- Type the IP address of the DNS server then click Enter

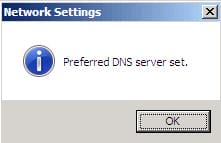
- Click OK on the pop up message box : Preferred DNS server set

- If you have an alternate DNS server, then type its IP address then click Enter. If you do not have an alternate DNS Server, then keep this entry blank and click Enter
- If in the previous step you had configured an Alternate DNS Server, then click OK on the pop up message box : Alternate DNS server set
-
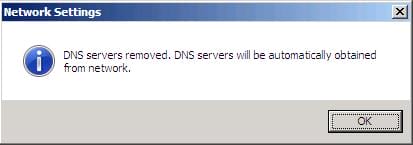
To Clear DNS Server Settings, follow these steps:
- In the Network Adapter Settings option, type 3 then click OK
- Click OK when the pop up message DNS servers removed. DNS servers will be automatically obtained from network is displayed

Add Local Administrator
This option adds a user as a local administrator in the server itself. This option does not create a new user. If your server is on a workgroup and you want to create a new user on the server, then you will need to use the command : Net user username /add
![]()
If the server is joined to a domain, then you can set a domain user as a local administrator on this server.
To add a local administrator, follow these steps :
-
Type 4 and click Enter
-
Type the username and click Enter, if you the server is joined to a domain, then the username would be domain\username , example : elmajdal\tarek. If the server is in a workgroup, then type the username only as shown in the below image

-
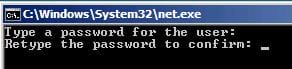
When prompted, type a password for the user and click Enter
-
When prompted, type the password a second time and click Enter

-
Click OK on the confirmation message box User added to local Administrators group. Username.

Domain/Workgroup
By default, Hyper-V Server is joined to the workgroup : WORKGROUP, you can either keep it in the same workgroup, joined it to another workgroup or join it to a domain. In my case, I will keep it in its default workgroup.
If you want to join it to another workgroup, do the following :
-
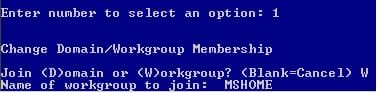
Type 1 and click Enter
-
Type W and click Enter
-
Type the name of the workgroup you want to join your server to and click Enter

-
Click OK on the pop up message Welcome to the workgroup: NEW WORKGROUP NAME


To join the server to a domain, do the following :
-
Type 1 and click Enter
-
Type D and click Enter
-
Type the domain name ( ex. ELMAJDAL.NET ) and click Enter
-
Type the domain username in the following format: domain\user ( ex. ELMAJDAL\TAREK), make sure that this user has the needed permissions to join this server to the domain ( ex. domain admin )

-
When prompted, type a password for the user and click Enter

-
You will receive a pop up message You must restart your computer to apply these changes. Restart now? , Click Yes and the server will be restarted

Remote Desktop
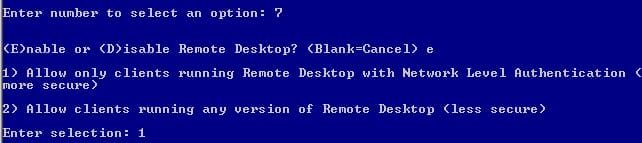
- Type 7 and click Enter.
- Here you have a choice to either selection option 1 or option 2. Option 1 is to allow only clients running remote desktop with Network Level Authentication ( XP SP3, Vista SP1 & Windows Server 2008 ), whereas option 2 to allow clients running any version of remote desktop.

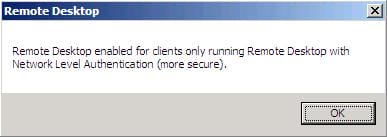
- Once you made you selection and clicked on Enter, you will be prompted with a pop up message showing your selection. Click OK

- You will notice that the status beside 7) Remote Desktop inside the Hyper-V Configuration window is now displaying as Enabled ( your selection ), where your selection is replaced either by less secure (option 1) or more secure clients only (option 2).

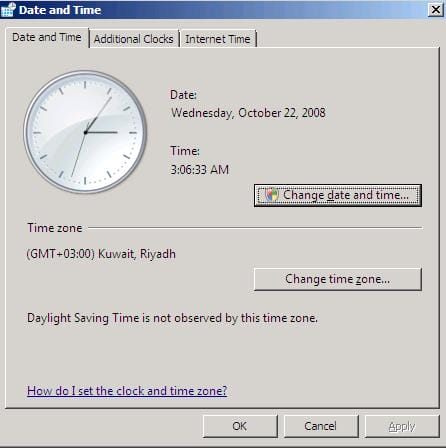
Date and Time
-
- Type 9 and click Enter to configure or modify the Hyper-V Server Date and Time options.
- Type 9 and click Enter to configure or modify the Hyper-V Server Date and Time options.
-
The Date and Time applet will open, configure the desired settings and then click on OK

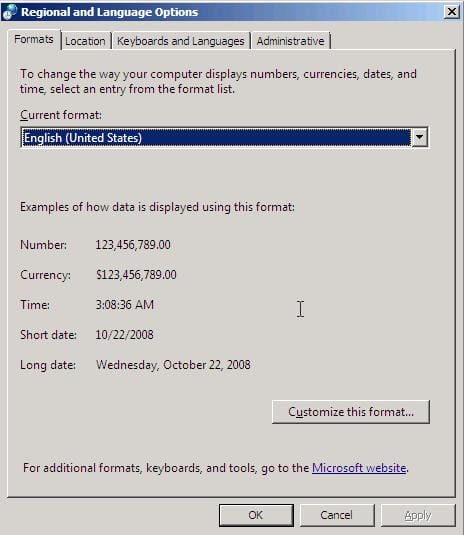
Regional and Language Options
-
- Type 8 and click Enter to configure or modify the Hyper-V Server Regional and Language options.
-
The Regional and Language Options applet will open, configure the desired settings and then click on OK

Set Automatic Windows Update
The current Update settings are displayed in the default Hyper-V Configuration window.
To set updates to automatic
-
Type 5 and click Enter.
-
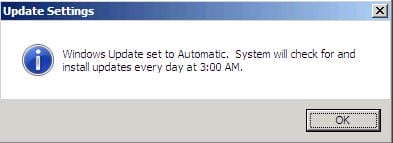
Type A and click Enter

-
You will be prompted with Windows Update set to Automatic. System will check for and install updates every day at 3:00AM
-
Click OK

-
You will notice that the Windows Updates Settings status has changed to Automatic


Download and Install Updates
The current Update Status is displayed in the default Hyper-V Configuration window.
-
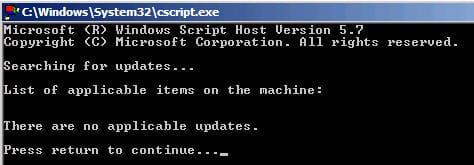
Type 6 and click Enter to search for updates. Searching for updates will start and if any updates are available, they will be listed.

-
If there was no updates to download, then just click on any key to exit from the above window, else type Y and click Enter, this will download the updates and then they will be installed.
Log Off User
-
Type 10 and click Enter
-
You will be prompted with Are you sure you want to log off?
-
Click Yes

Restart Server
-
Type 11 and click Enter
-
You will be prompted with Are you sure you want to restart?
-
Click Yes

Shut Down Server
-
Type 12 and click Enter
-
You will be prompted with Are you sure you want to shut down?
-
Click Yes

Exit to Command Line
-
Type 13 and click Enter to exit to the Command Line.
Summary
In part two of the article Introducing Microsoft Hyper-V Server 2008, I configured Hyper-V Server so that it is set on the network. In the next and last part of this article, part three, I will show you how to connect to the server remotely so that you can start creating your virtual machines.
Related Articles
Introducing Microsoft Hyper-V Server 2008 – Part 1 : Installation