Introduction
In this article I’ll walk through the installation instructions for Exchange Server 2013 prerequisites.
The prerequisites that are needed to install Exchange 2013 on a Windows Server 2012 server depends on which Exchange roles you want to install.
Exchange Server 2013 has only two roles, Mailbox and Client Access server roles. Exchange Server 2013 can be installed Either as:
-
Mailbox server role or combined Mailbox and Client Access server roles
-
Client Access server role
Note : If you want to install as a Client Access Server role only, then you neither need to install Microsoft Office 2010 Filter Packs 64 bit nor Microsoft Office 2010 Filter Packs SP1 64 bit
Lets setup and install all Exchange Server 2013 prerequisites :
-
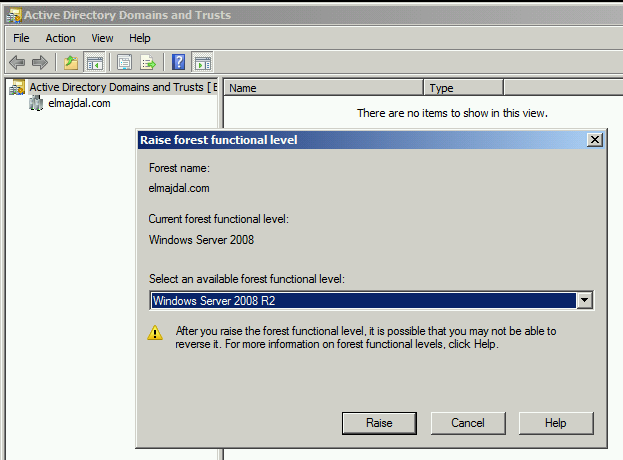
The minimum requirement for Active Directory at this point is the forest functional level set at least to Windows Server 2003
If you need to check your current Forest Functional Level, then read this article : How to Raise the Forest and Domain Functional Levels in Windows Server 2008/R2
My current domain controller is Windows Server 2008 R2 and the forest functional level is Windows Server 2008.
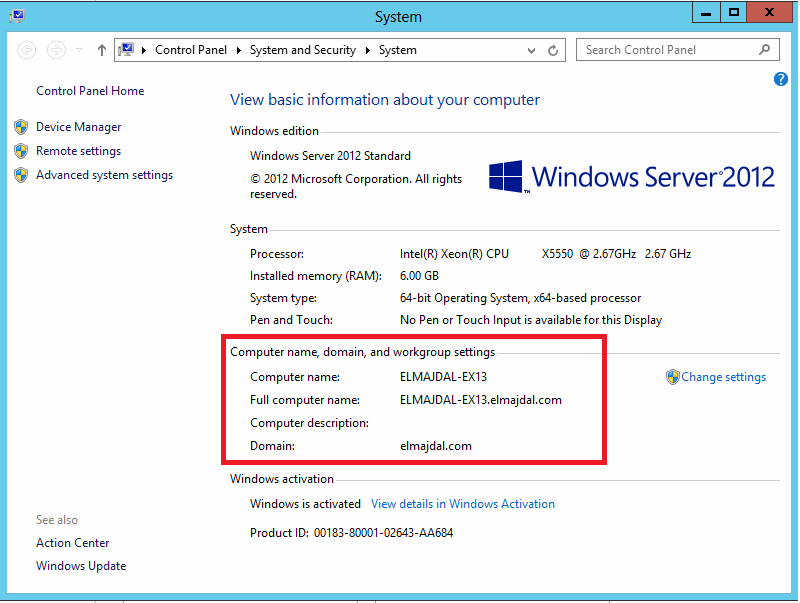
2. Join the server to the Domain. Exchange Server needs to be a domain member.
Exchange Server 2013 will update Active Directory schema. Make sure the user you are going to login with is a domain user that has the following privileges : Domain Admin, Enterprise Admin and Schema Admin.

3. Make sure server is fully updated before running Exchange Server setup.
4. Install Windows Features using PowerShell
Run Windows PowerShell as Administrator and Paste the following :
Install-WindowsFeature AS-HTTP-Activation, Desktop-Experience, NET-Framework-45-Features, RPC-over-HTTP-proxy, RSAT-Clustering, RSAT-Clustering-CmdInterface, RSAT-Clustering-Mgmt, RSAT-Clustering-PowerShell, Web-Mgmt-Console, WAS-Process-Model, Web-Asp-Net45, Web-Basic-Auth, Web-Client-Auth, Web-Digest-Auth, Web-Dir-Browsing, Web-Dyn-Compression, Web-Http-Errors, Web-Http-Logging, Web-Http-Redirect, Web-Http-Tracing, Web-ISAPI-Ext, Web-ISAPI-Filter, Web-Lgcy-Mgmt-Console, Web-Metabase, Web-Mgmt-Console, Web-Mgmt-Service, Web-Net-Ext45, Web-Request-Monitor, Web-Server, Web-Stat-Compression, Web-Static-Content, Web-Windows-Auth, Web-WMI, Windows-Identity-Foundation, RSAT-ADDS
Installation will start
After installation is completed, a restart is required. So close everything and reboot your server.
5. Prepare Active Directory Domain by running the following command inside an elevated command prompt:
Setup /PrepareAD /OrganizationName:OrganizationName /IAcceptExchangeServerLicenseTerms
Where OrganizationName is your Exchange Server Organization name
In Windows Server 2013 Start Screen, type cmd and from the left side pane, right click on Command prompt and choose Run as administrator
Browse to the Exchange Setup files, in my case, the DVD drive letter is E: , then type the below command and hit Enter
Setup /PrepareAD /OrganizationName:ELMAJDAL /IAcceptExchangeServerLicenseTerms
Note: My Organization Name is ELMAJDAL, so replace ELMAJDAL with your organization name.
Organization preparation will be completed.
6. Download and Install Microsoft Unified Communications Managed API 4.0, Core Runtime 64-bit
Download it from : http://www.microsoft.com/en-us/download/details.aspx?id=34992
Run the installer and Click Next
Accept the license terms and then click Install
When installation is completed, click Finish
Download and Install Microsoft Office 2010 Filter Packs 64 bit
Download it from : https://www.microsoft.com/en-us/download/details.aspx?id=17062
Once download is completed, run the Filter Pack setup, and then click Next on the Welcome to the Microsoft Filter Pack 2.0 Setup Wizard page
Accept the license terms and click Next
Filter Pack 2.0 will be installed successfully, click OK
Download and Install Microsoft Office 2010 Filter Packs SP1 64 bit
Download it from : https://www.catalog.update.microsoft.com/Search.aspx?q=2460041
After we installed Microsoft Filter Packs 2.0 64bit, we need to update it to SP1. Run the setup, accept the license terms and click Continue
With the installation of Service Pack 1 for Microsoft Filter Pack 2010 64bit, our Server is up and ready for Exchange Server 2013 installation.
Summary
In this article, we have made the server which will host Exchange Server 2013 ready and setup with all the required prerequisites. In the next article, We will install Exchange Server 2013.