


Introduction
In this article, I will be showing you how to slipstream TMG Server 2010 with Service Pack 1. Not only that, but I will continue also to show you how to slipstream Software Update 1 as well.
Doing so, the next time you install TMG Server 2010, you won’t have to worry about upgrading it to SP1 and later to SU1.
The files required for this article are :
-
Forefront Threat Management Gateway (TMG) 2010
-
Microsoft Forefront Threat Management Gateway (TMG) 2010 Service Pack 1 :
You can download TMG 2010 SP1 from this link -
Software Update 1 for Microsoft Forefront Threat Management Gateway (TMG) 2010 Service Pack 1 : You can download SU1 for TMG 2010 SP1 from this link
I have downloaded TMG_ENU_SE_EVAL_AMD64.exe and extracted its content to the root drive (c:\), inside a folder called Microsoft Forefront TMG. Also I have downloaded TMG Server 2010 SP1 ( TMG-KB981324-AMD64-ENU.msp ) and saved it inside a folder, on the root drive, called : TMG SP1 , and also download software Update 1 ( TMG-KB2288910-amd64-ENU.exe ) and saved it inside a folder in the root directory called TMG SP1 SU1 as shown in the below image.

Follow the below steps to slipstream TMG Server 2010 with SP1
-
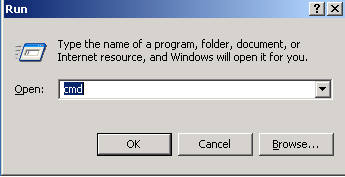
Open a Command Prompt Windows by clicking Start > Run , type cmd and click on OK

-
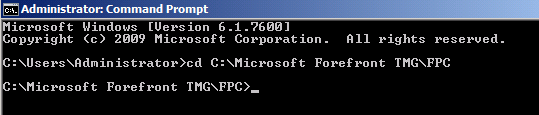
Open an elevated Command Prompt window, then browse to the folder FPC which is inside the folder that has the content of the Microsoft Forefront TMG, by typing :
cd <TMG-folder-name\fpc> , where TMG-folder-name is in my case : Microsoft Forefront TMG
-
To merge SP1 with TMG setup files, type the following command :
C:\<TMG-folder-name\FPC>Msiexec /a MS_FPC_Server.msi /p <TMG-sp1-file-path>
where C:\<TMG-folder-name\FPC> is equal to : C:\Microsoft Forefront TMG\FPC
and <TMG-sp1-file-path> is equal to : C:\TMG SP1\TMG-KB981324-AMD64-ENU.msp

and click on enter to execute the command line
-
On the Welcome to the Installation Wizard for Microsoft Forefront TMG Service Pack 1 window, click Next

-
On the Network location window, The Network Location will the place where the content of the Service Pack 1 files with be extracted and merged with the content of Forefront TMG Server 2010, which is C:\Microsoft Forefront TMG\FPC , click Next

-
On the Ready to Install the Program page, click Install

-
Merging SP1 with Microsoft Forefront TMG Server 2010 files will start
When installation is completed, click on Finish


Congratulation…You now have TMG Server 2010 + SP1 installation files.
Follow the below steps to slipstream TMG Server 2010 SP1 With SU1
- First we will need to extract the Software Update 1 executable file, to get the .msp file out of it.
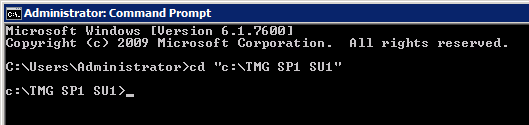
- Open Command Prompt and change the directory to where you have downloaded Software Update 1type : cd “c:\TMG SP1 SU1”

- Type the name of the SU1 .exe filename and followied by /integrate: /t and then followed by the path to where you want to extract its content.
I will be extracting it to the same folder along with its .exe file, so my path would be C:\TMG SP1 SU1TMG-KB2288910-amd64-ENU.exe /integrate /t “C:\TMG SP1 SU1” This will extract the .msp file out from the .exe file.

 This will extract the .msp file out from the .exe file.
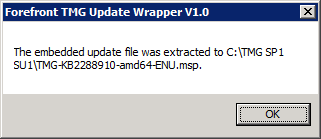

Now that we have the .msp file, we are going to repeat the same steps used to slipstream SP1.
- In Command Prompt, change the directory to C:\Microsoft Forefront TMG\FPC

- Now type the following command :msiexec /a MS_FPC_Server.msi /p “C:\TMG SP1 SU1\TMG-KB2288910-amd64-ENU.msp”and hit Enter

- On the Welcome to the Installation Wizard for Microsoft Forefront TMG Service Pack 1 Update 1 page, click Next
- On the Network Location page, as you can see, Software Update 1 files will be slipstream with the content of the C:\Microsoft Forefront TMG\FPC\ folder, click Next
- On the Ready to Install the Program page, click Install Copying files will start
- Once the installation is completed, click Finish


Done…..The next time you will have a task to install TMG Server 2010, you don’t have to waste an extra step to install SP1 and then install SU1. Using these setup files now, in a single step, you will be installing TMG Server 2010 With SP1 + SU1.
If you want to make sure everything that we have done was proper, then the next time you install TMG Sever 2010, check its version number, and you will find out its 7.0.9027.400
If you don’t know how to check the version number, then check my article How to Determine Which Version of TMG Server 2010 is installed
Summary
In this article, I have shown you the steps to slipstream TMG Server 2010 with Service Pack 1 and with Software Update 1 as well.