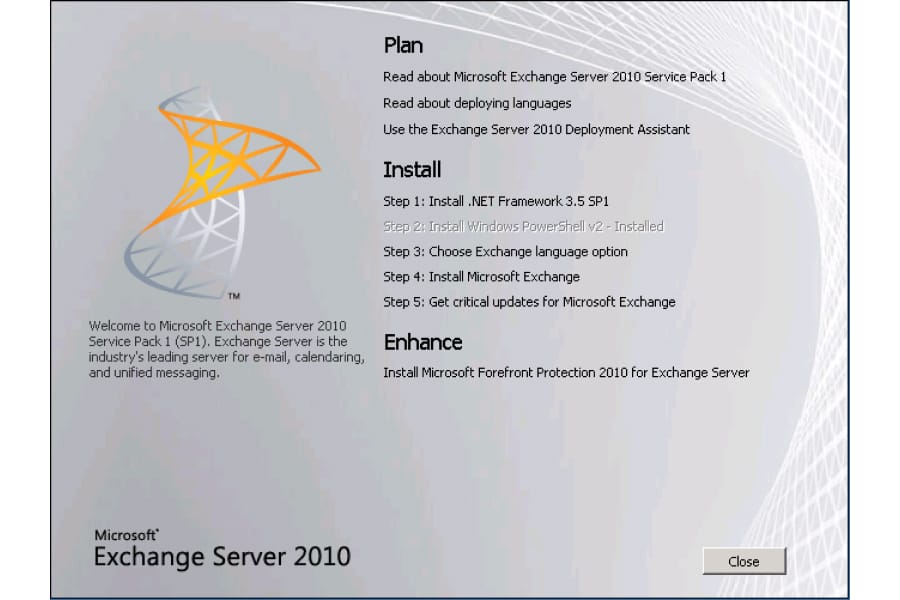
Introduction
Exchange Server installation can be a headache for any system administrator if the prerequisites are not setup properly prior to the start of exchange installation. In this article, I will be showing you an easy way to understand the prerequisites and the steps to follow in order to have a successful Exchange Server setup.
I will be setting up Exchange Server 2010 SP1 on Windows Server 2008 R2 SP1 Enterprise Edition. I will be setting up a typical Exchange Server installation. A typical installation consist of the Client Access, Hub Transport, and Mailbox server roles, along with the Exchange Management Console.
Before setting up Exchange Server, you have to make sure you have the proper environment and prerequisites installed:
Domain/Forest Requirement:
– Exchange Server requires to be installed on a Domain Member server, so join your Exchange server to the Domain. You can install it on the Domain Controller itself, but this is not considered as a best practice method.
– There should be at least one domain Controller which is set as a Global Catalog. Check this article for more info on Global Catalog : Setting a Windows Server 2008 Domain Controller as a Global Catalog
– The Domain and Forest Level shall be minimum set to be Windows Server 2003, Check This article to know how to raise or check your Forest/Domain Functional Level : How to Raise the Forest and Domain Functional Levels in Windows Server 2008/R2
– The User which will be used to install Exchange Server should have the Required Permissions: Domain Admin, Schema Admin, Enterprise Admin. This is required because While Exchange installation will update Forest and Domain Schema.
Exchange Server Prerequisites:
I will start this section by mentioning the prerequisites, and then I will be explaining each of the below prerequisites in details
The prerequisites are :
– Turn on Windows Update and fully update your server
– Enable and Set the Net TCP Port Sharing service to be automatic
– Install Filter Pack 2010
– Install Exchange required Roles and Features
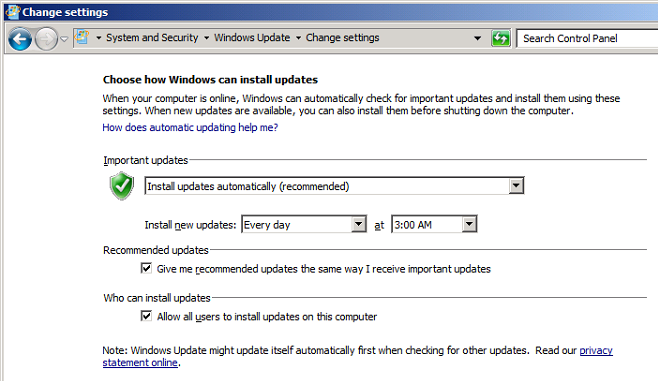
1. Make sure Windows Update is enabled and fully update your Windows Server before proceeding with Exchange server installation.
2. Enable the .Net TCP Port Sharing service and set its startup type to Automatic .
Go to Services by clicking on Start > Administrative Tools > Services
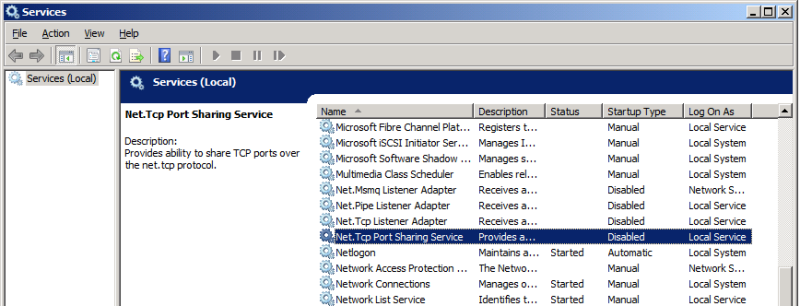
Set the Service Startup type to be Automatic and then click on Start

3. Download Microsoft Office 2010 Filter Packs, the x64 version, from : https://www.microsoft.com/en-us/download/details.aspx?id=17062
Once the Filter Pack is downloaded, double click on it to run the setup wizard, click Next on the Welcome window
Accept the license terms and then click Next
Filter Pack will be successfully installed, click on OK
4. Now we will install the roles and features required by Exchange Server 2010 SP1. Here we will be using PowerShell.
On the Start menu, navigate to All Programs > Accessories > Windows PowerShell. Open an elevated Windows PowerShell console by right clicking and selecting Run as administrator
and run the following command.
Import-Module ServerManager
3. Use the Add-WindowsFeature cmdlet to install the necessary operating system components for a typical Exchange Server installation. A typical installation consist of the Client Access, Hub Transport, and Mailbox server roles, along with the Exchange Management Console
Add-WindowsFeature NET-Framework,RSAT-ADDS,Web-Server,Web-Basic-Auth,Web-Windows-Auth,Web-Metabase,Web-Net-Ext,Web-Lgcy-Mgmt-Console,WAS-Process-Model,RSAT-Web-Server,Web-ISAPI-Ext,Web-Digest-Auth,Web-Dyn-Compression,NET-HTTP-Activation,RPC-Over-HTTP-Proxy -Restart
Once you paste the above command inside PowerShell, the features and roles will start their setup process and the server will automatically restart to complete the installation.
5. Once the server is restarted, login to your machine and run Exchange Server 2010 Setup
6. Step 1 & 2 are already completed because you have installed the required features using the previous step.
Click on Step 3 and Choose Install languages only from the DVD
7. Now click on Step 4: Install Microsoft Exchange
On the Introduction page, click Next
8. Accept the License Terms and click Next
9. On the error reporting page select if you want to enable the error reporting feature or not, then click Next
If you enabled it, Microsoft Exchange will automatically send error reports to Microsoft. This helps Microsoft improving their products.
10. On the Installation Type page, Select Typical Exchange Server Installation. A typical installation consist of the Client Access, Hub Transport, and Mailbox server roles, along with the Exchange Management Console
If you want to customize your selection, then click on Custom Exchange Server Installation
Here you don’t need to select the option Automatically install Windows Server roles and features required for Exchange Server, as we already installed these roles and features in a previous step using PowerShell and restarted our server.
11. On the Organization name, Type your organization name and then click Next
12. If the server is facing external access then type the name that your users will be using to access your mail server from the internet. For example, my users will be able to check their mails using any browse by typing http://mail.elmajdal.com
13. On the Customer Experience Improvement Program, select if you want to join the program or not and then click Next
14. Exchange Readiness Checks will start to check if all prerequisites are setup and installed, and will report to you if you have any prerequisites missing
The only warning you will receive is that Exchange Server 2010 setup will prepare your Domain for Exchange. The domain preparation operation will start once you click on Install .
Make sure the user you are using to install Exchange is a domain admin, enterprise admin, schema admin. Make sure also that you are logged into the computer using your domain user, and not using a local computer account .
15. Exchange installation will start
16. Installation will be completed. Click Finish
You will be notified that its better to reboot the server after the installation is completed, as setup has made changes to the operating system settings that require a reboot to take effect.
17. Exchange Management Console will open. and you can start configuring your server, which we will discuss in future articles.
Summary
Exchange 2010 installation can be a mess if you didn’t know what you are doing. Exchange require specific prerequisites that must be installed. Once all prerequisites are installed, you can guarantee a successful Exchange Server installation.